

Master Lovable in 90 minutes 💜
The step-by-step guide to build your first Lovable web app.

Before we begin.
The biggest reason to put off building an AI product? It’s not intellect. It’s not laziness. It’s not even money.
After running 50+ AI events in the last 4 months, we kept seeing the same thing: people weren’t building because of their environment. They weren’t in rooms that made continuous building feel normal.
We’re changing that — by putting you in the same rooms as builders at the frontier of AI. Online and offline.
Today’s edition.
Lovable launched 470 days ago, changing website development forever. The barrier to entry wasn’t knowing how to code anymore. It was prompting an AI tool. Master that, and you’d still hit a wall when the credits ran out.
2 weeks ago, we found a workaround for that. Lazar Jovanovic, Lovable’s vibe coding engineer, showed us how to build a web app and how to make Lovable remember your vision across sessions. Today, we’re sharing that with you.

Get ready. Set a 90-minute timer and open this email in one window and Lovable in another window. When it goes off, you’ll have a web app you own — built on Lovable, but not stuck there.
Part 1: Set up Lovable.
Click on this link.
You’ll land on Lovable’s homepage. Now, click on Log In.
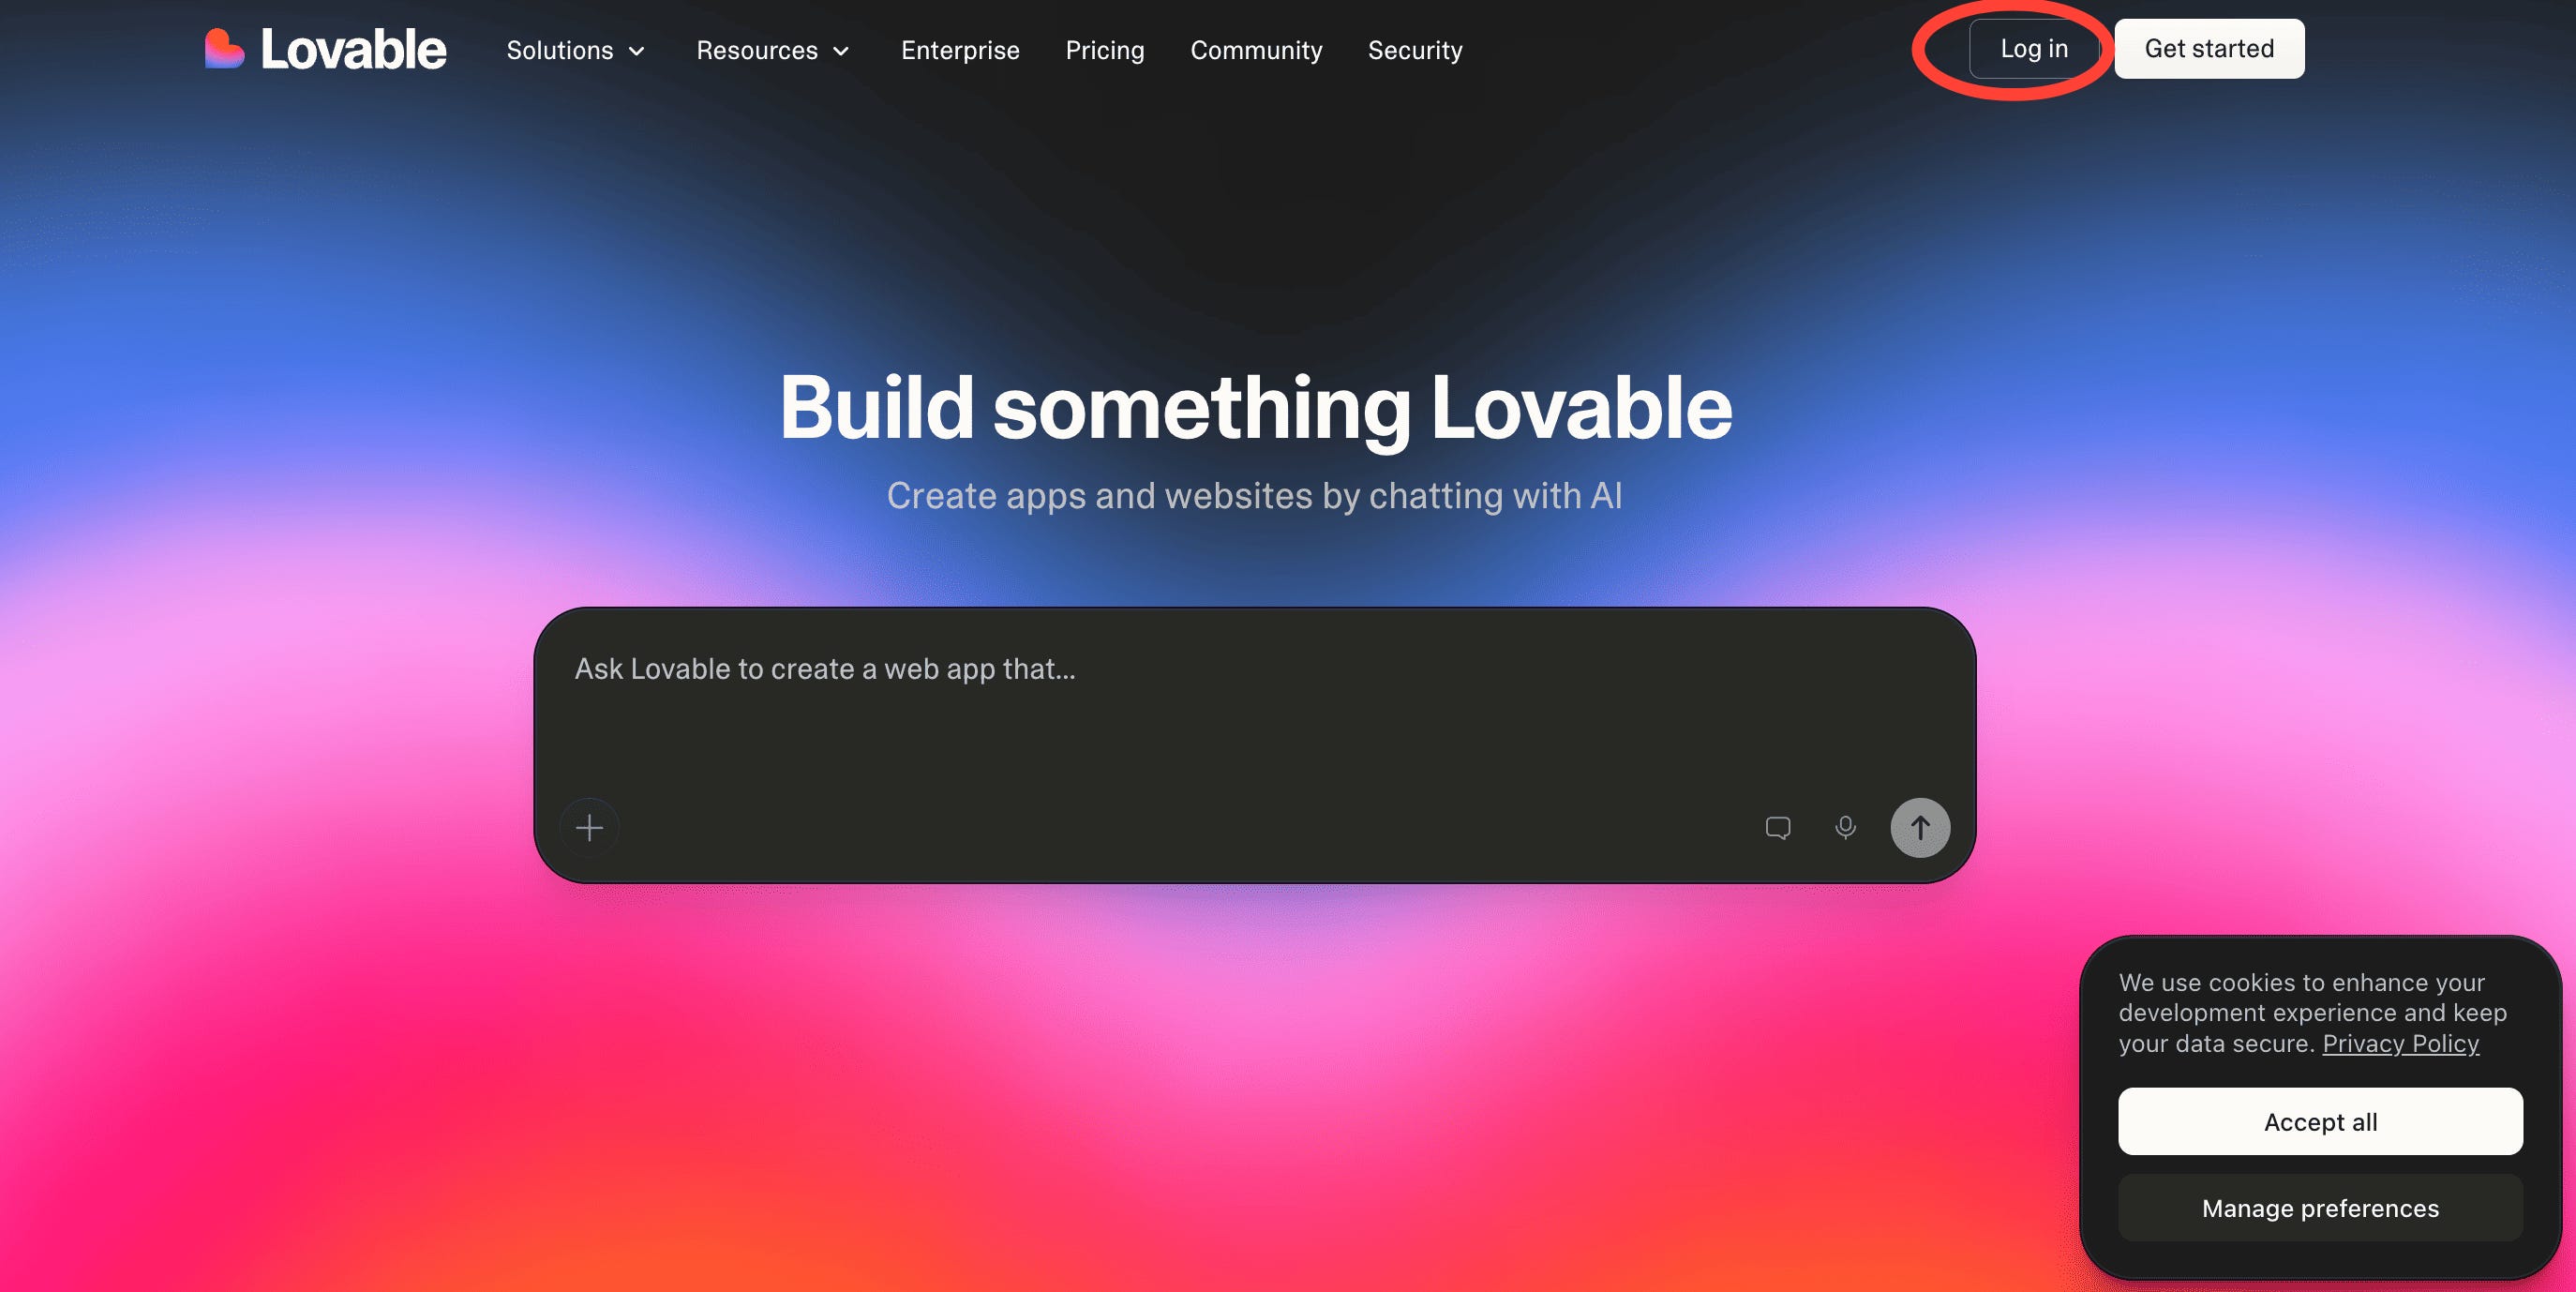
You’ll get options to Sign In via your email. Do this to create your first Lovable account.
Upgrade your plan.
We’ll be using “Plan” mode today to structure our project. This will help us build our web app in under 90 minutes. It is credit-intensive, so we recommend upgrading to a 1-month plan to create this project. Here’s how to do it.
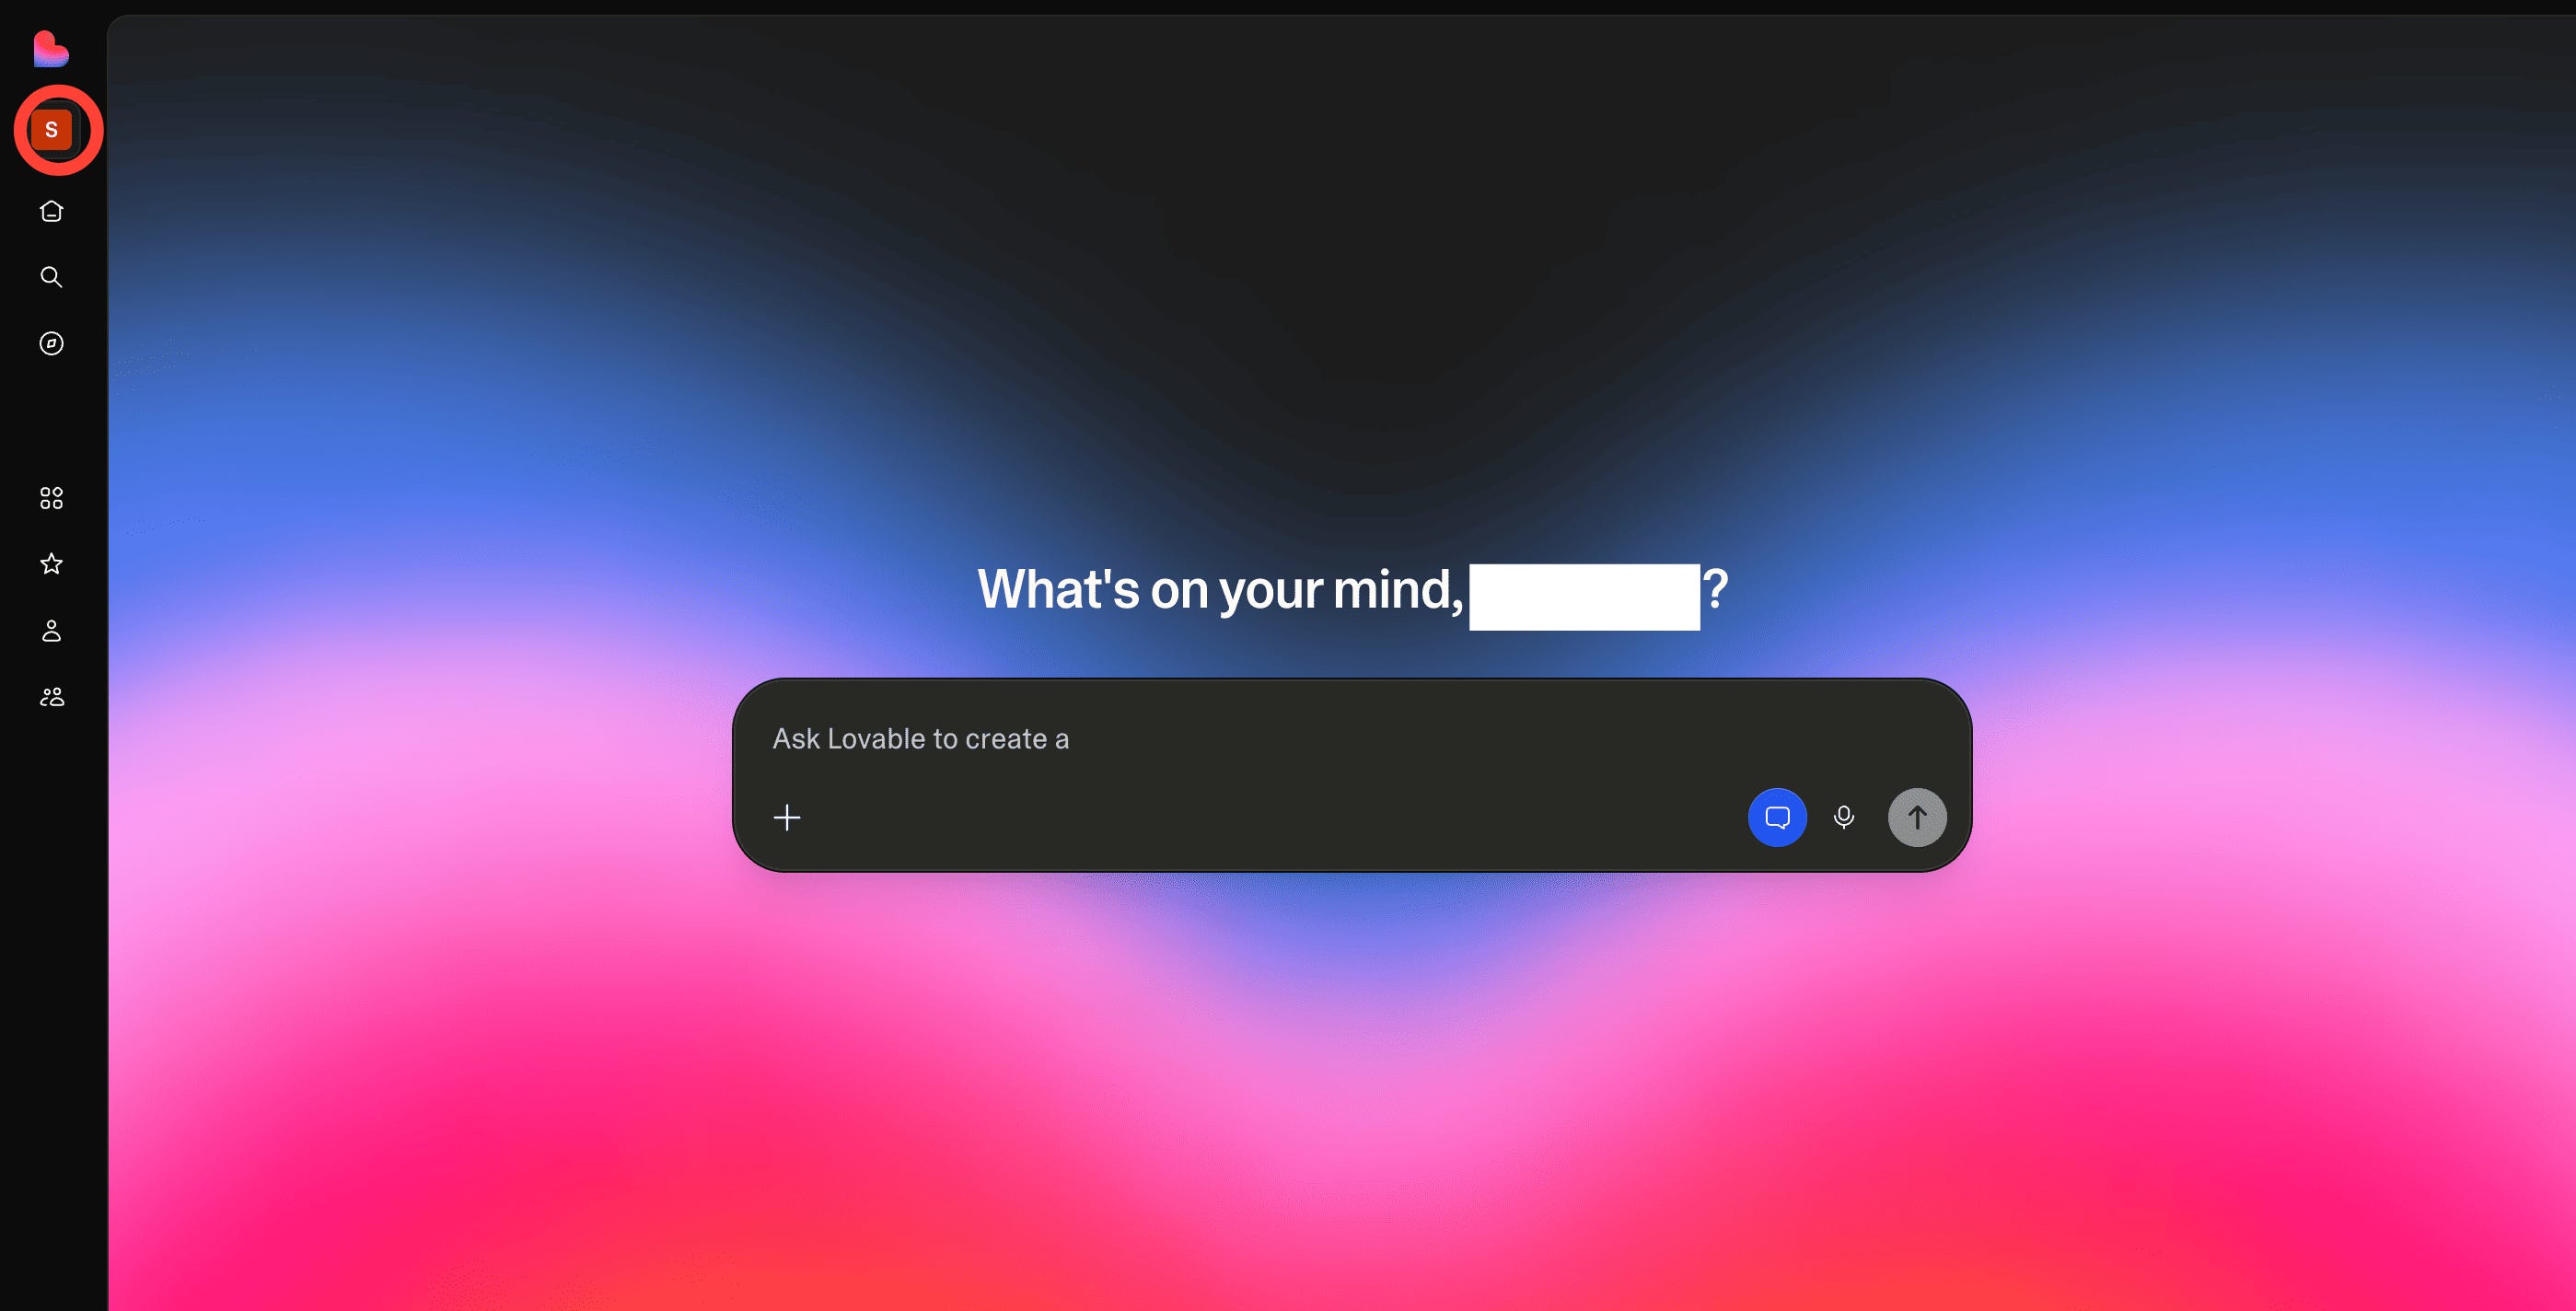
1. Click on the coloured box below the lovable logo on the top left of your screen. This will open your controls tab.
2. Now, you’ll see the “Upgrade” button. This will open up the billing dashboard.
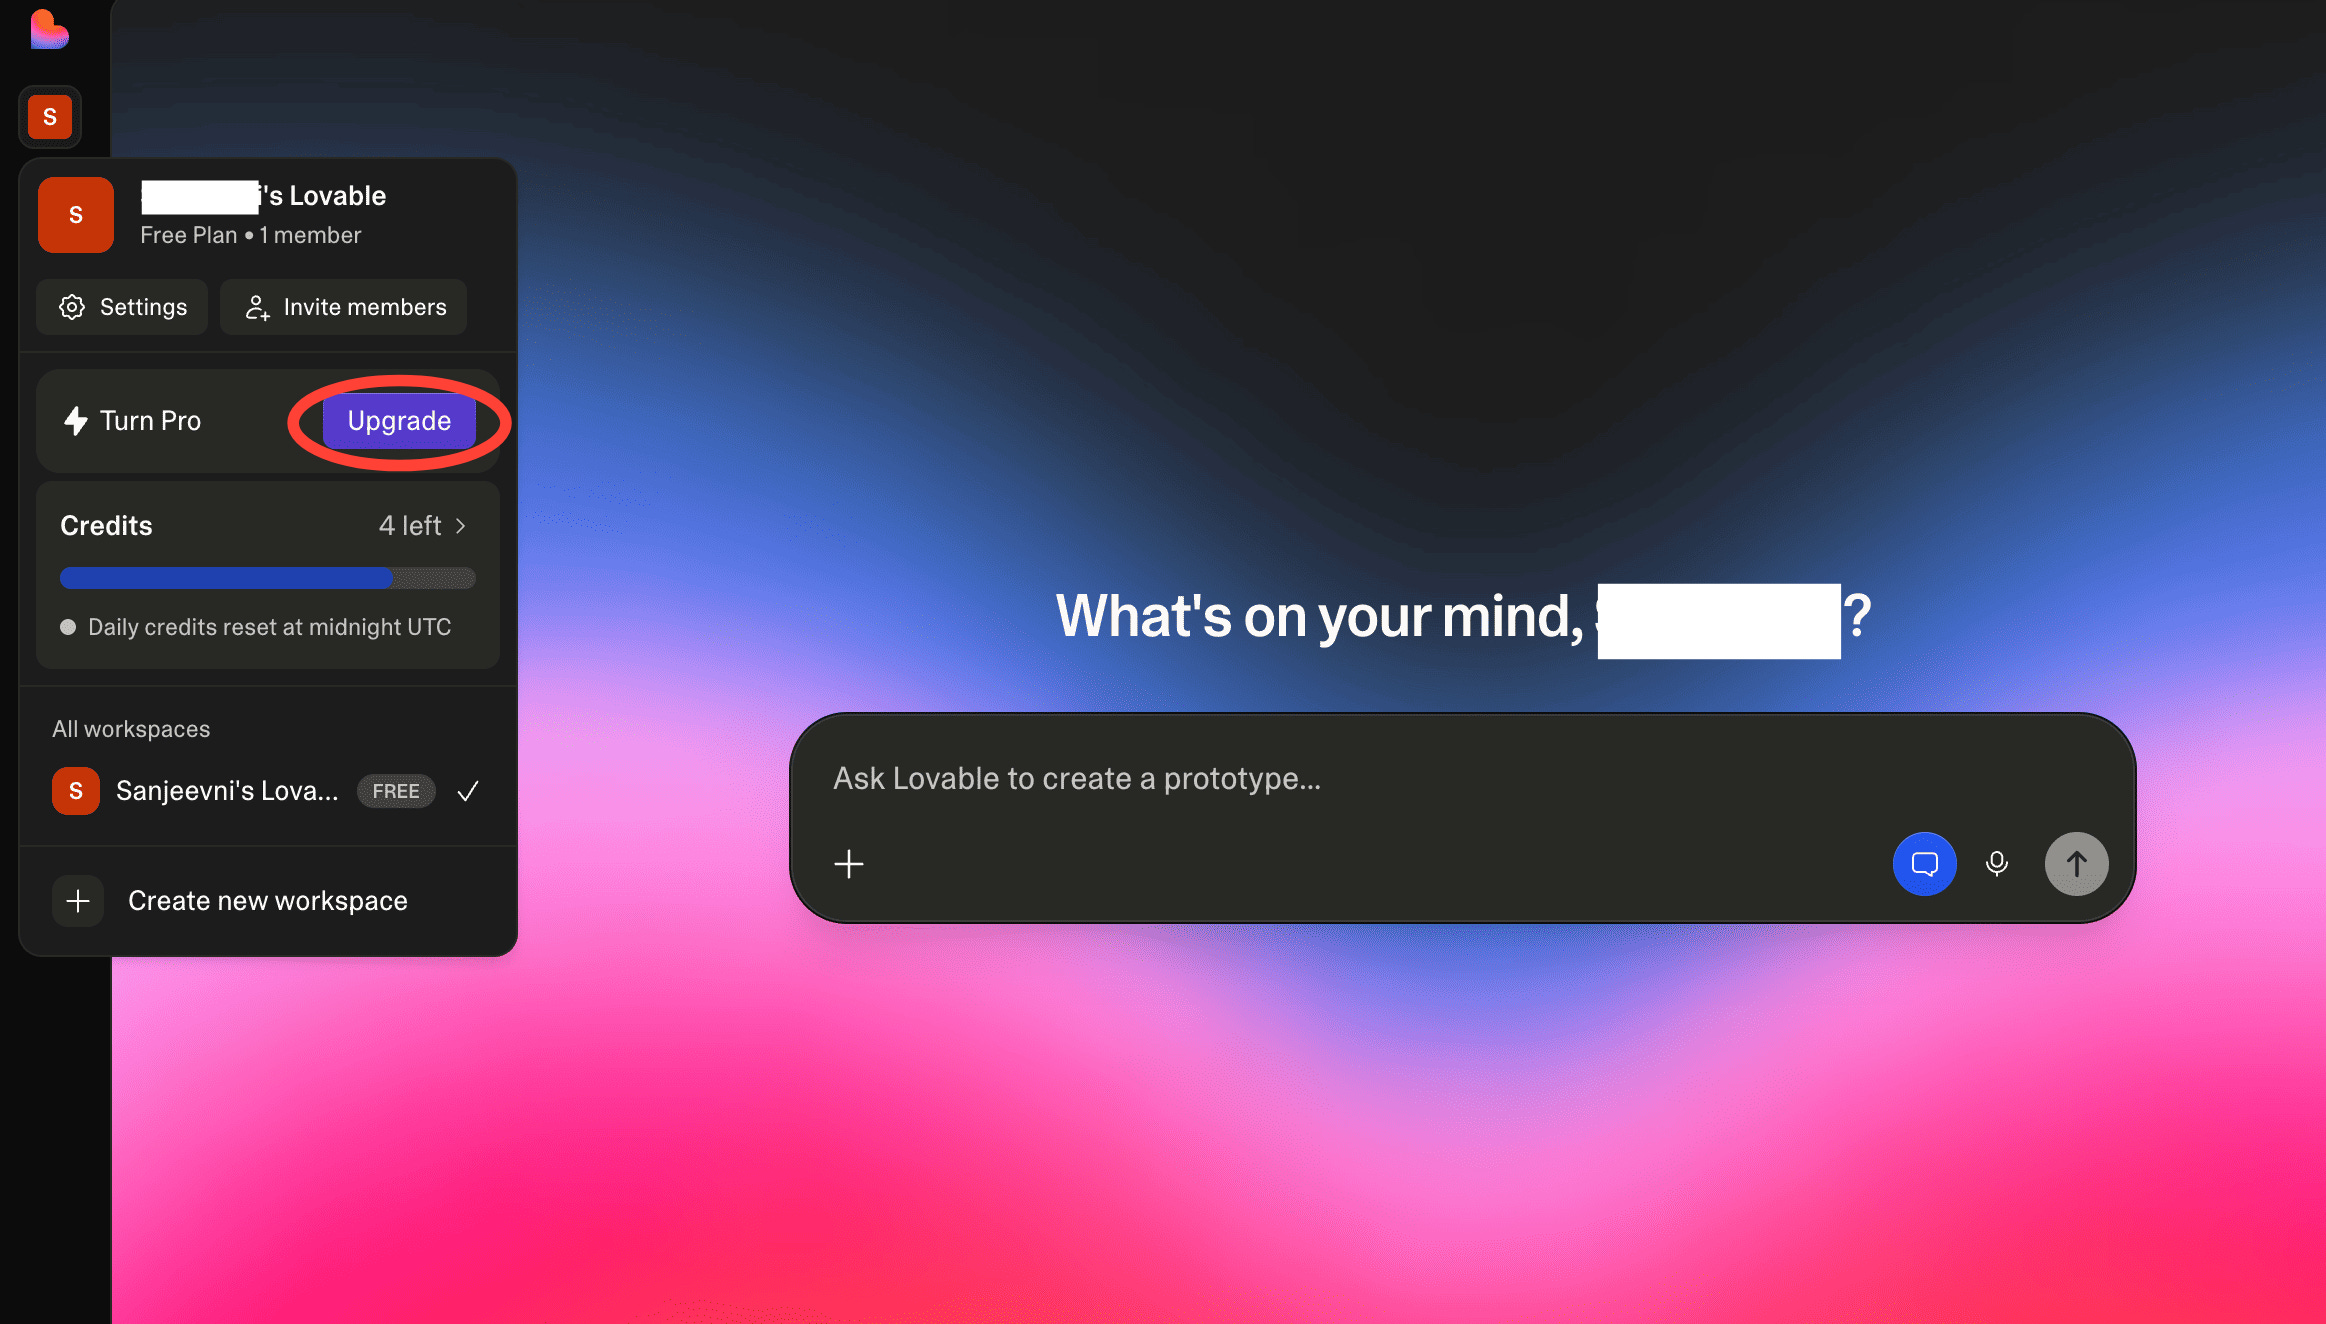
3. Select the $25 plan and click on “Upgrade”. This will give you access to 100 credits for the month + usage-based cloud and AI for the project, along with a ton of other perks. You should see the payment screen next.
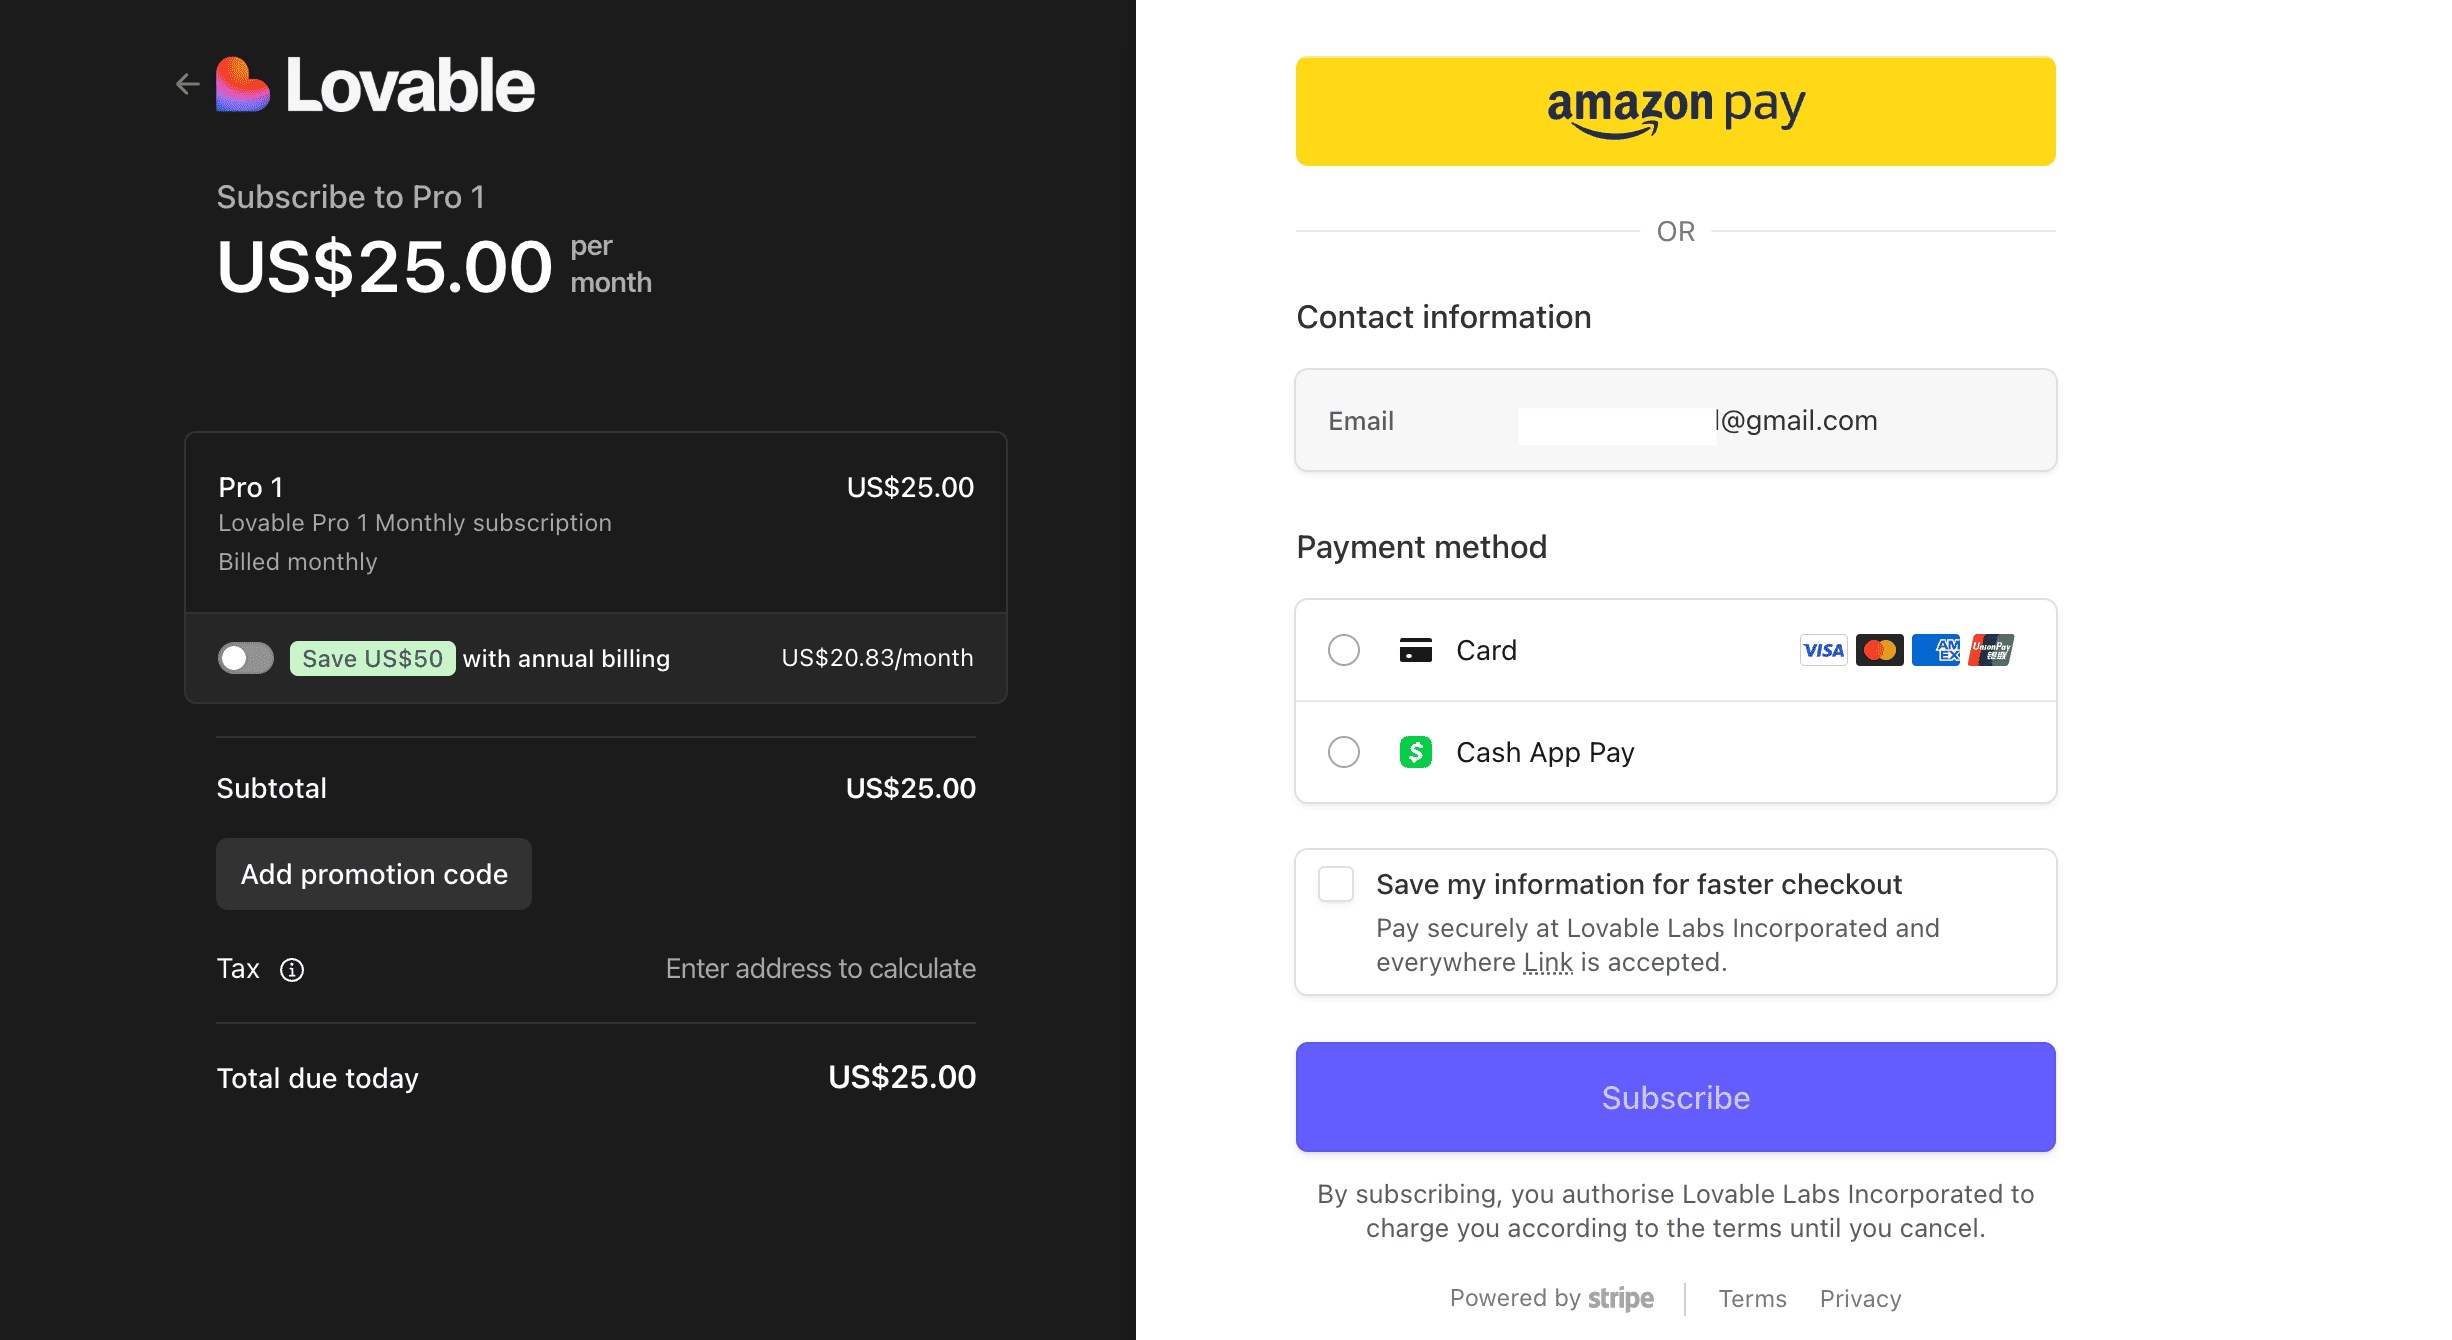
Check your email, enter your payment details and complete the payment.
Congratulations! You’re all set to build your first web app.
Step 2: Building your web app.
As long as you have a solid idea, you can build any web app on Lovable.
One catch.
Lovable finds it hard to remember context over long sessions. Today, we are solving this problem by creating documentation, knowledge bases, plans and task breakdowns.
Wait, what is documentation and a knowledge base? These are the documents that Lovable references to align itself with your goal.
And what are plans and task breakdowns? These are pre-defined action items for Lovable. So, you don’t have to keep prompting to get your job done.
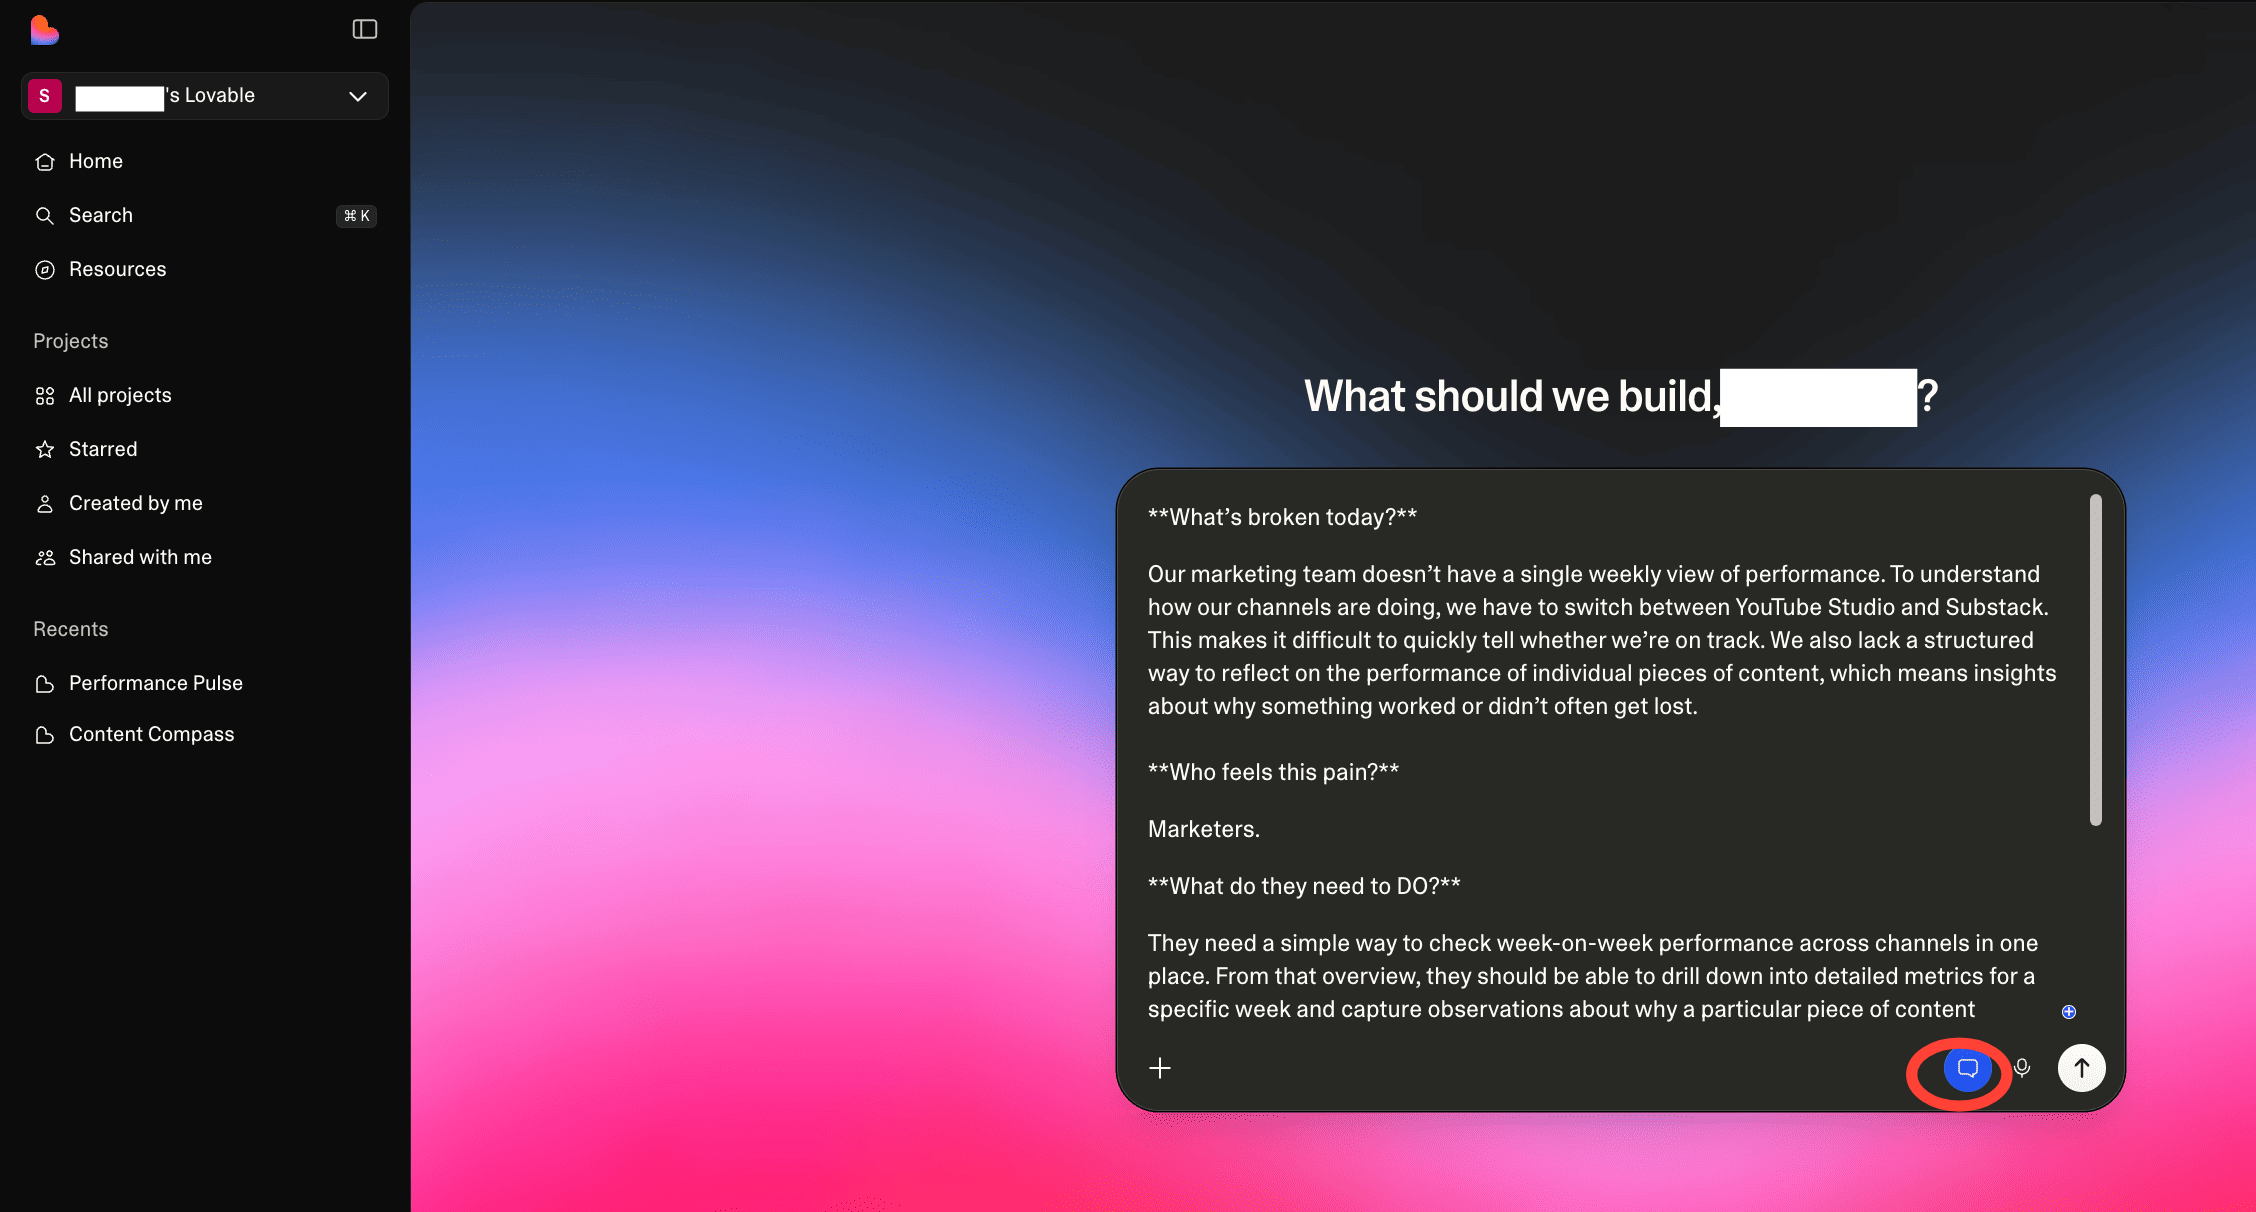
What are we building today?
A marketing dashboard that shows channel performance at a glance. That might give you a rough idea of what we’re going for. But AI needs a lot more context. So, we’re using a 4-question framework we used to hash out our idea for AI.
The 4-question framework.
**What’s broken today?**
**Who feels this pain?**
**What do they need to DO?**
**What does success look like?**
Tip: Use ChatGPT to refine your idea here.
My answers to those questions look like this.
**What’s broken today?**
Our marketing team doesn’t have a single weekly view of performance. To understand how our channels are doing, we have to switch between YouTube Studio and Substack. This makes it difficult to quickly tell whether we’re on track. We also lack a structured way to reflect on the performance of individual pieces of content, which means insights about why something worked or didn’t often get lost.**Who feels this pain?**
Marketers.
**What do they need to DO?**
They need a simple way to check week-on-week performance across channels in one place. From that overview, they should be able to drill down into detailed metrics for a specific week and capture observations about why a particular piece of content performed well or poorly.**What does success look like?**
Success looks like a marketing lead opening the app and immediately seeing how each channel is performing weekly. They can click on a specific week in the graph to view detailed metrics for that period and add notes about what happened, capturing insights about what worked, what didn’t, and why.
We’ll use this in creating our plan.
Build out your idea with ‘Plan’ mode.
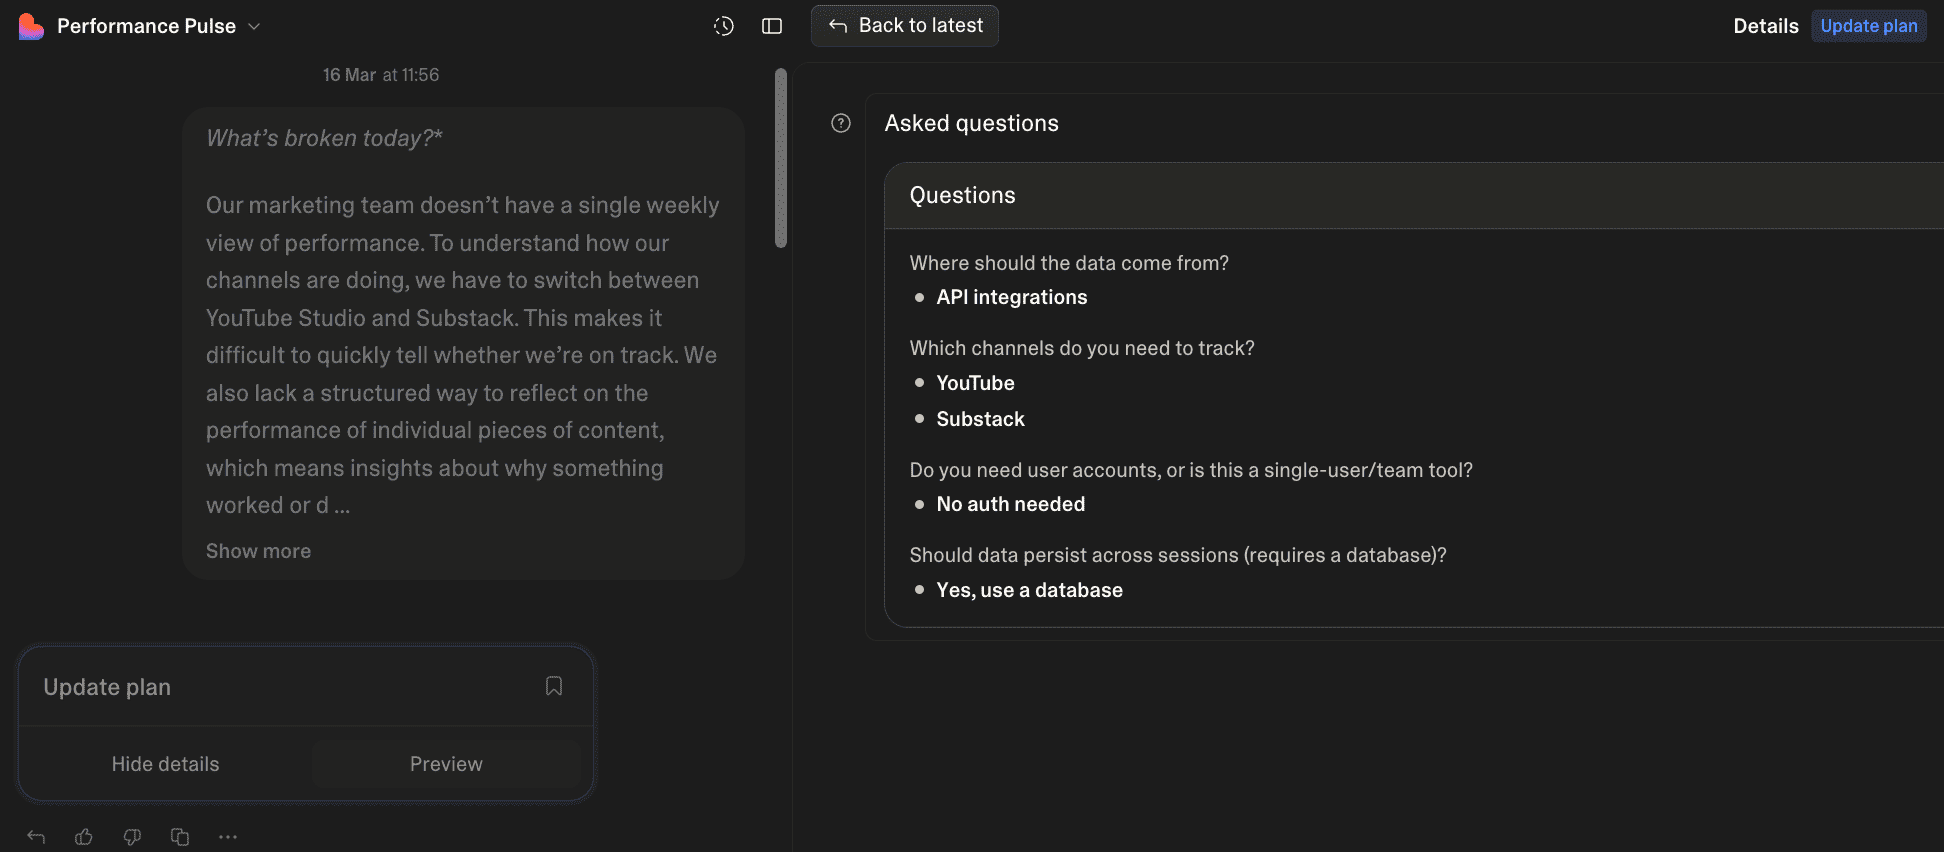
Copy your answers to the framework and paste them into the Lovable chatbox. Make sure to turn the “Plan” mode on.
Lovable will now ask you questions to better understand the project. Here’s what it asked me, and my answers.
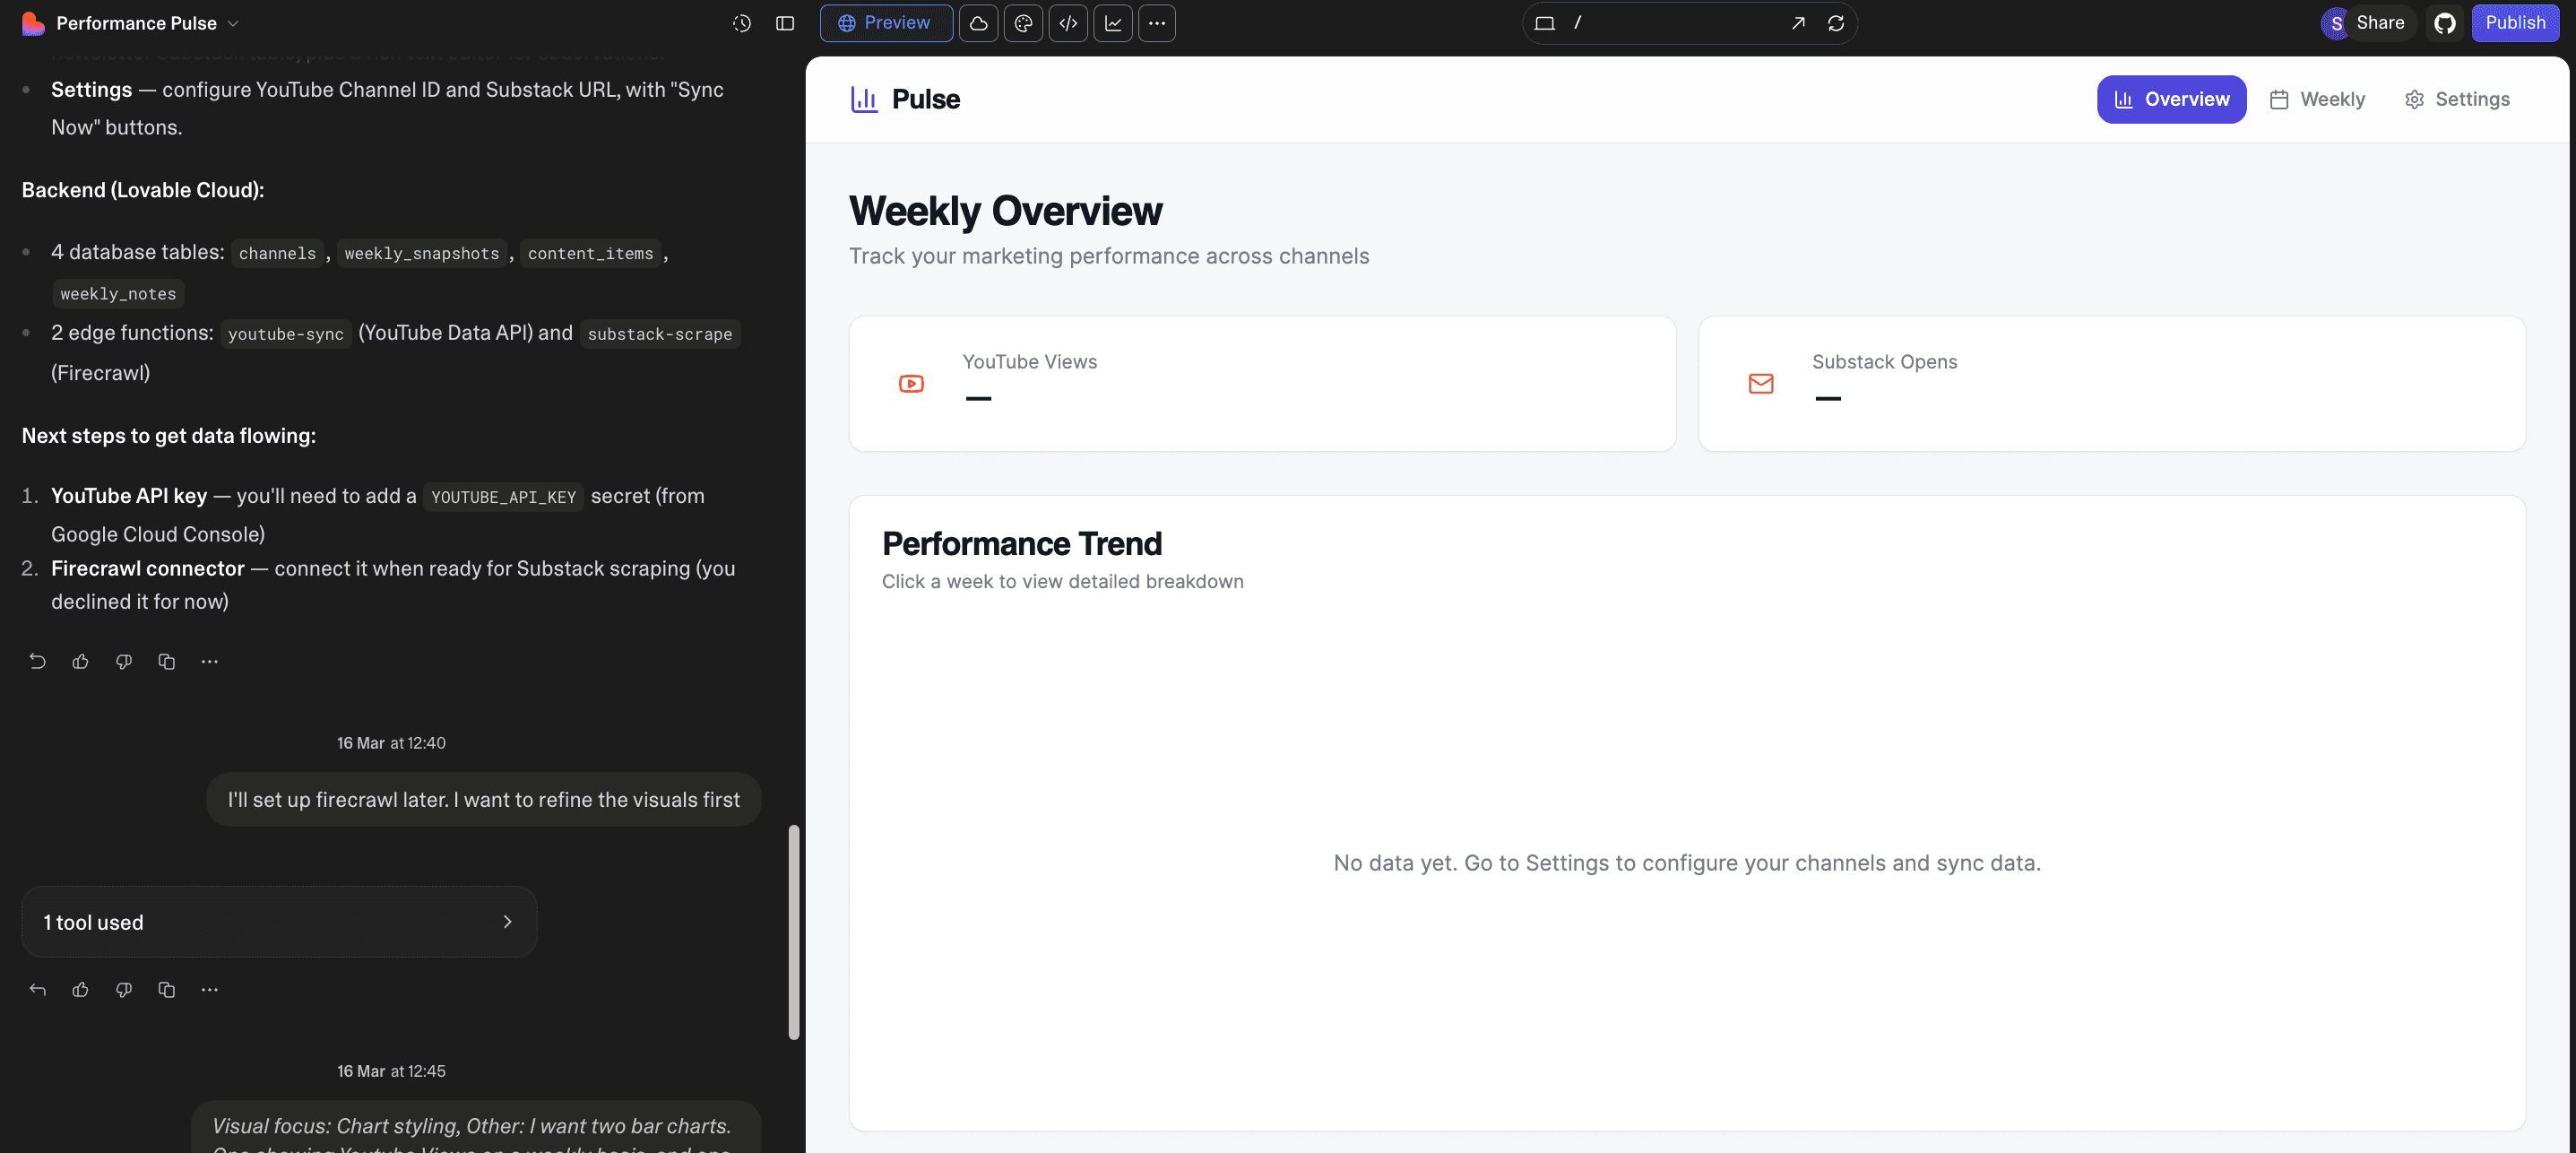
Once you do this, Lovable will show you a preview of your web app on the visual editor tab. Now you can tweak how you want your dashboard to look and what it should do.
Here’s what my v1. looked like.
Now, you have two options.
Option 1: Prompt Lovable manually.
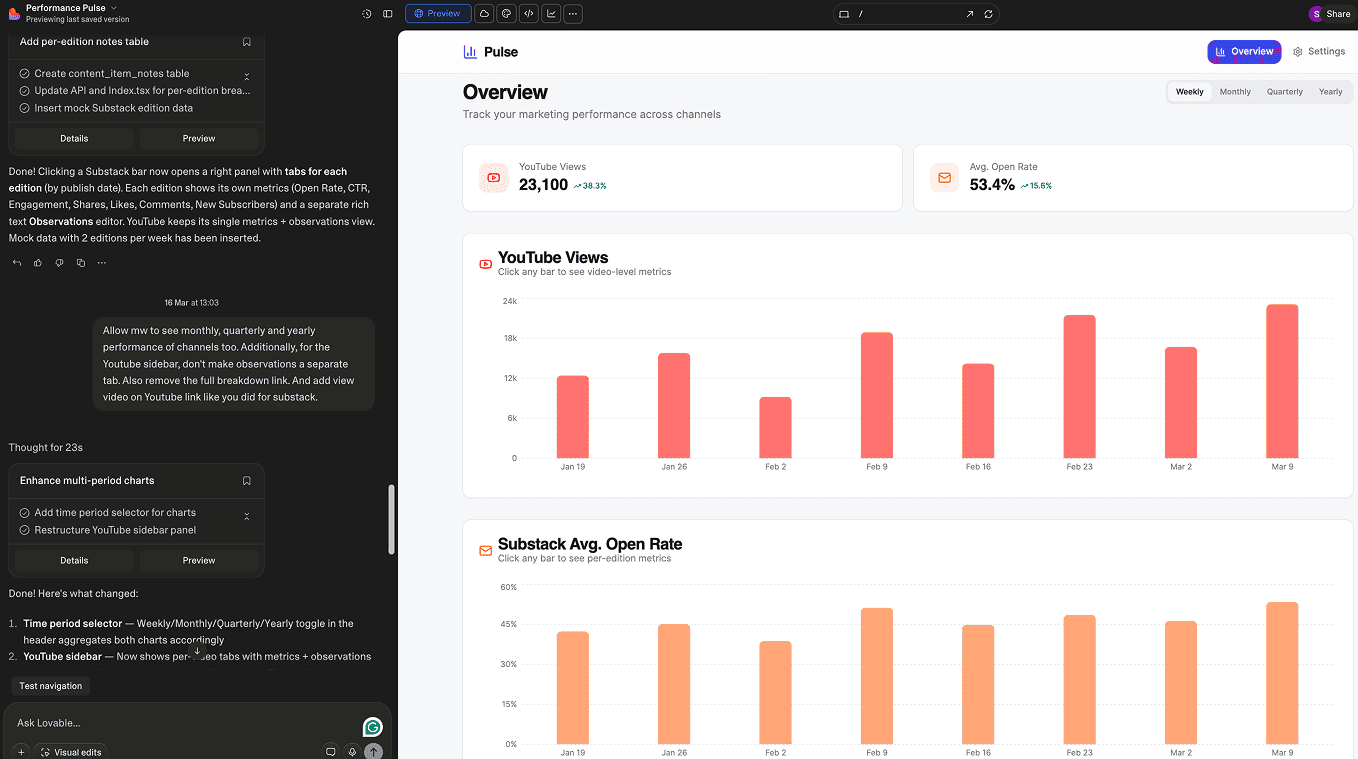
This is time-consuming, but fairly straightforward. All you need to do is tell Lovable what to change. Lovable will do it for you. Here’s where I reached by simply prompting Lovable.

2. Let Lovable take over.
Remember, Lovable found it hard to keep track of context? That becomes a massive problem when letting Lovable build autonomously — you never know when it’ll go off track. Today, we’re solving this problem with documentation. Here are the steps to build it out.
Step 1: Give Lovable persistent memory.
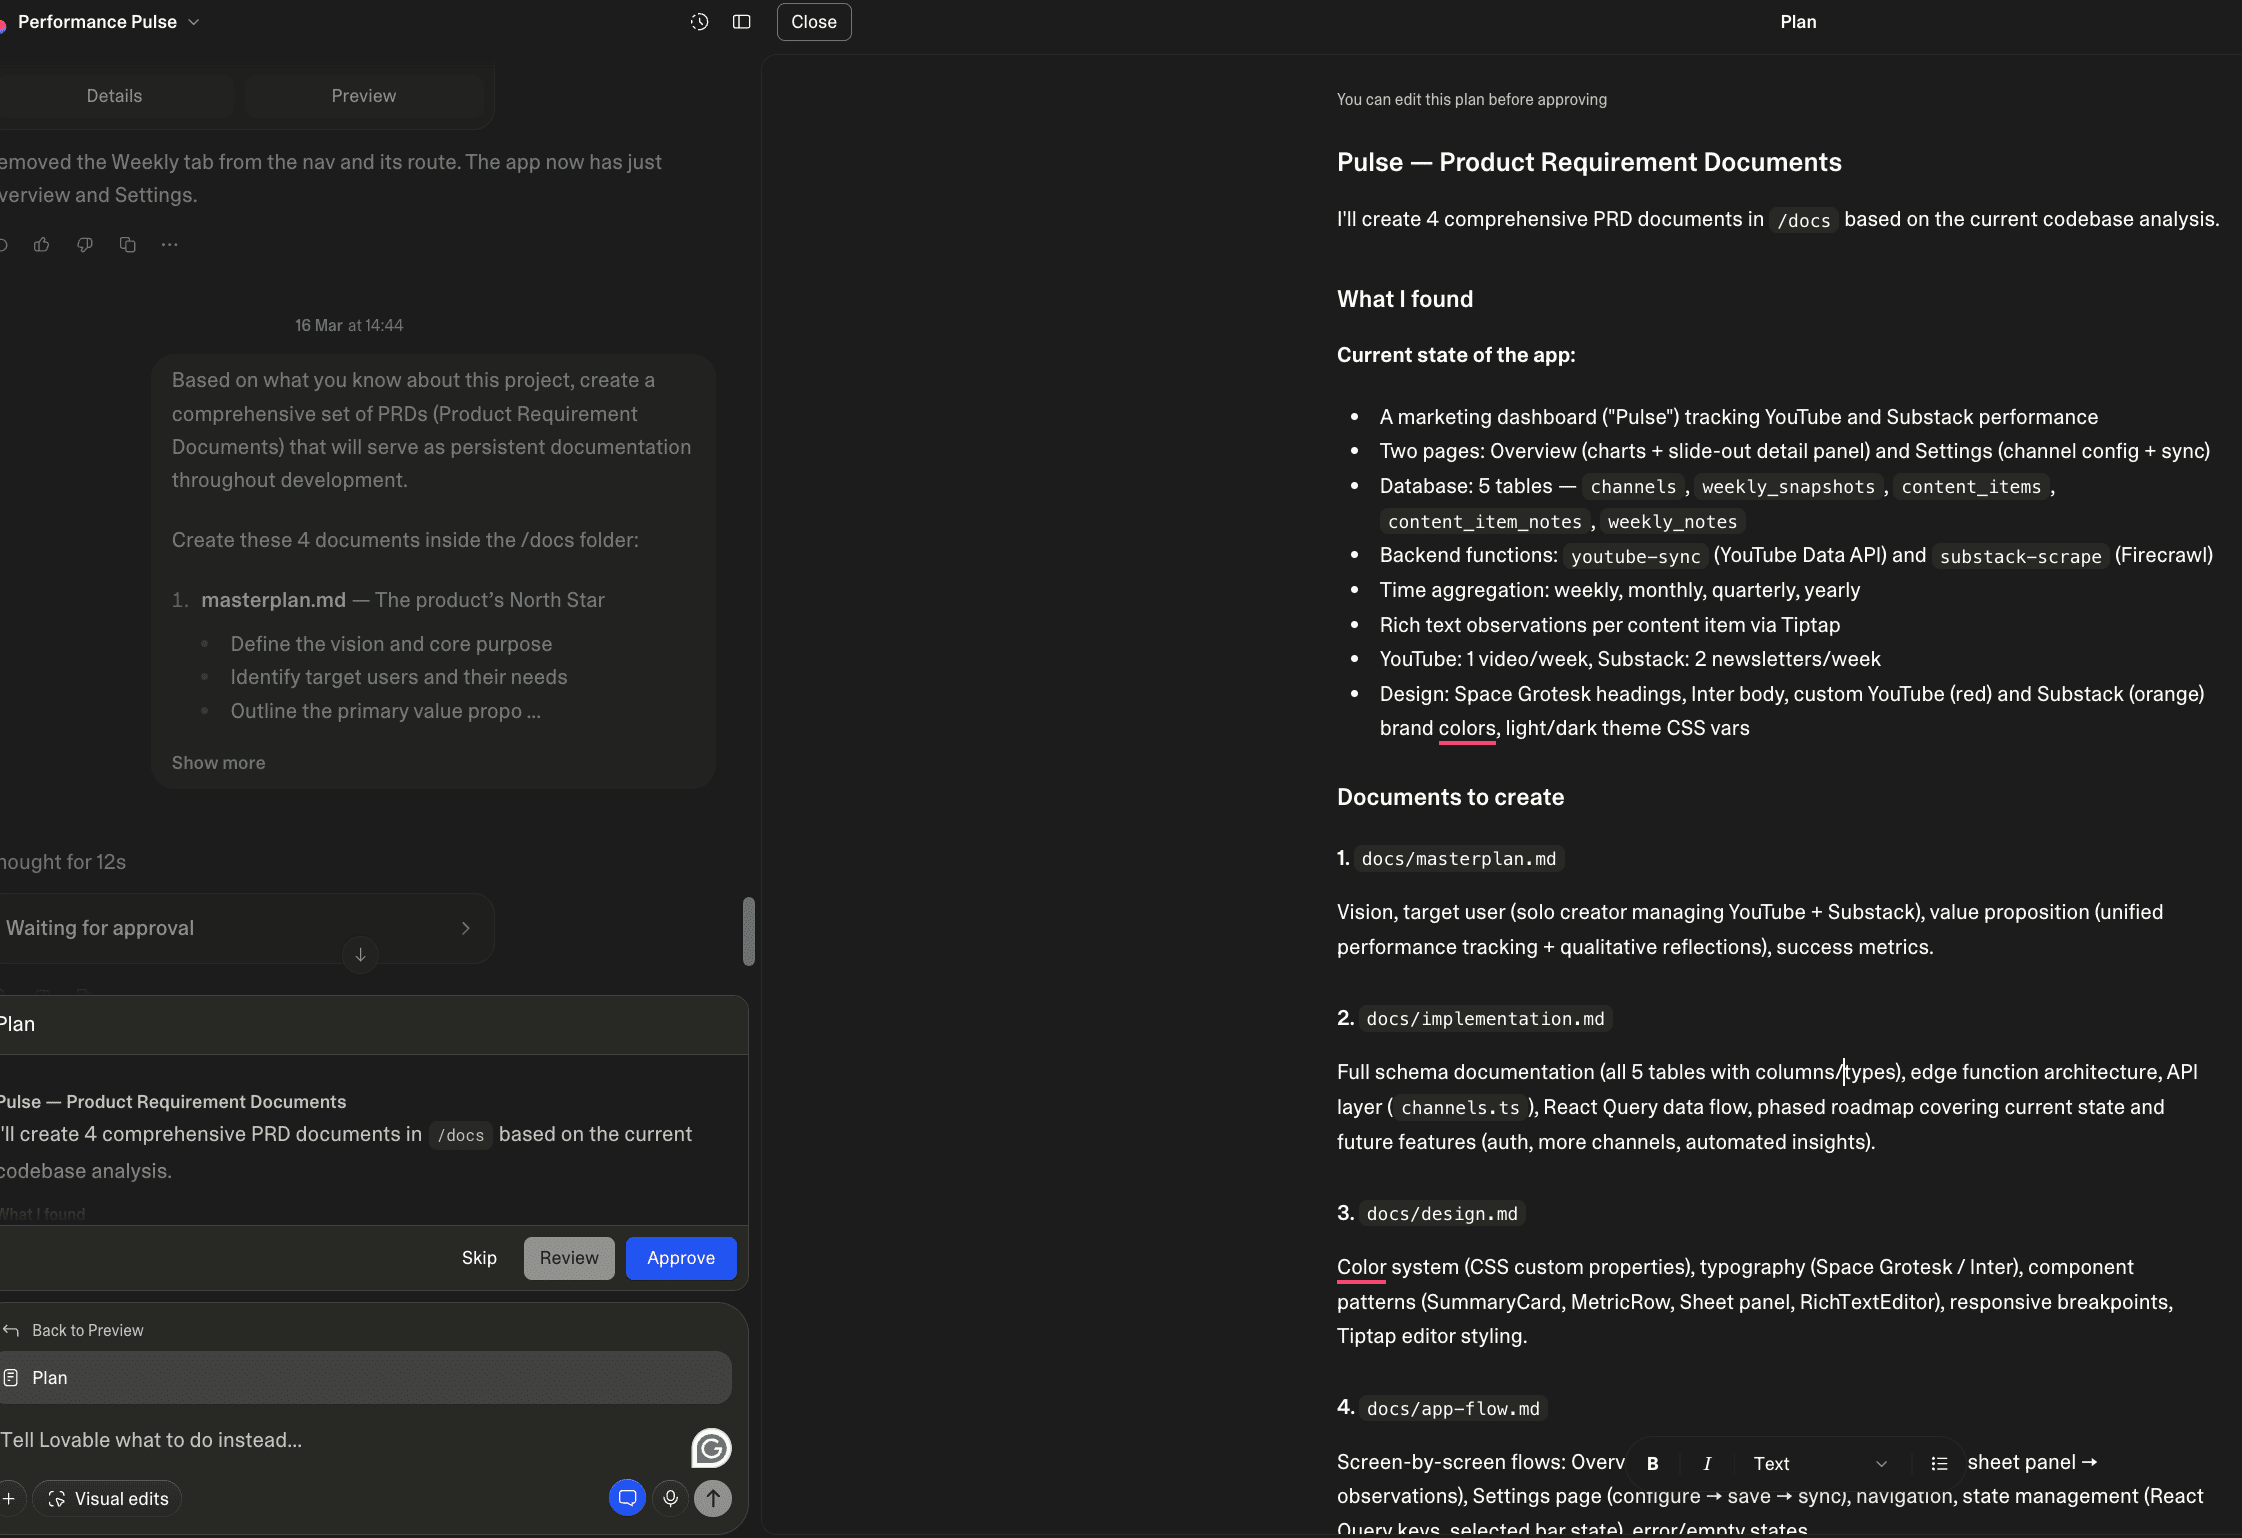
Meaning, ensure it doesn’t lose context midway by providing documentation in the form of a PRD. Here’s a prompt you can use.
Based on what you know about this project, create a comprehensive set of PRDs (Product Requirement Documents) that will serve as persistent documentation throughout development.
Create these 4 documents inside the /docs folder:
1. **masterplan.md** — The product’s North Star
- Define the vision and core purpose
- Identify target users and their needs
- Outline the primary value proposition
- Establish success metrics and goals
2. **implementation.md** — Step-by-step build guide
- Break down the technical architecture
- Define database schema and data models
- List core features and their requirements
- Create a phased implementation plan
3. **design.md** — Brand and UX guidelines
- Establish visual style and design principles
- Define component patterns and UI standards
- Specify responsive behavior and accessibility
- Document any branding requirements
4. **app-flow.md** — The product’s skeleton
- Map out primary user journeys
- Define screen-by-screen flows
- Document navigation and state transitions
- Cover edge cases and error states
Each document should be detailed enough that any developer could pick up the project and understand exactly what to build
This is what you should see.
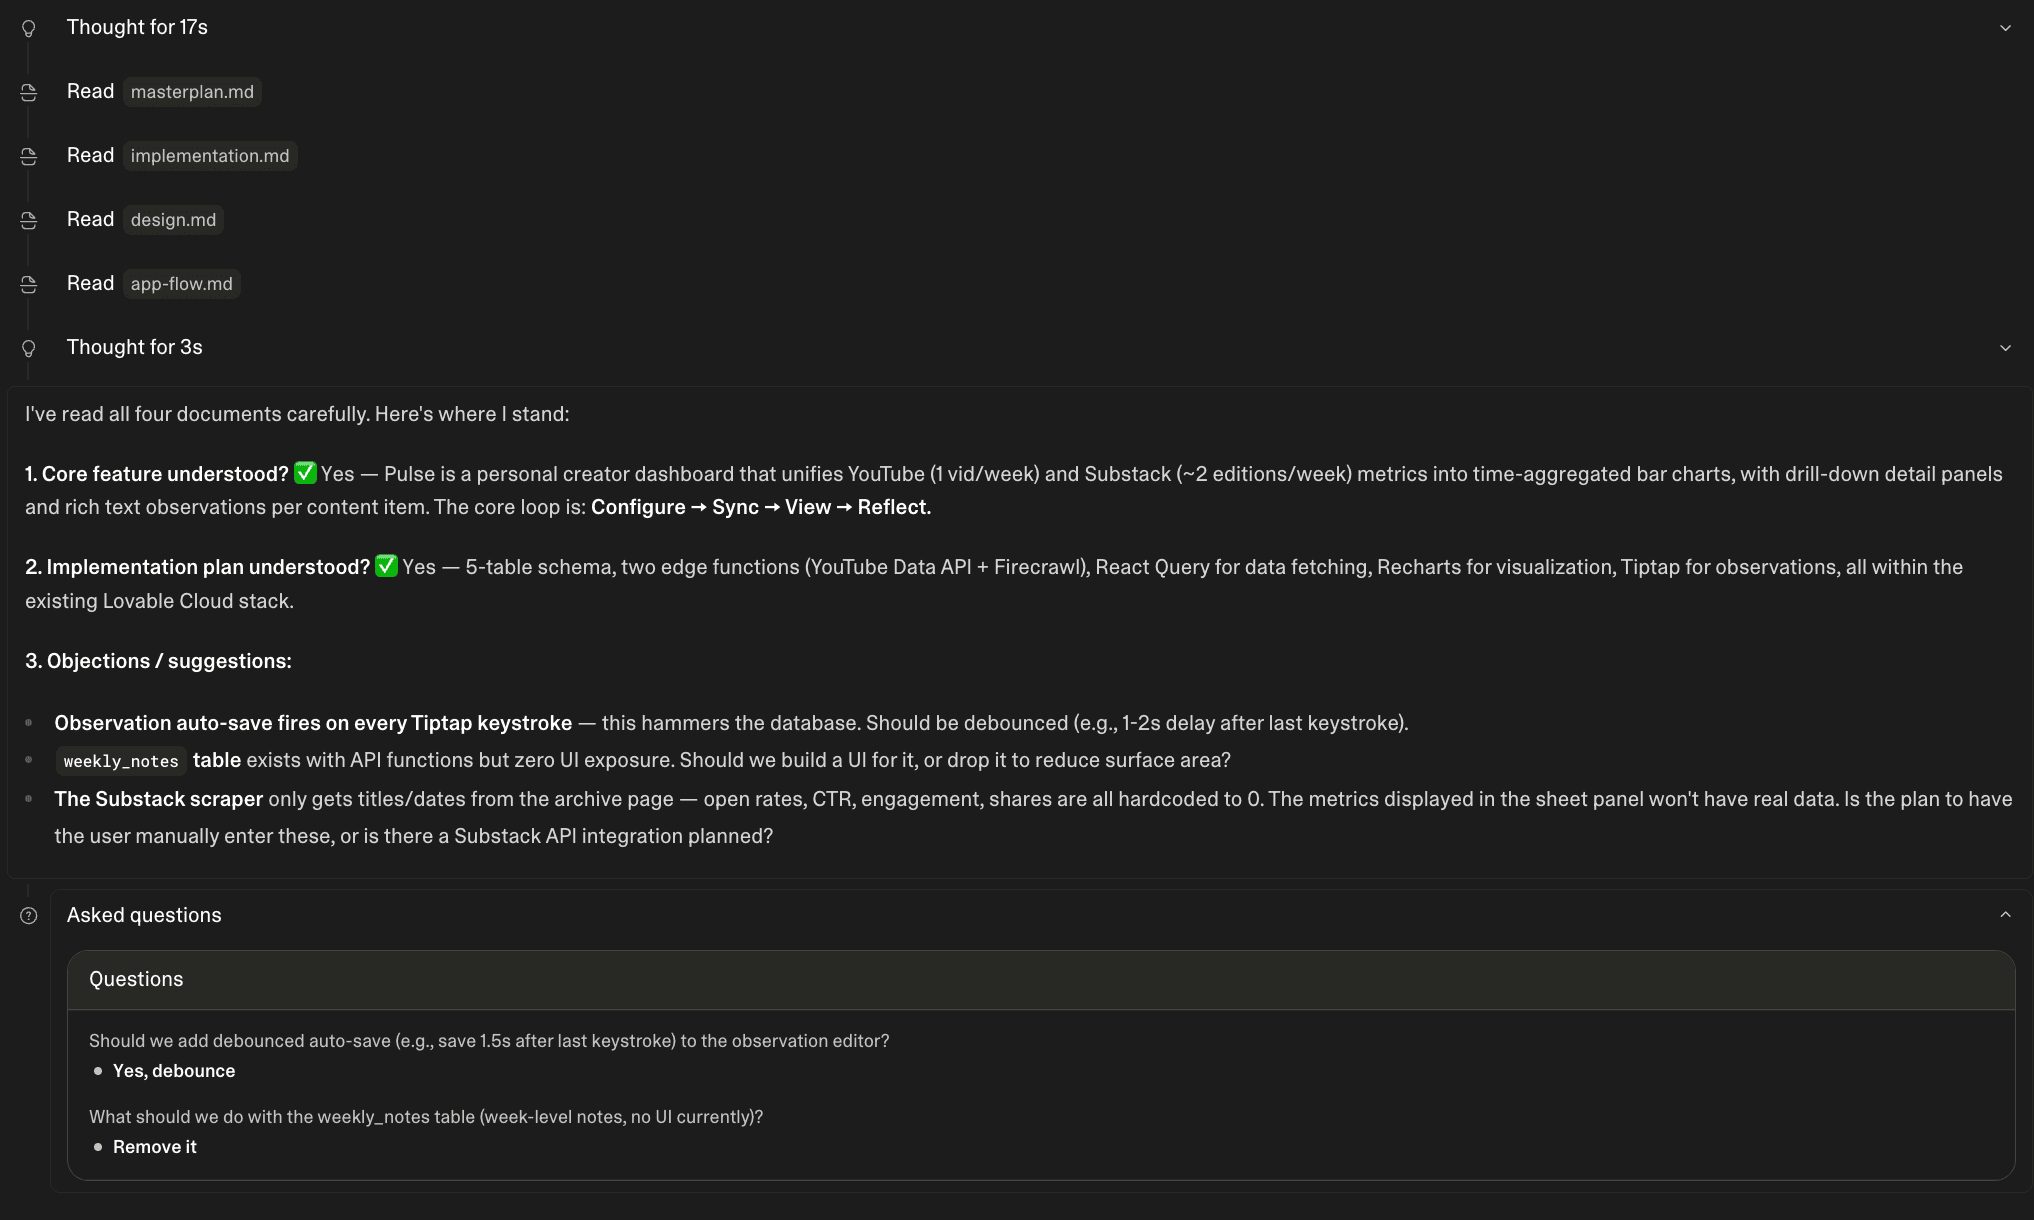
Step 2: Consolidate PRDs into one source of truth
So, instead of reading each PRD, Lovable reads the source of truth before every task. Here’s the prompt.
Ok, I’ve uploaded/created some documents you can rely on:
- masterplan - our product’s North Star
- implementation - step-by-step build guide
- design - brand and UX bible
- app-flow - product’s skeleton
Now, please tell me if you:
1. Have read and understood the project and its core feature?
2. Understand the implementation plan from start to finish?
3. Have any objections or suggestions?
Also, ask me any clarifying questions you need.
If we’re on the same page, create tasks.md as the source of truth for implementation order.
Step 3: Configure Knowledge Base
This ensures Lovable actually reads the documentation before performing a task. Here’s the prompt.
Before you begin ANY response, say “I’m using knowledge”
Always read project documentation in the /docs folder.
Use masterplan.md and tasks.md as the source of truth.
Every time you complete tasks, mark them done in tasks.md and tell me:
1. What was completed
2. How to test it
3. What is the next step
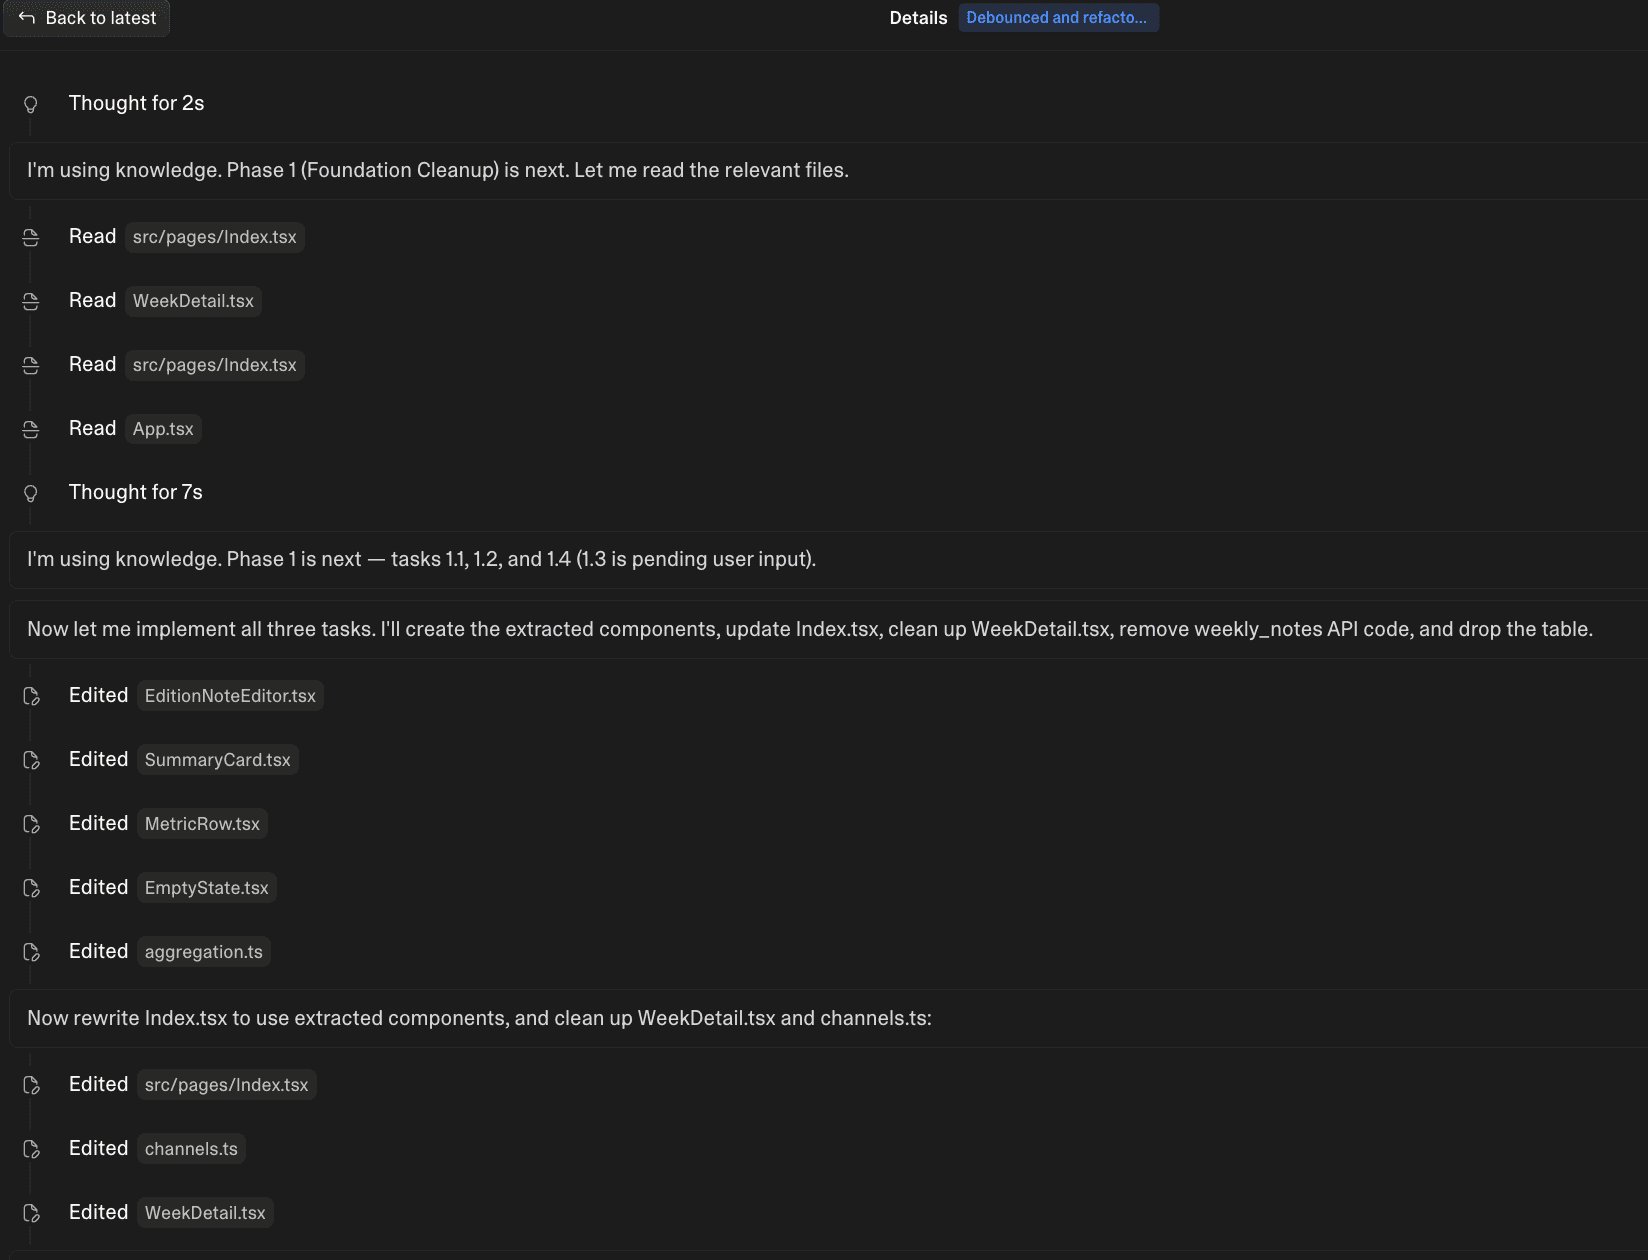
Step 4: Execute the plan automatically
Here’s the magic prompt.
Read tasks.md, check which group of tasks is next on the list, read relevant documentation, complete the tasks, mark them as done, and tell me what’s next.
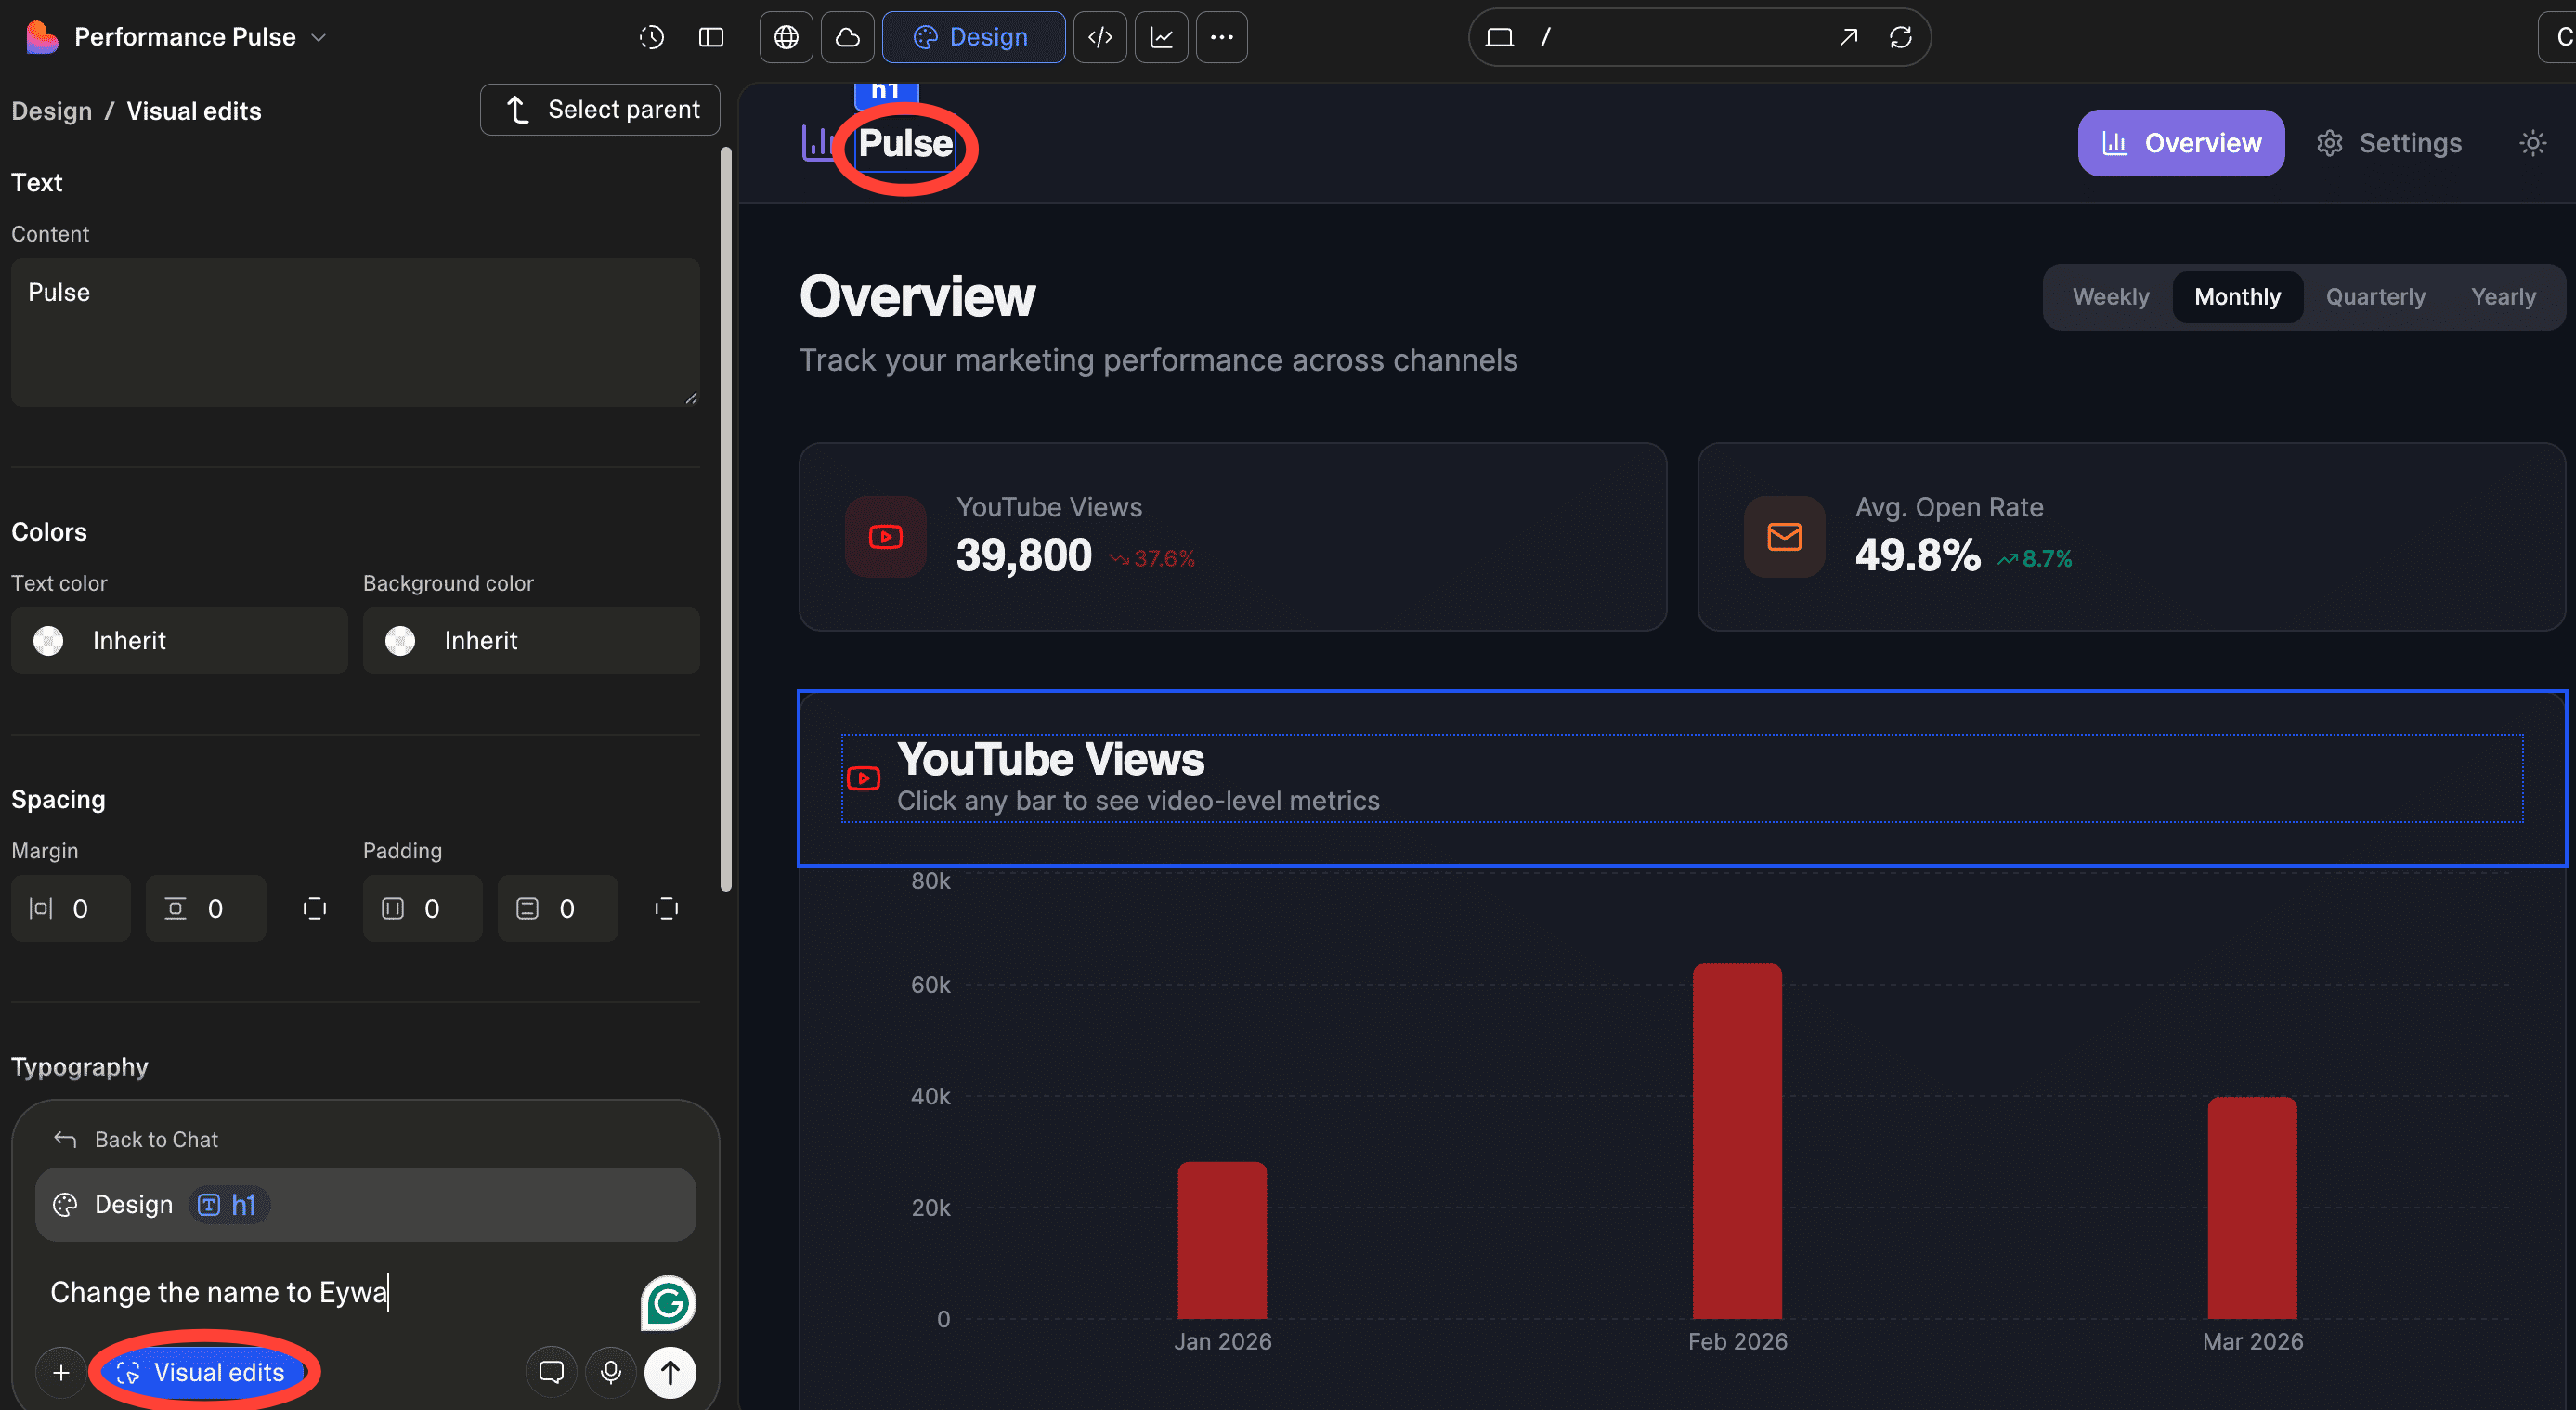
3. Make any final Visual Edits.
If you want to change specific details about the file, click on Visual Edits. This opens the editor, where you can click an element to edit it. Here, I edited the app's name.
And that’s it — you just built your first web app on Lovable.
The setup felt simple because it was. But don’t let that fool you. Lovable apps can be as complex as you need them to be — API calls to fetch data, integrations to keep everything in sync. The building blocks stay the same; you just stack them differently.
If you want a handbook that walks you through building autonomously, Lazar put one together here. And if you’d rather build with others, we run 8-hour buildathons every week. Find the next one in your city.