We’ve run 100+ AI buildathons with baby coders now. And we see 3 roadblocks come up again and again. What to build? How to build? What if I need help? And sometimes: How can I get credits?
We’ve solved them all at GrowthX. No more excuses.
So far, we’ve built apps without using a single line of code. Today, we’re changing that. We’re building an AI-based meeting prep agent that notifies you about the different email threads to discuss in your next meeting, USING CODE.
Before you start sweating buckets, take a breath. We’re keeping this easy. Click on the email header to open this email on Substack. Let’s get straight into it.
What’s the next 90 minutes going to look like? First, breaking down the project into its basics. Second, planning how to test along the way. Third, using Codex to build the code.
We’re using the $100 ChatGPT Pro plan for this. You can also get the $20 one. It’s a tiny bit of code so you shouldn’t hit limits. Btw, ChatGPT's free tier also writes code for you. No guarantee on the working-ness of the code, though.
We’ll be building the AI meeting prep agent within the Google ecosystem. It will check your emails, collate email threads between the same attendees over the last 30 days and surface them. Plus, it’ll use Sarvam to condense this information and really prep you for the meeting.
Before you begin building. Ask your friends to send you a few meeting-related emails using different keywords like catch-up, stand-up, meet, Zoom, Google Meet, etc. This will help you test your app later.
Here are the different components we’ll build and test along the way.
Find meeting emails
Group emails by person/ thread
Send threads to Sarvam
Get output
Step 1: Fetch Upcoming Meetings
This is probably the most important step of the project — if the app doesn’t surface all the required meetings correctly, the meeting prep agent won’t be great. That’s why we’ll also test if this works before we move on to the next step.
Now, Google doesn't have a nice built-in way to show that any app you make in its ecosystem is working. So we’ll build a tiny temporary webpage that displays what the script fetched — just so you can confirm it’s actually finding your meetings correctly. Think of it as a window into what your script is seeing.
Step 1a: Writing the code. Here’s the prompt I’m using for Codex:
Write a single clean Google Apps Script Code.gs file from scratch. No duplicate functions. The app scans Gmail threads from the last 30 days, groups threads that involve the exact same set of people together, and returns the groups sorted by most recent activity. Each group should contain the list of participants and all messages in chronological order with sender name, date, subject and a short snippet. Don’t use older code.gs files
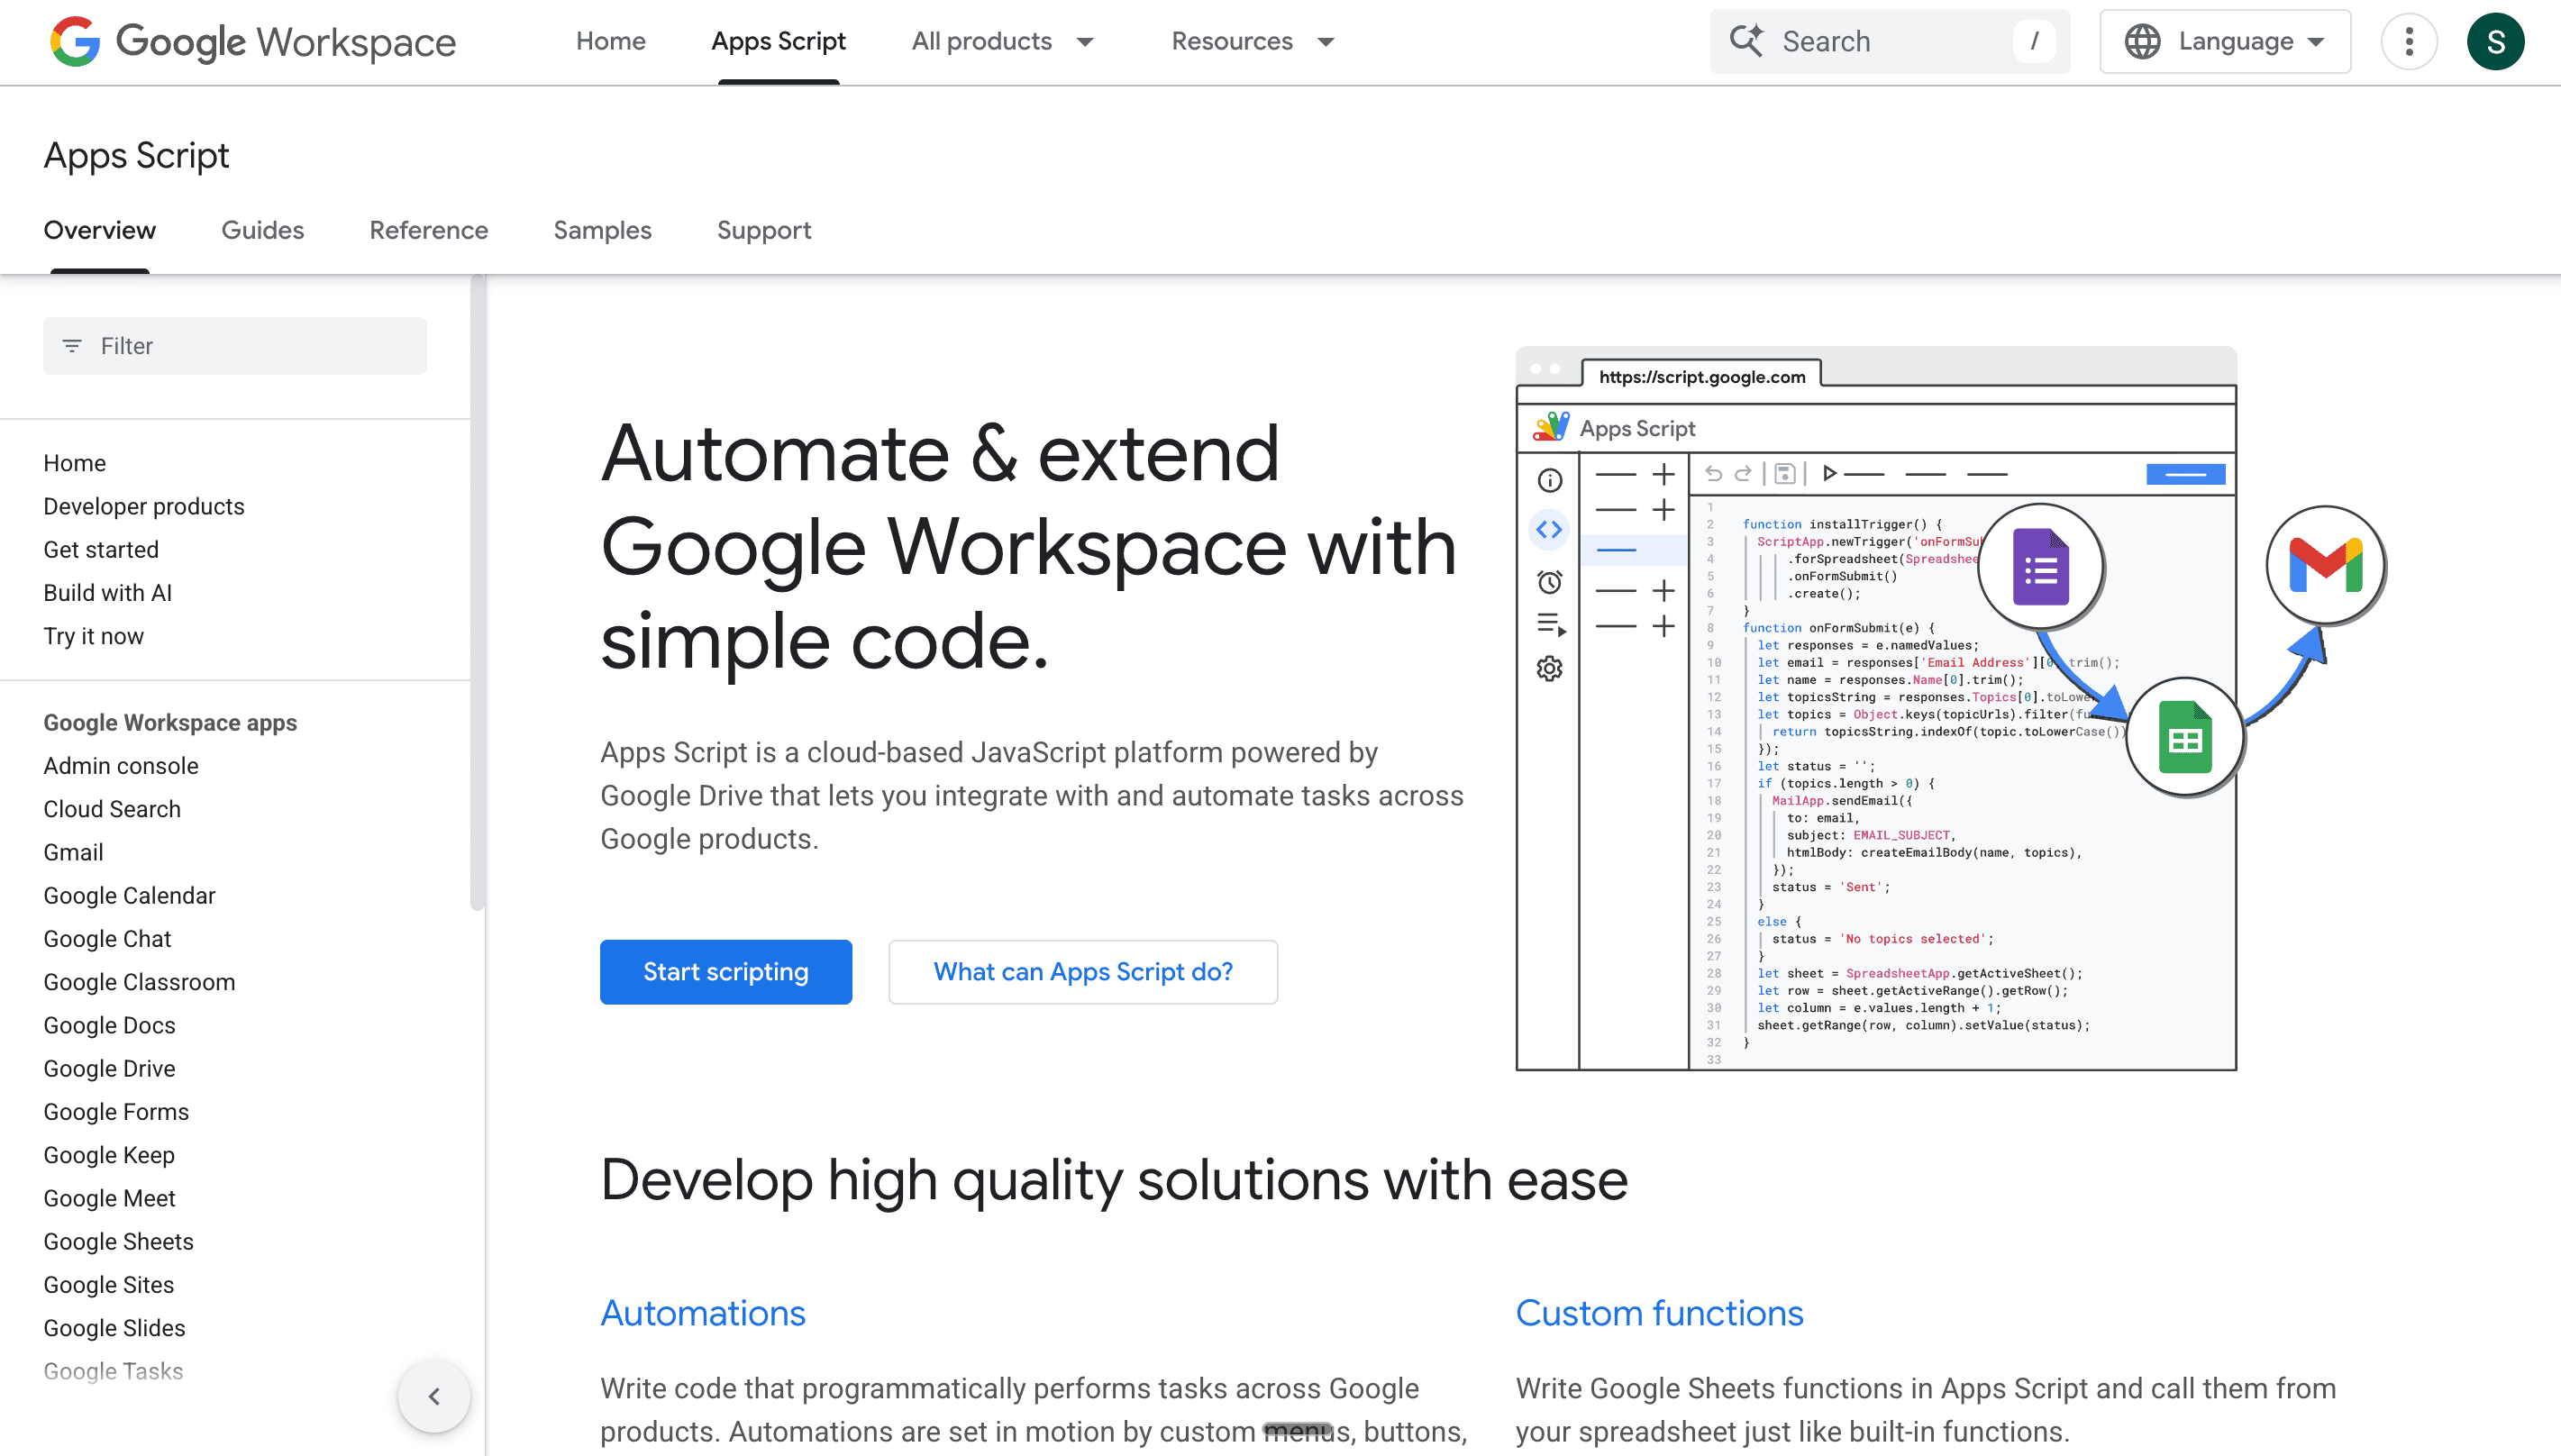
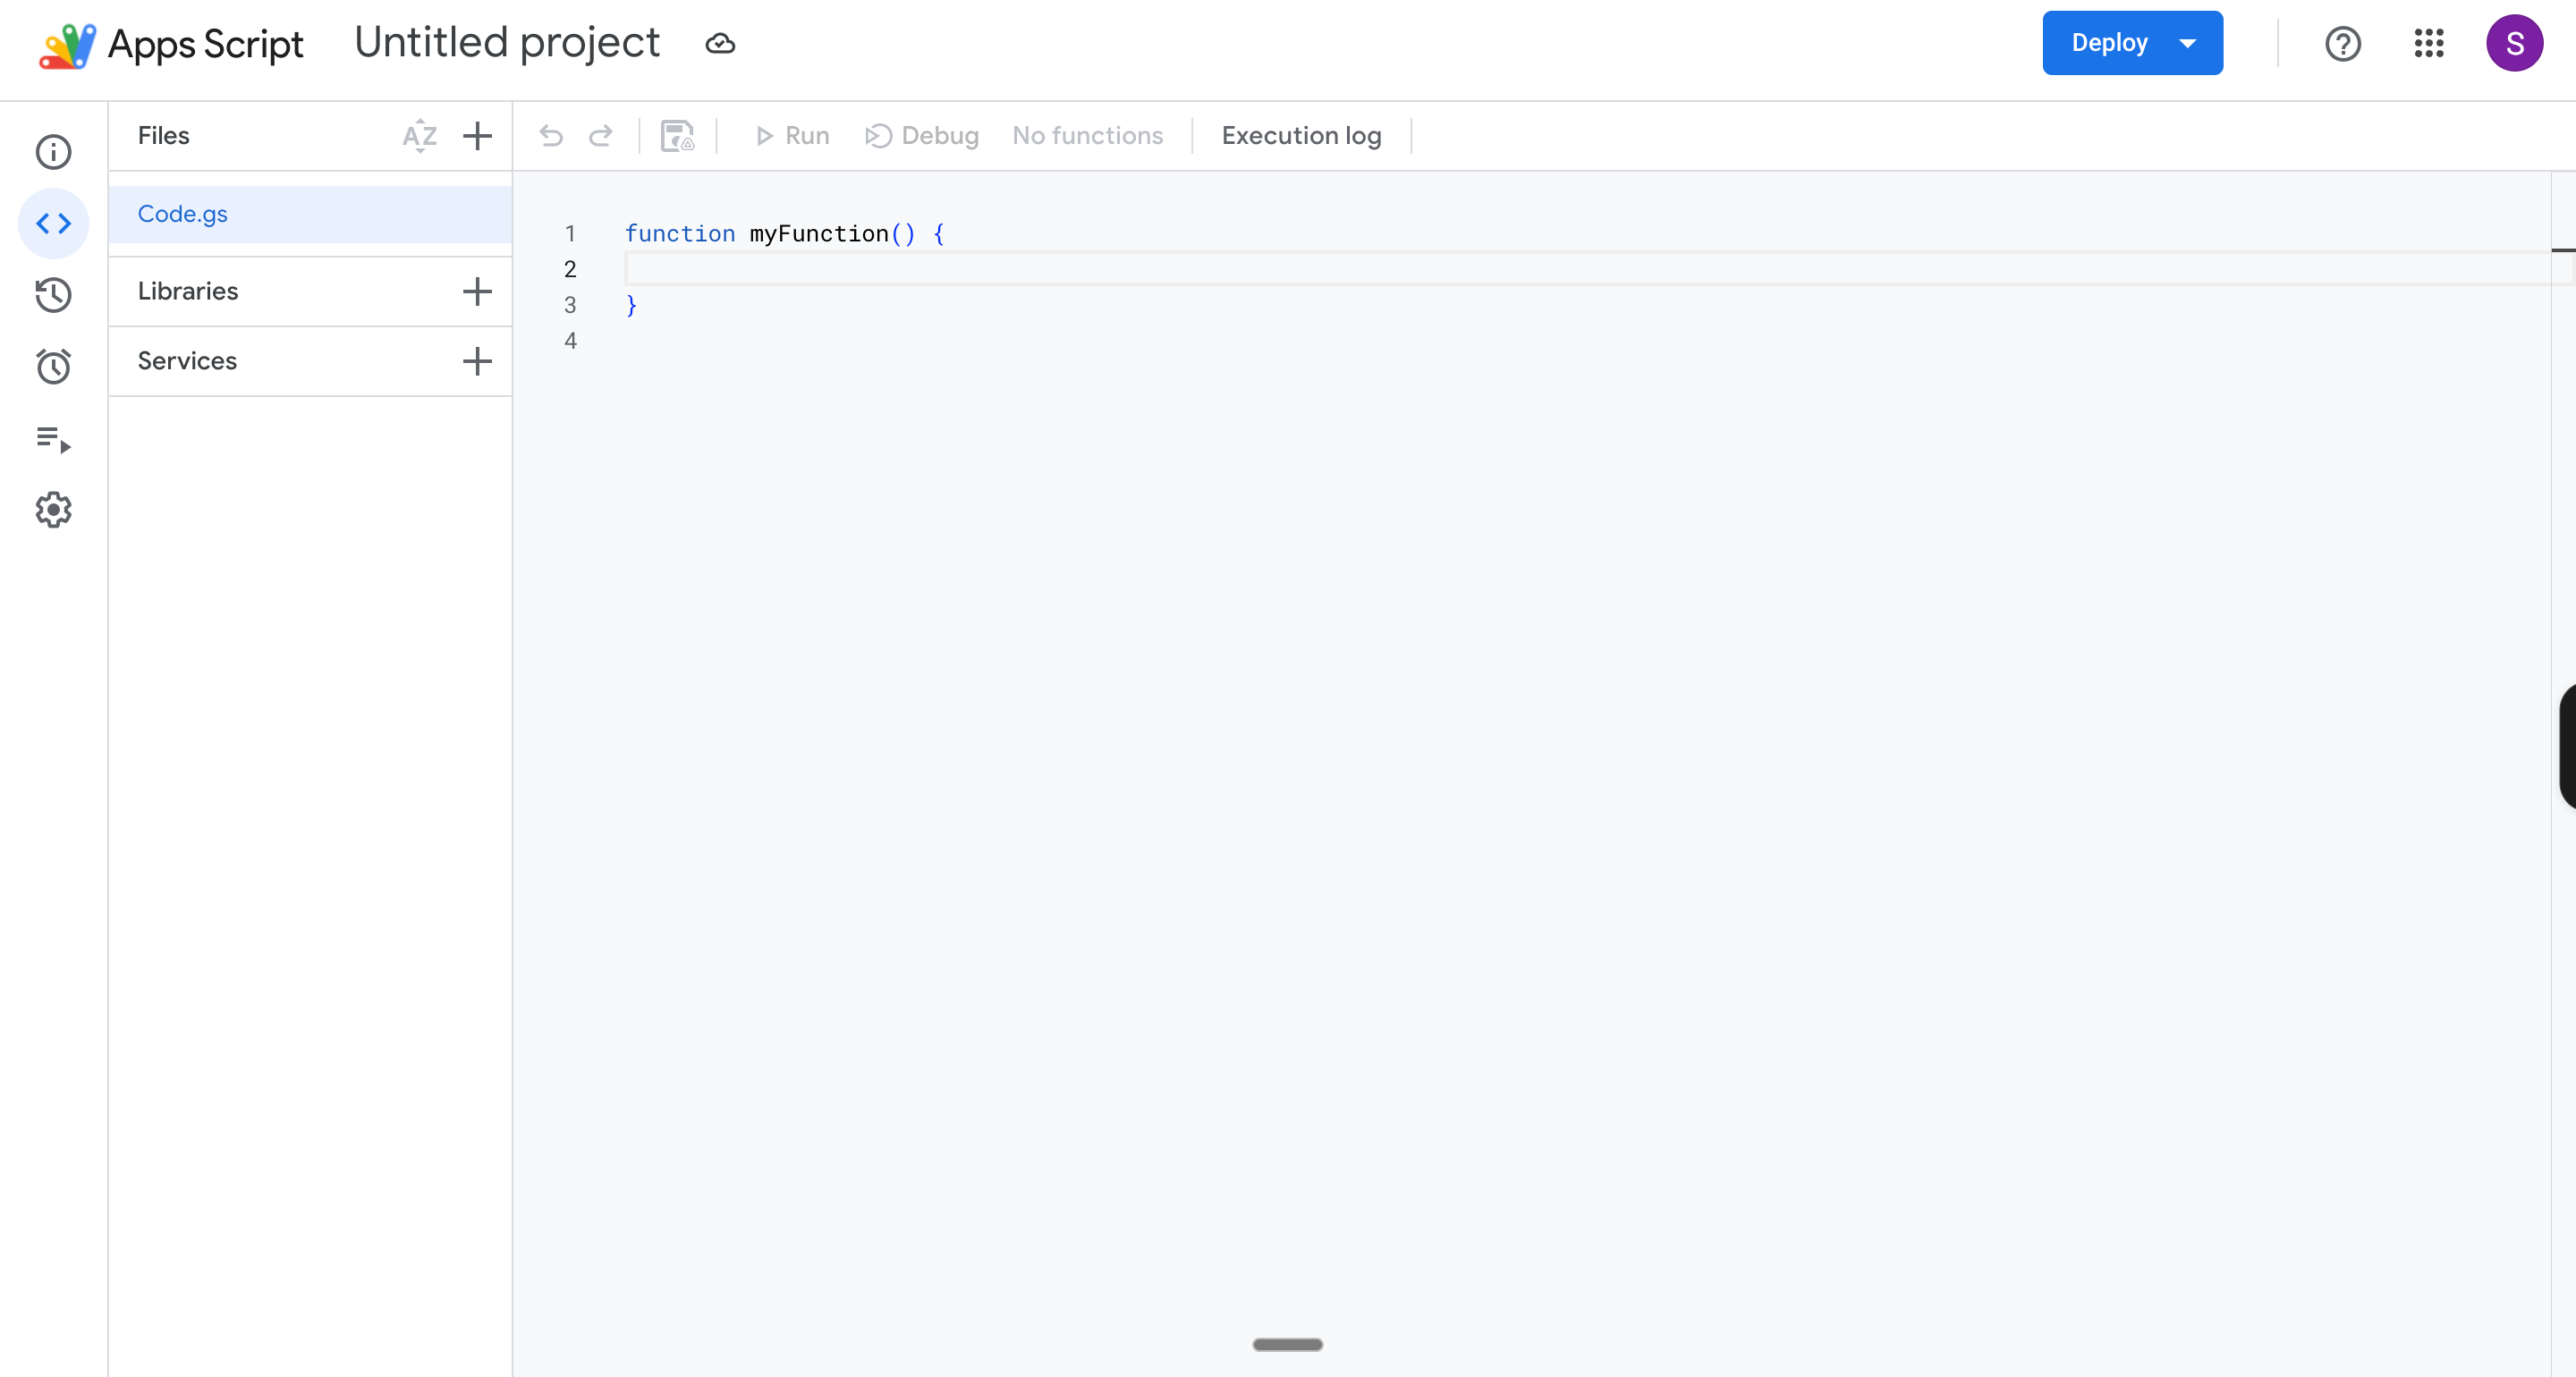
Step 1b: Configuring Google AppsScript. 1. Head to script.google.com. This is what you should see. Get ready, this is where we’ll build out the app.
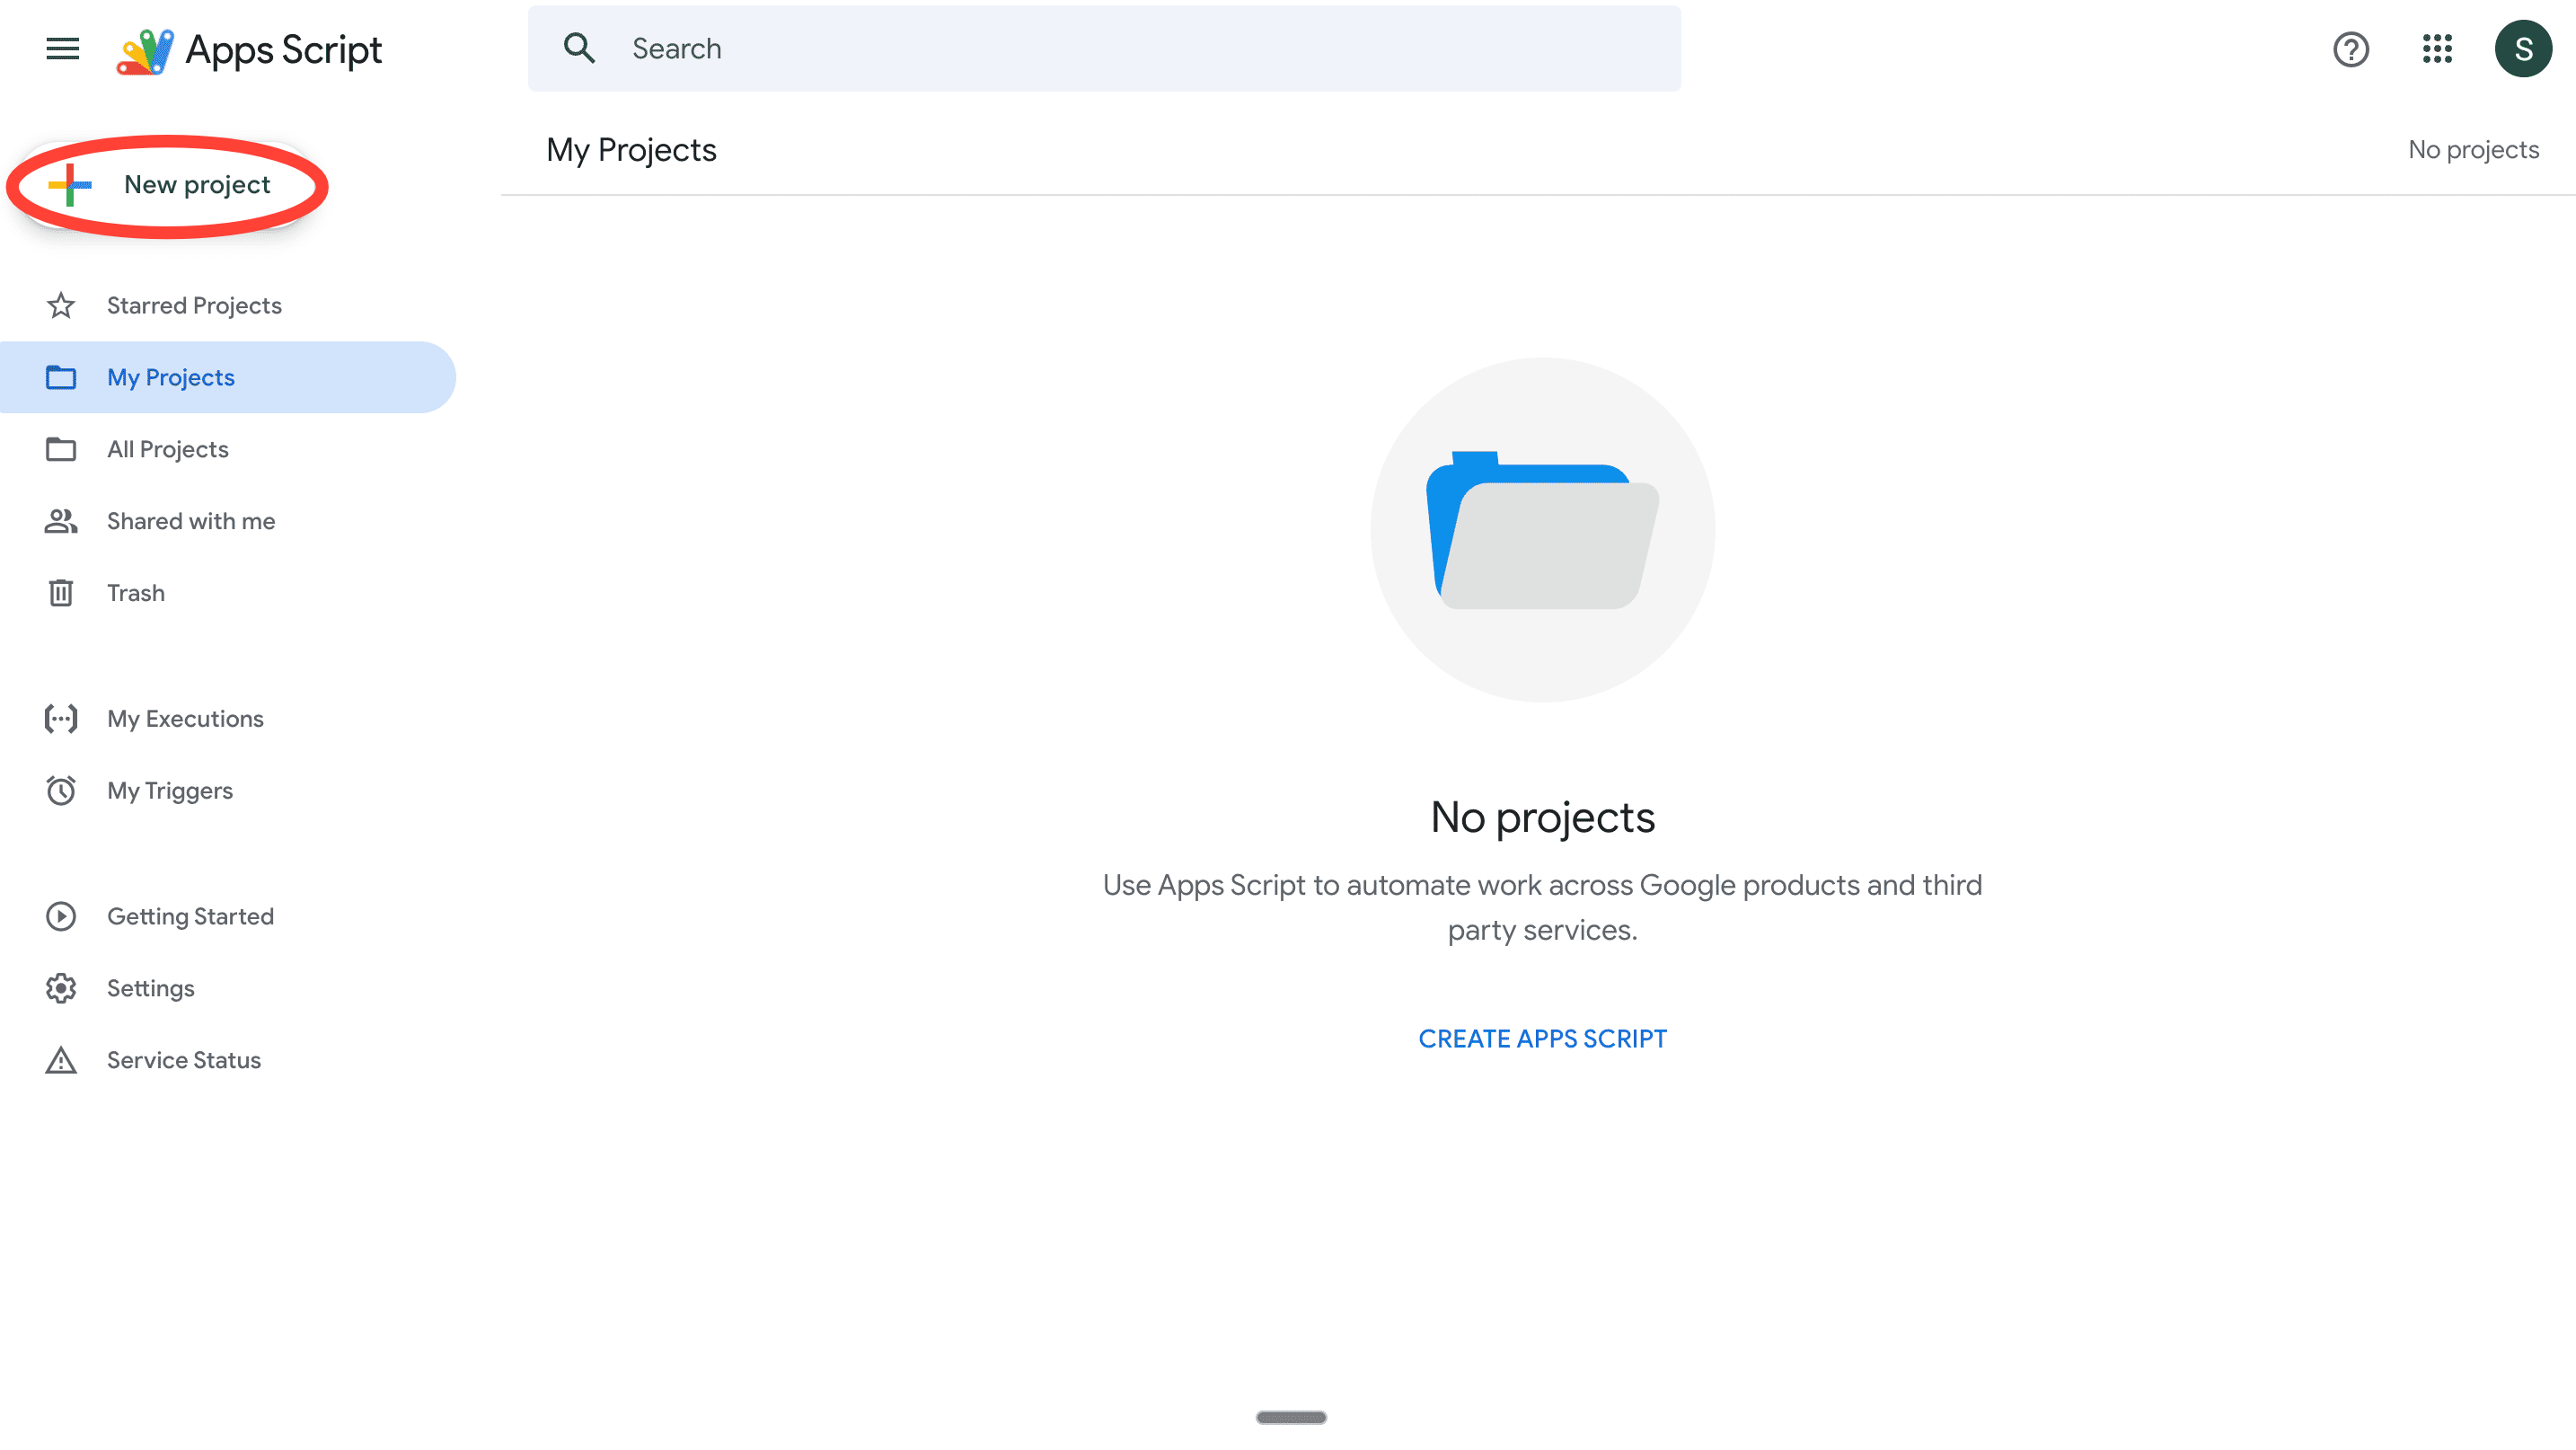
2. Log in with your Google account. This is the same Google account with your meeting emails. Recommend using your personal account here for testing to make getting permissions easier. This is what your dashboard should look like.
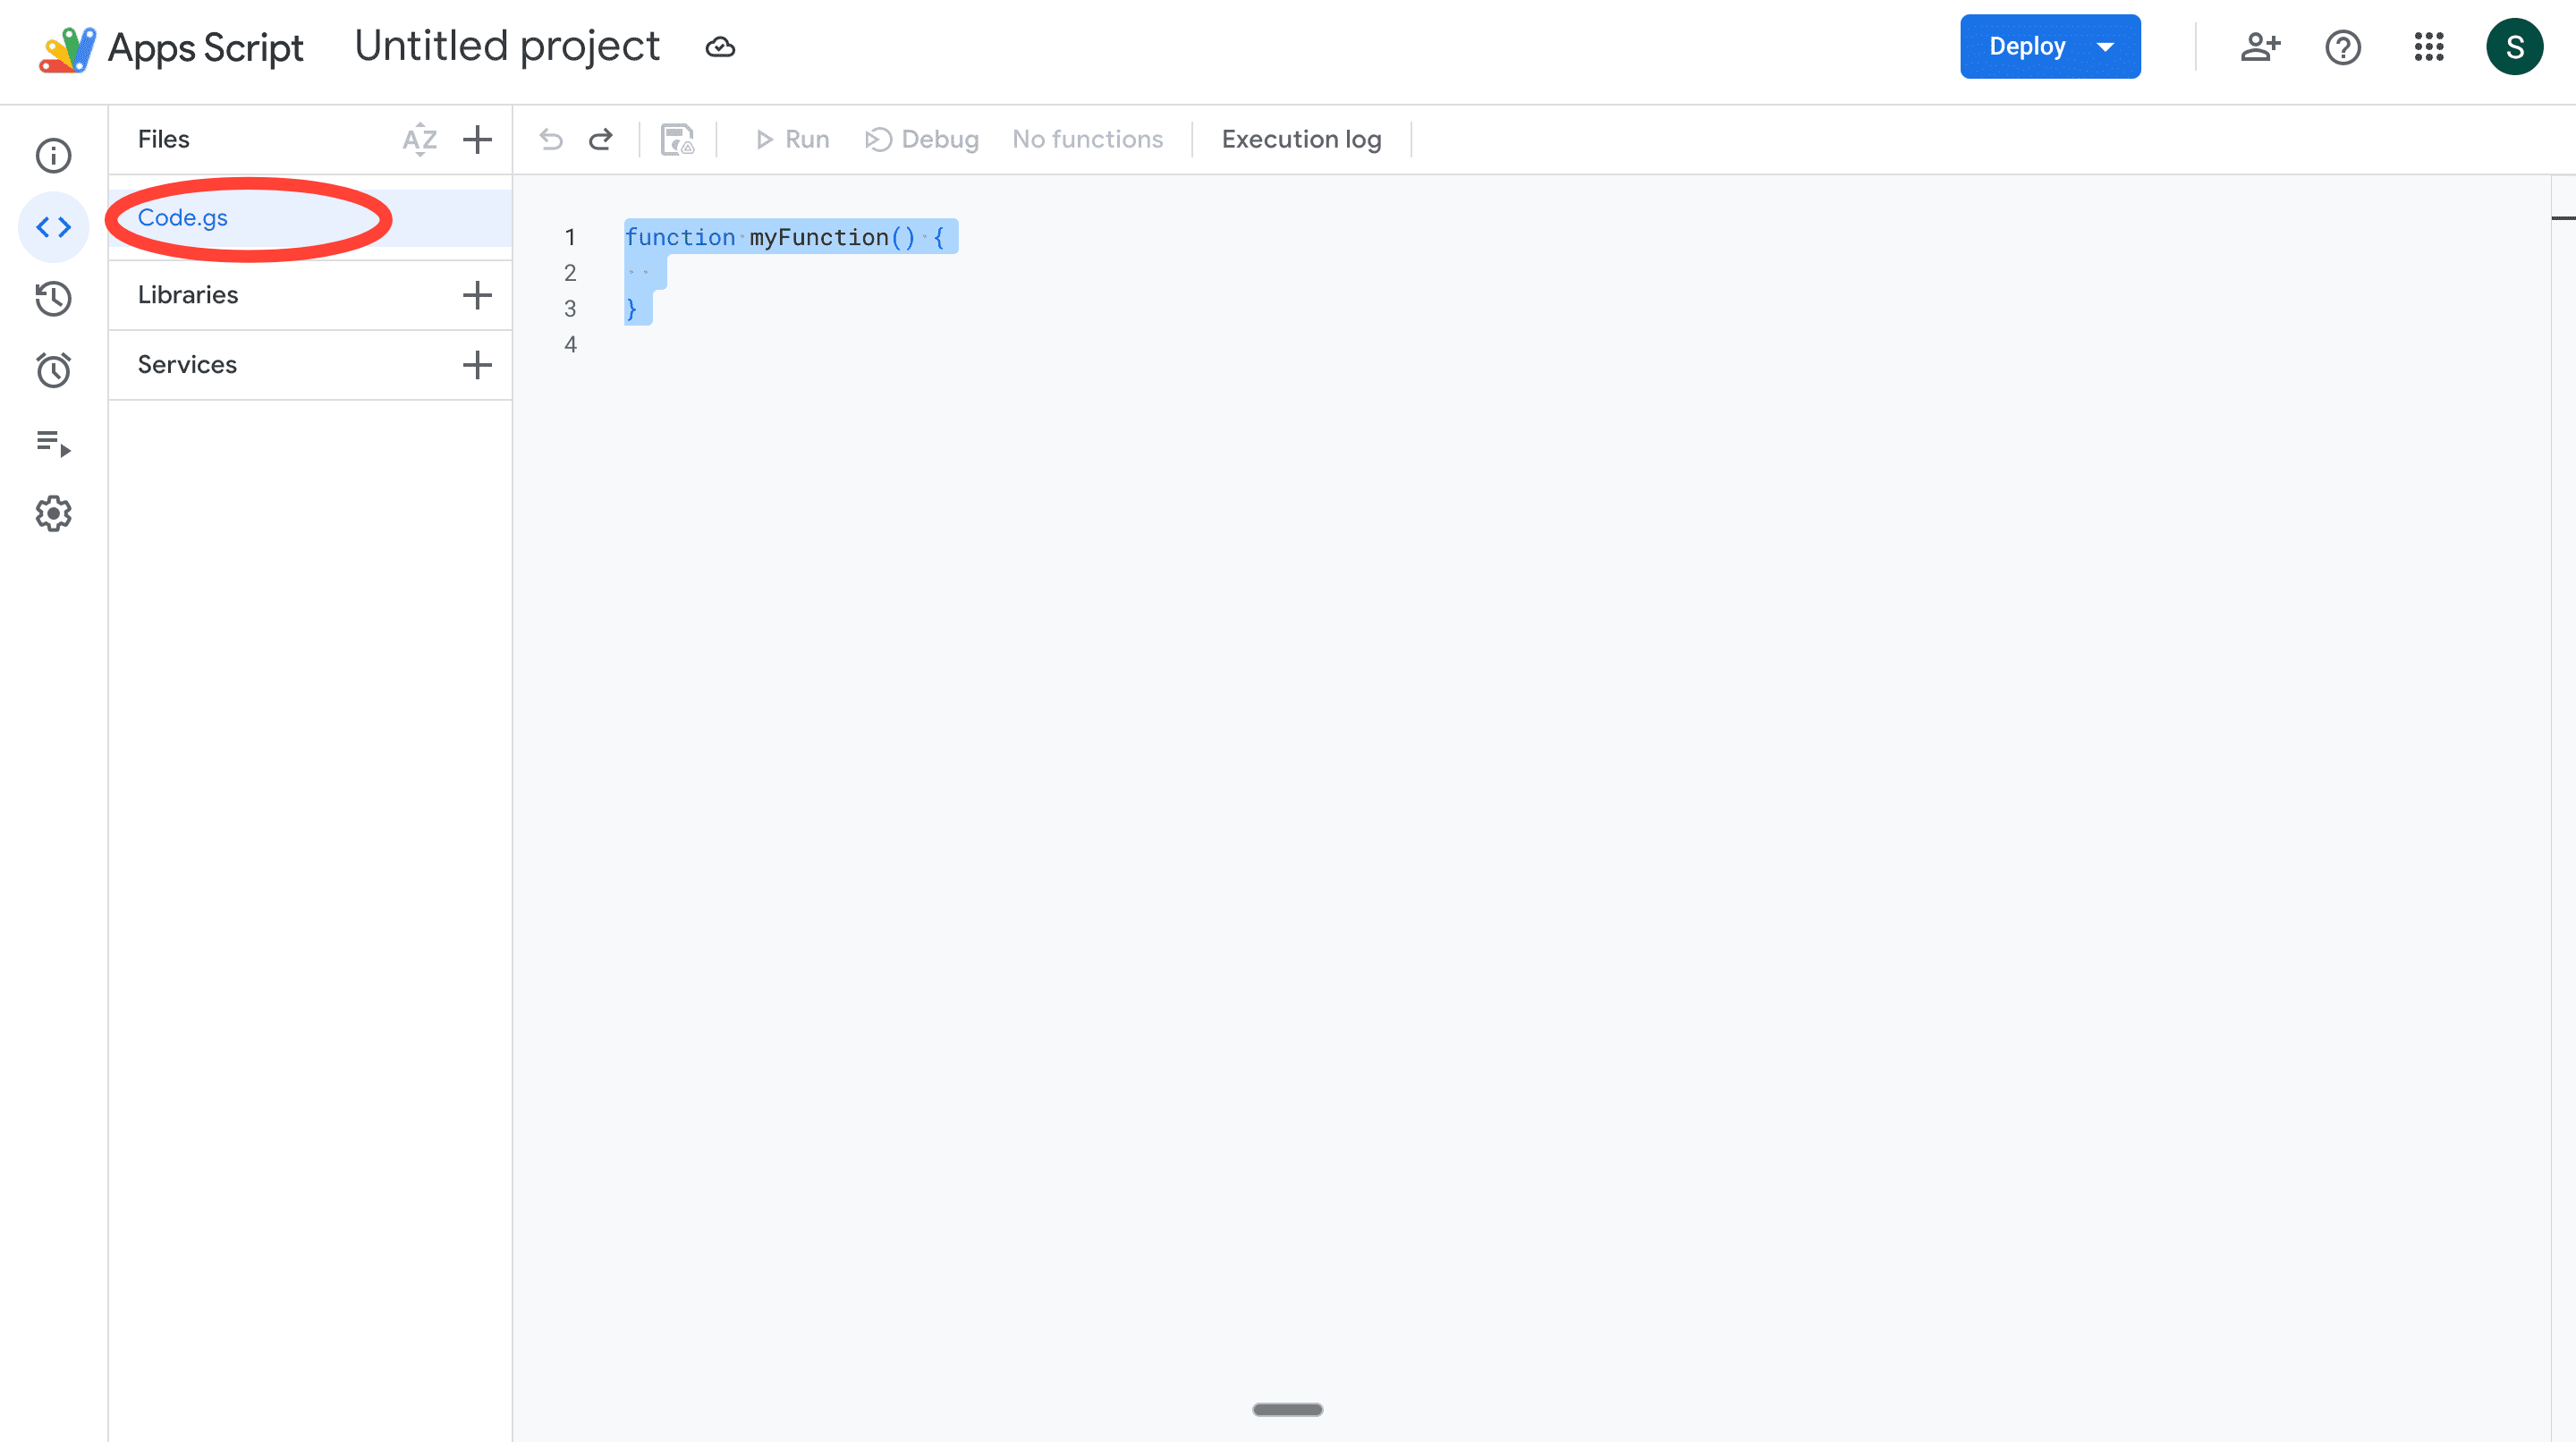
3. Now, click on New Project. You should see a Code.gs file created by default. This is where we’ll write all the code to run the app.
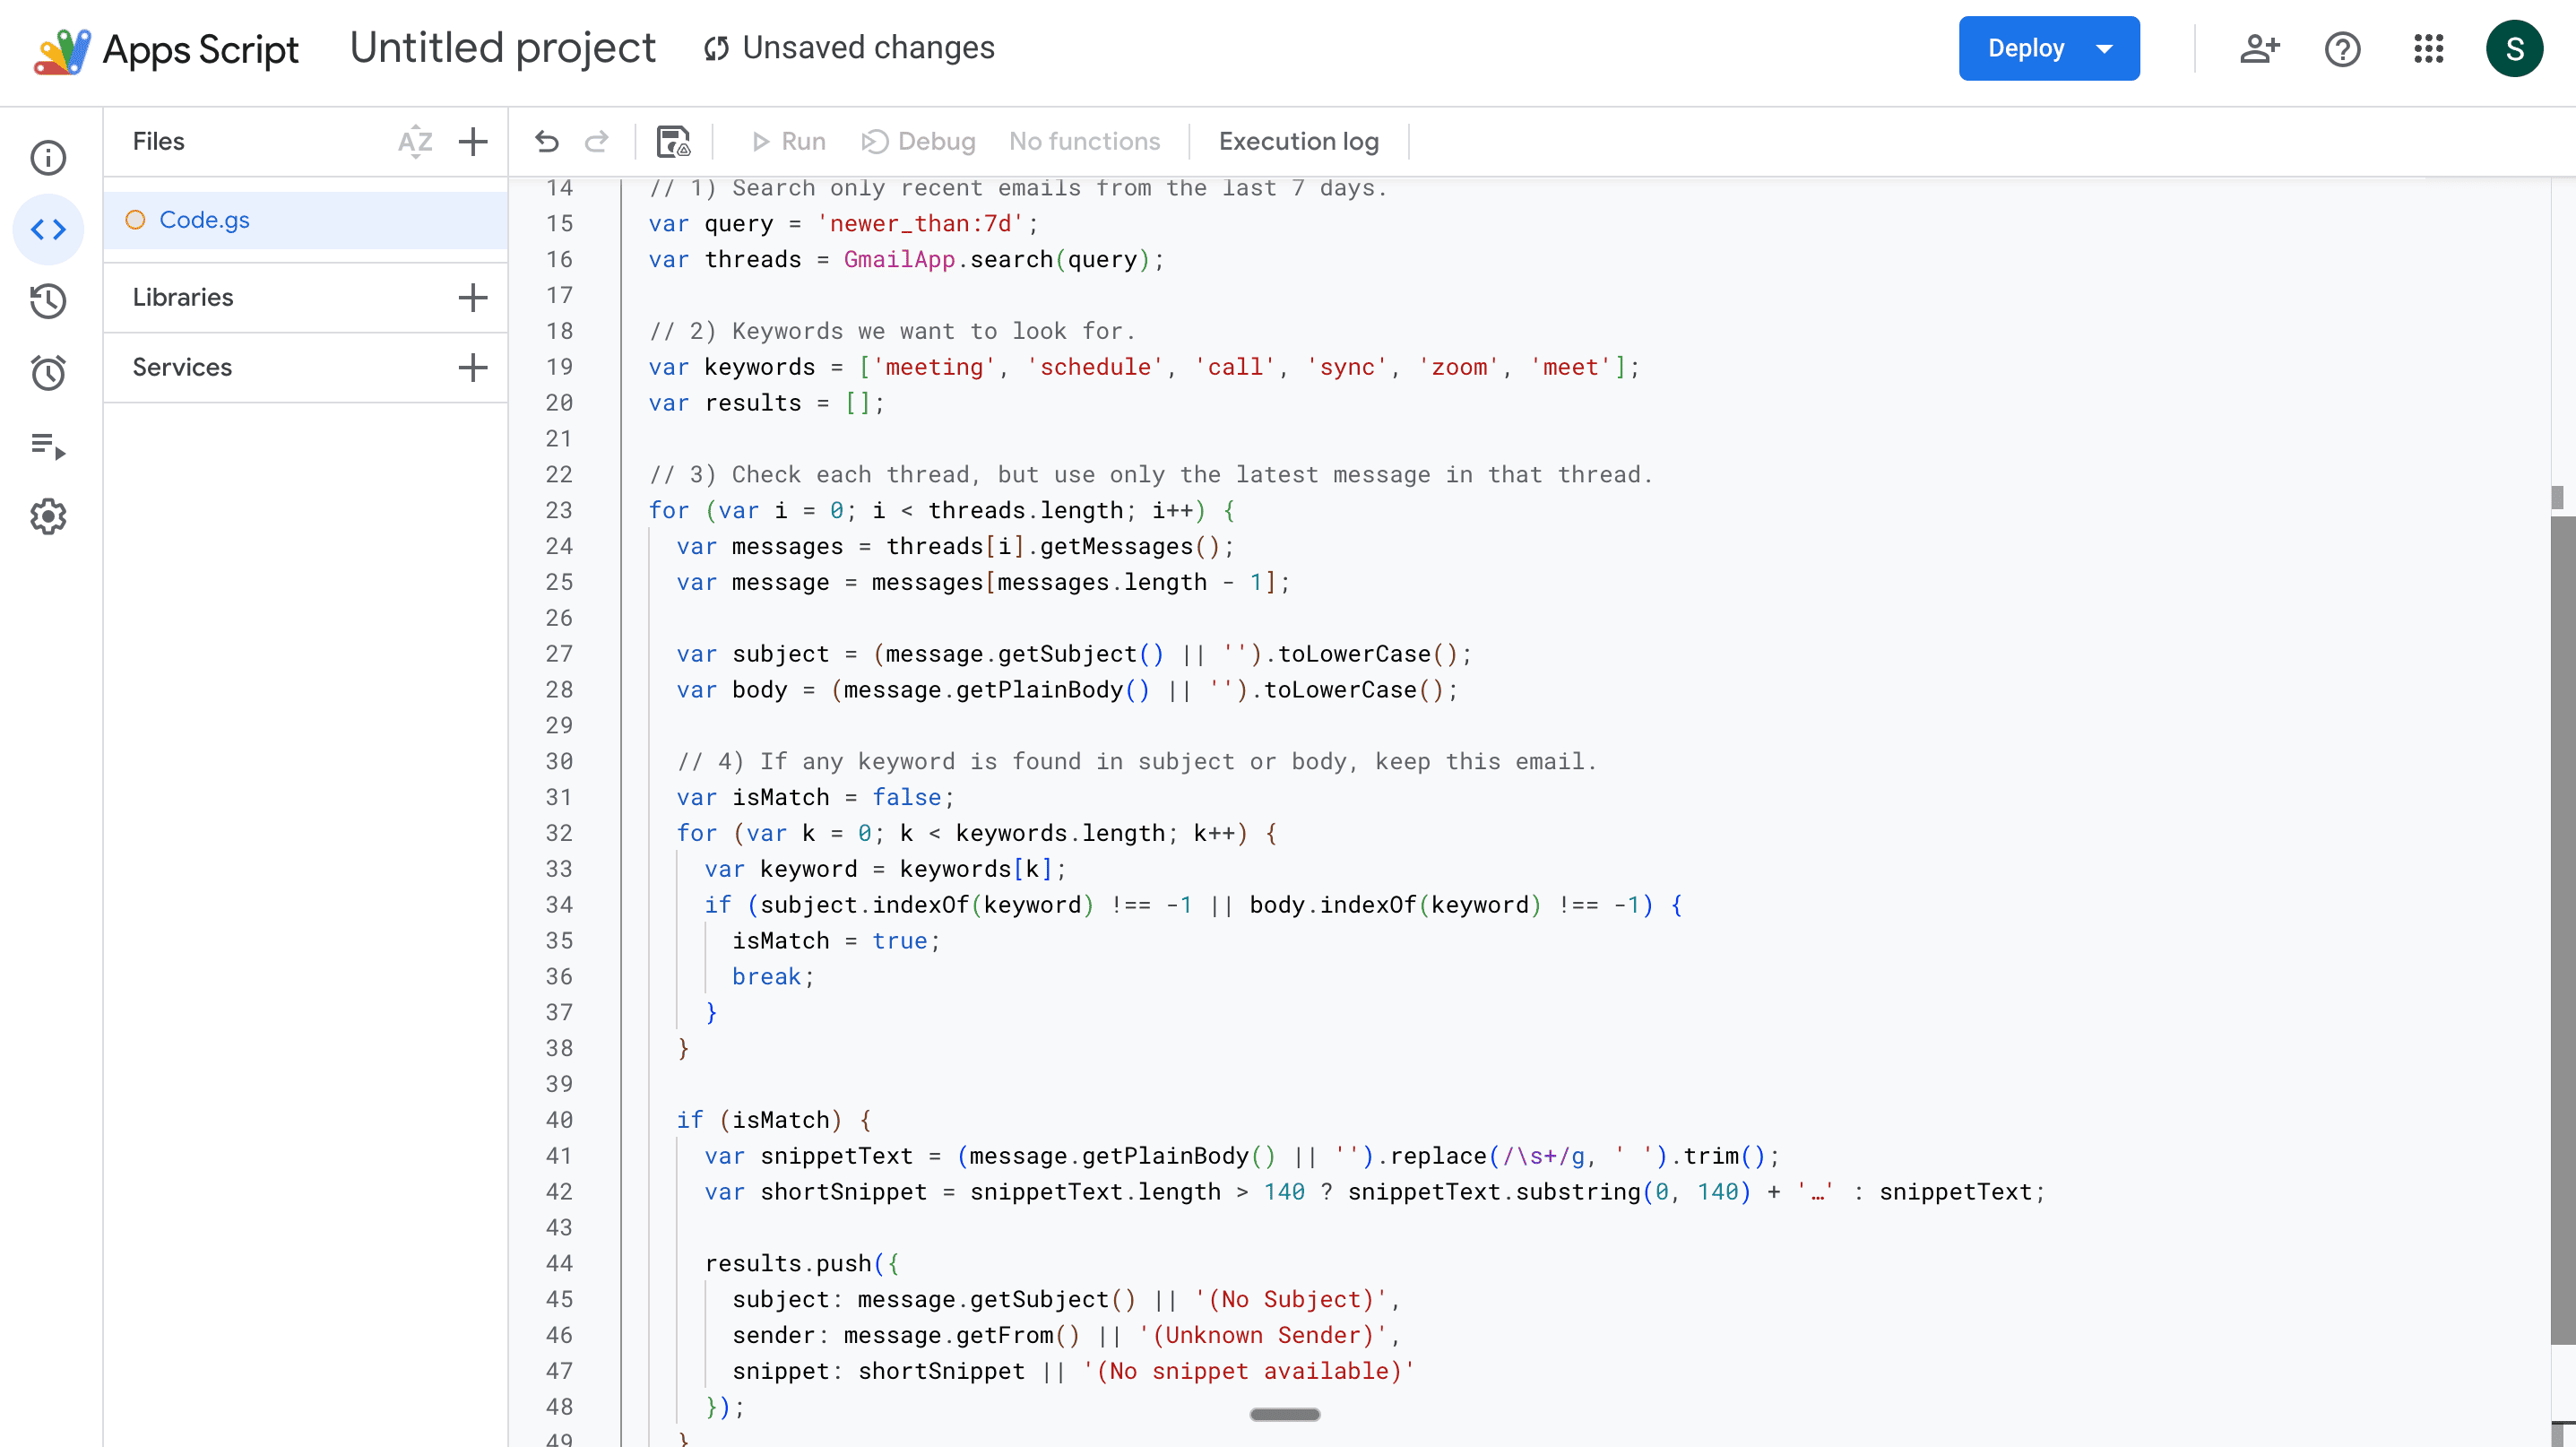
4. Remove all the existing code in the Code.gs file, and paste the code Codex made for you here.
Step 1c: Previewing your code. Today, we’re using an Index.html file to test if our code is working. Codex is already writing it for us (it doesn’t need to be fancy). All we need to do is paste it into a new Index.html file.
1. Go to the ‘+’ icon above your Code.gs file. Click on it and select HTML. This creates a new tab in which you can post your HTML code.
2. Paste the HTML Code created for you here. Btw, Codex doesn't generate a code automatically, so ask it to give you the HTML code separately at this stage.
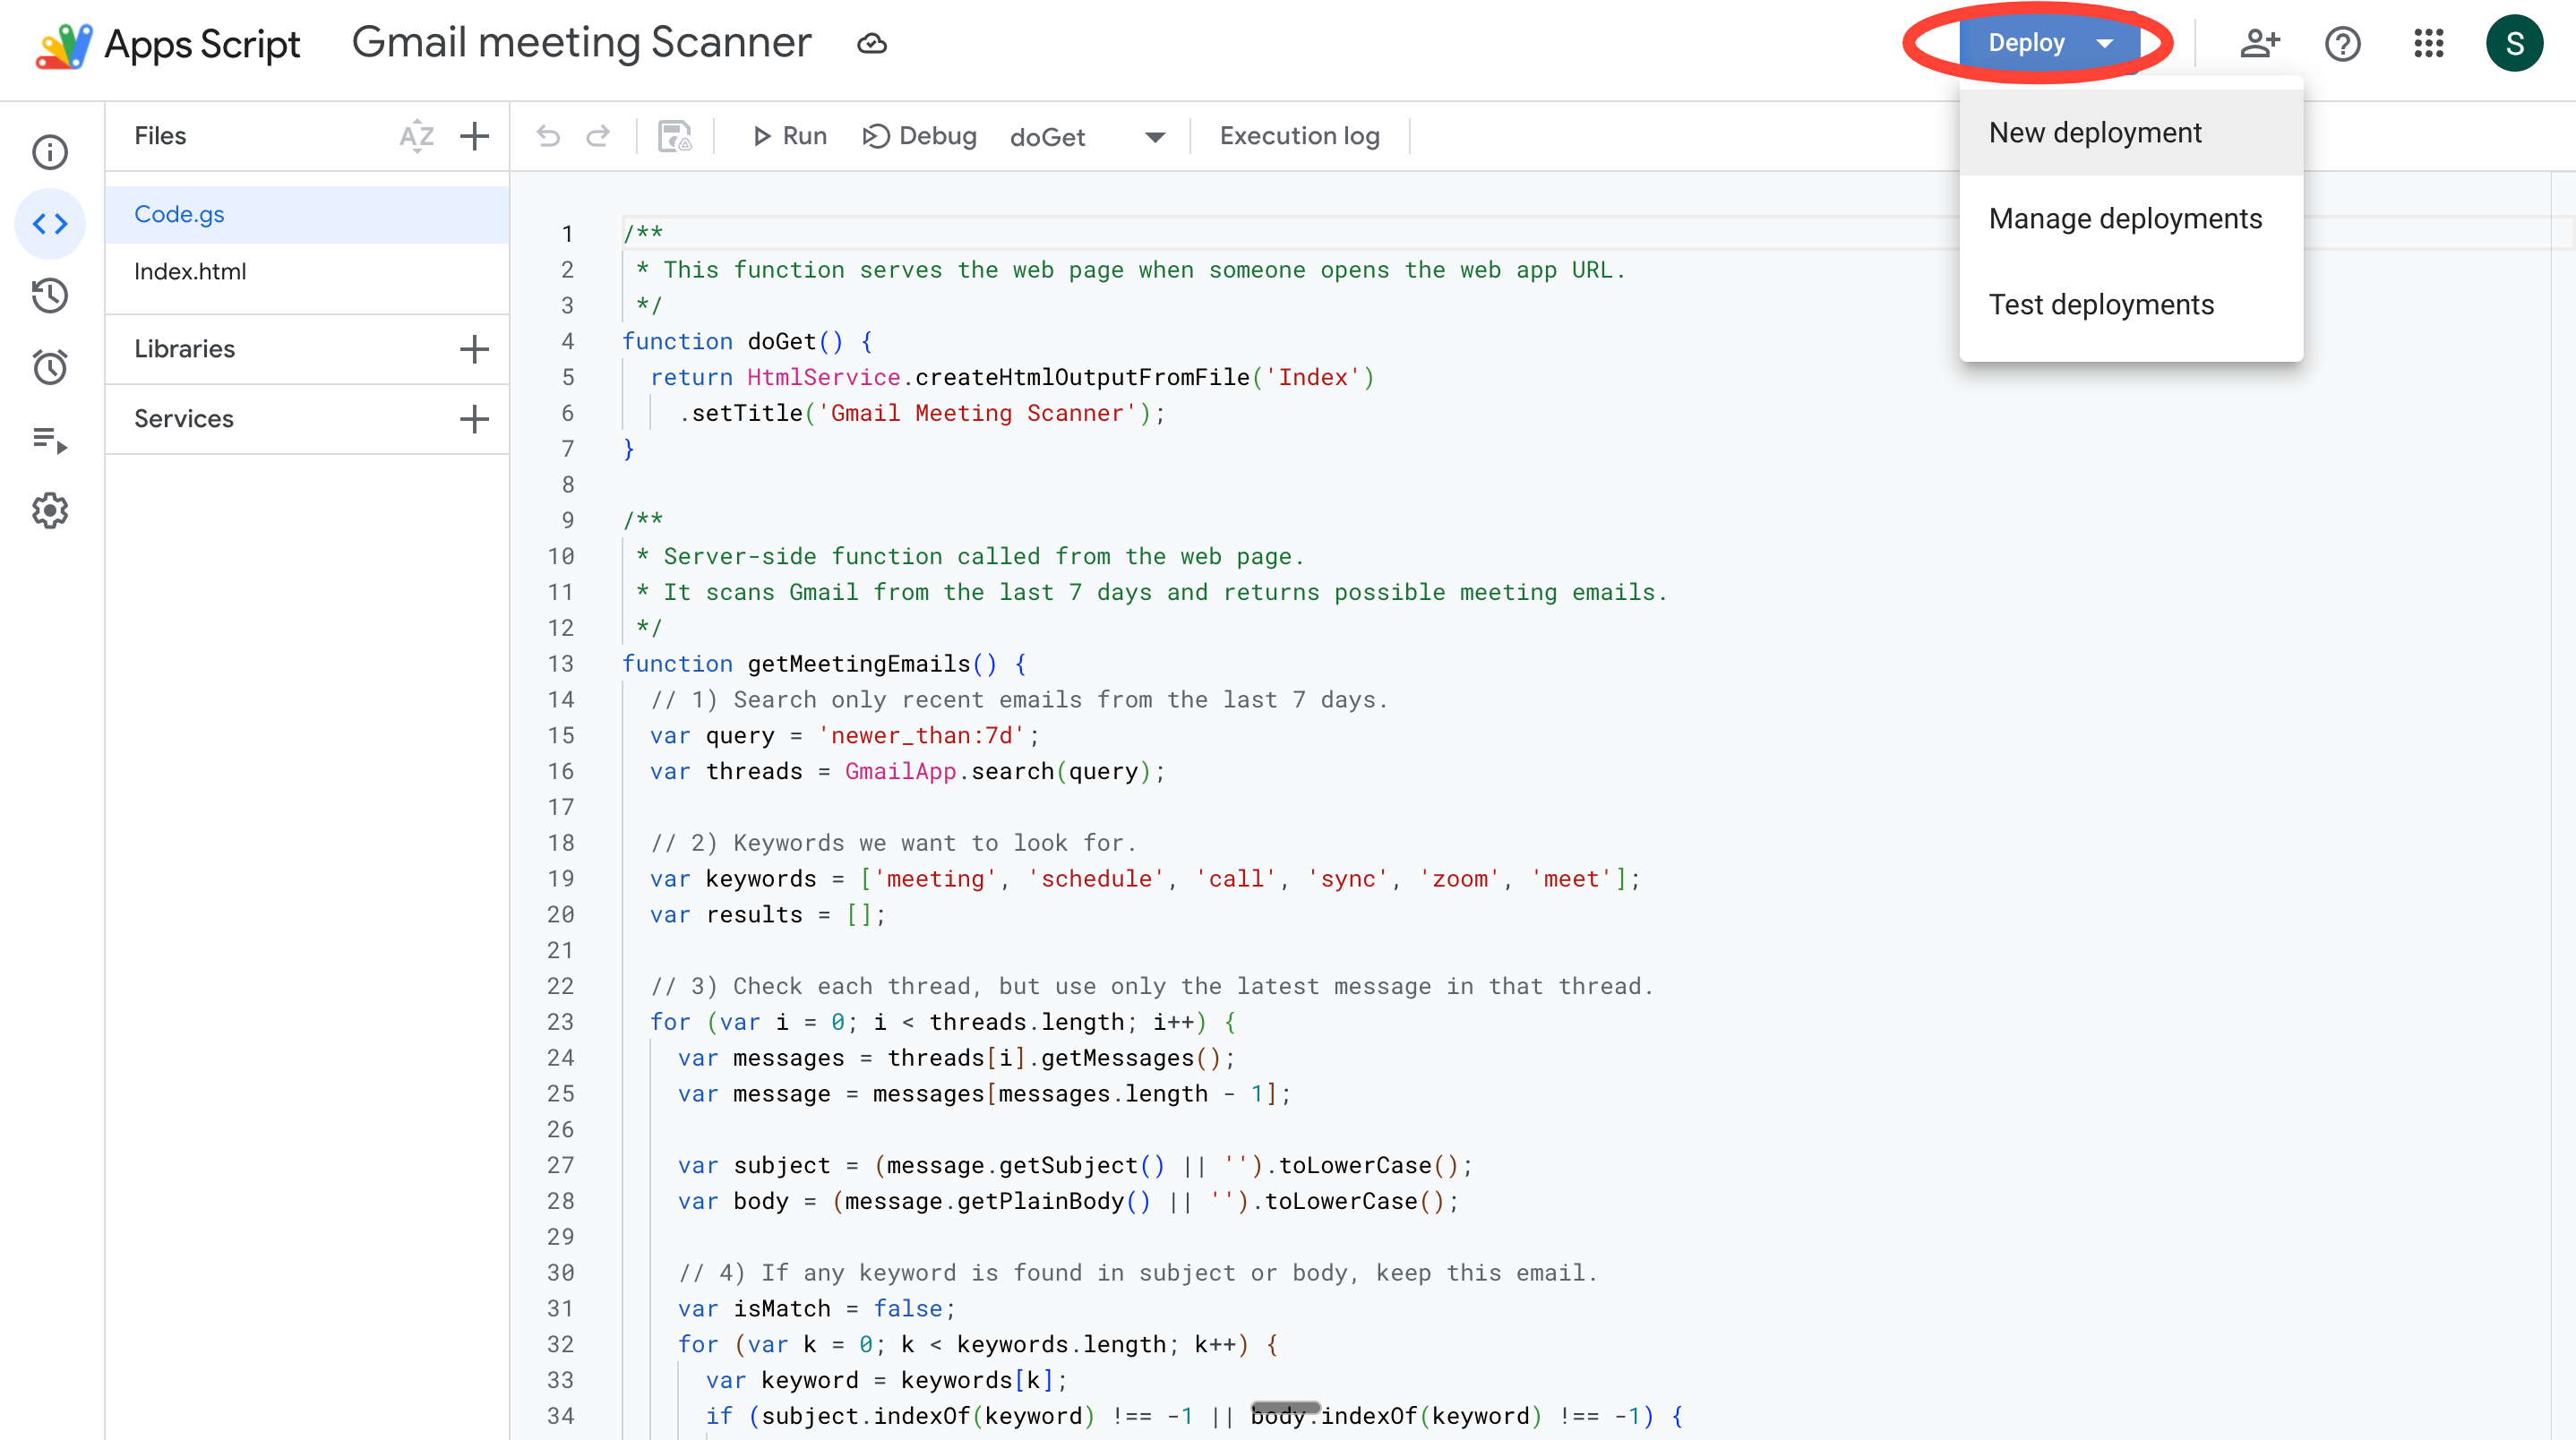
3. Now, click on the blue Deploy button up top and select New deployment.
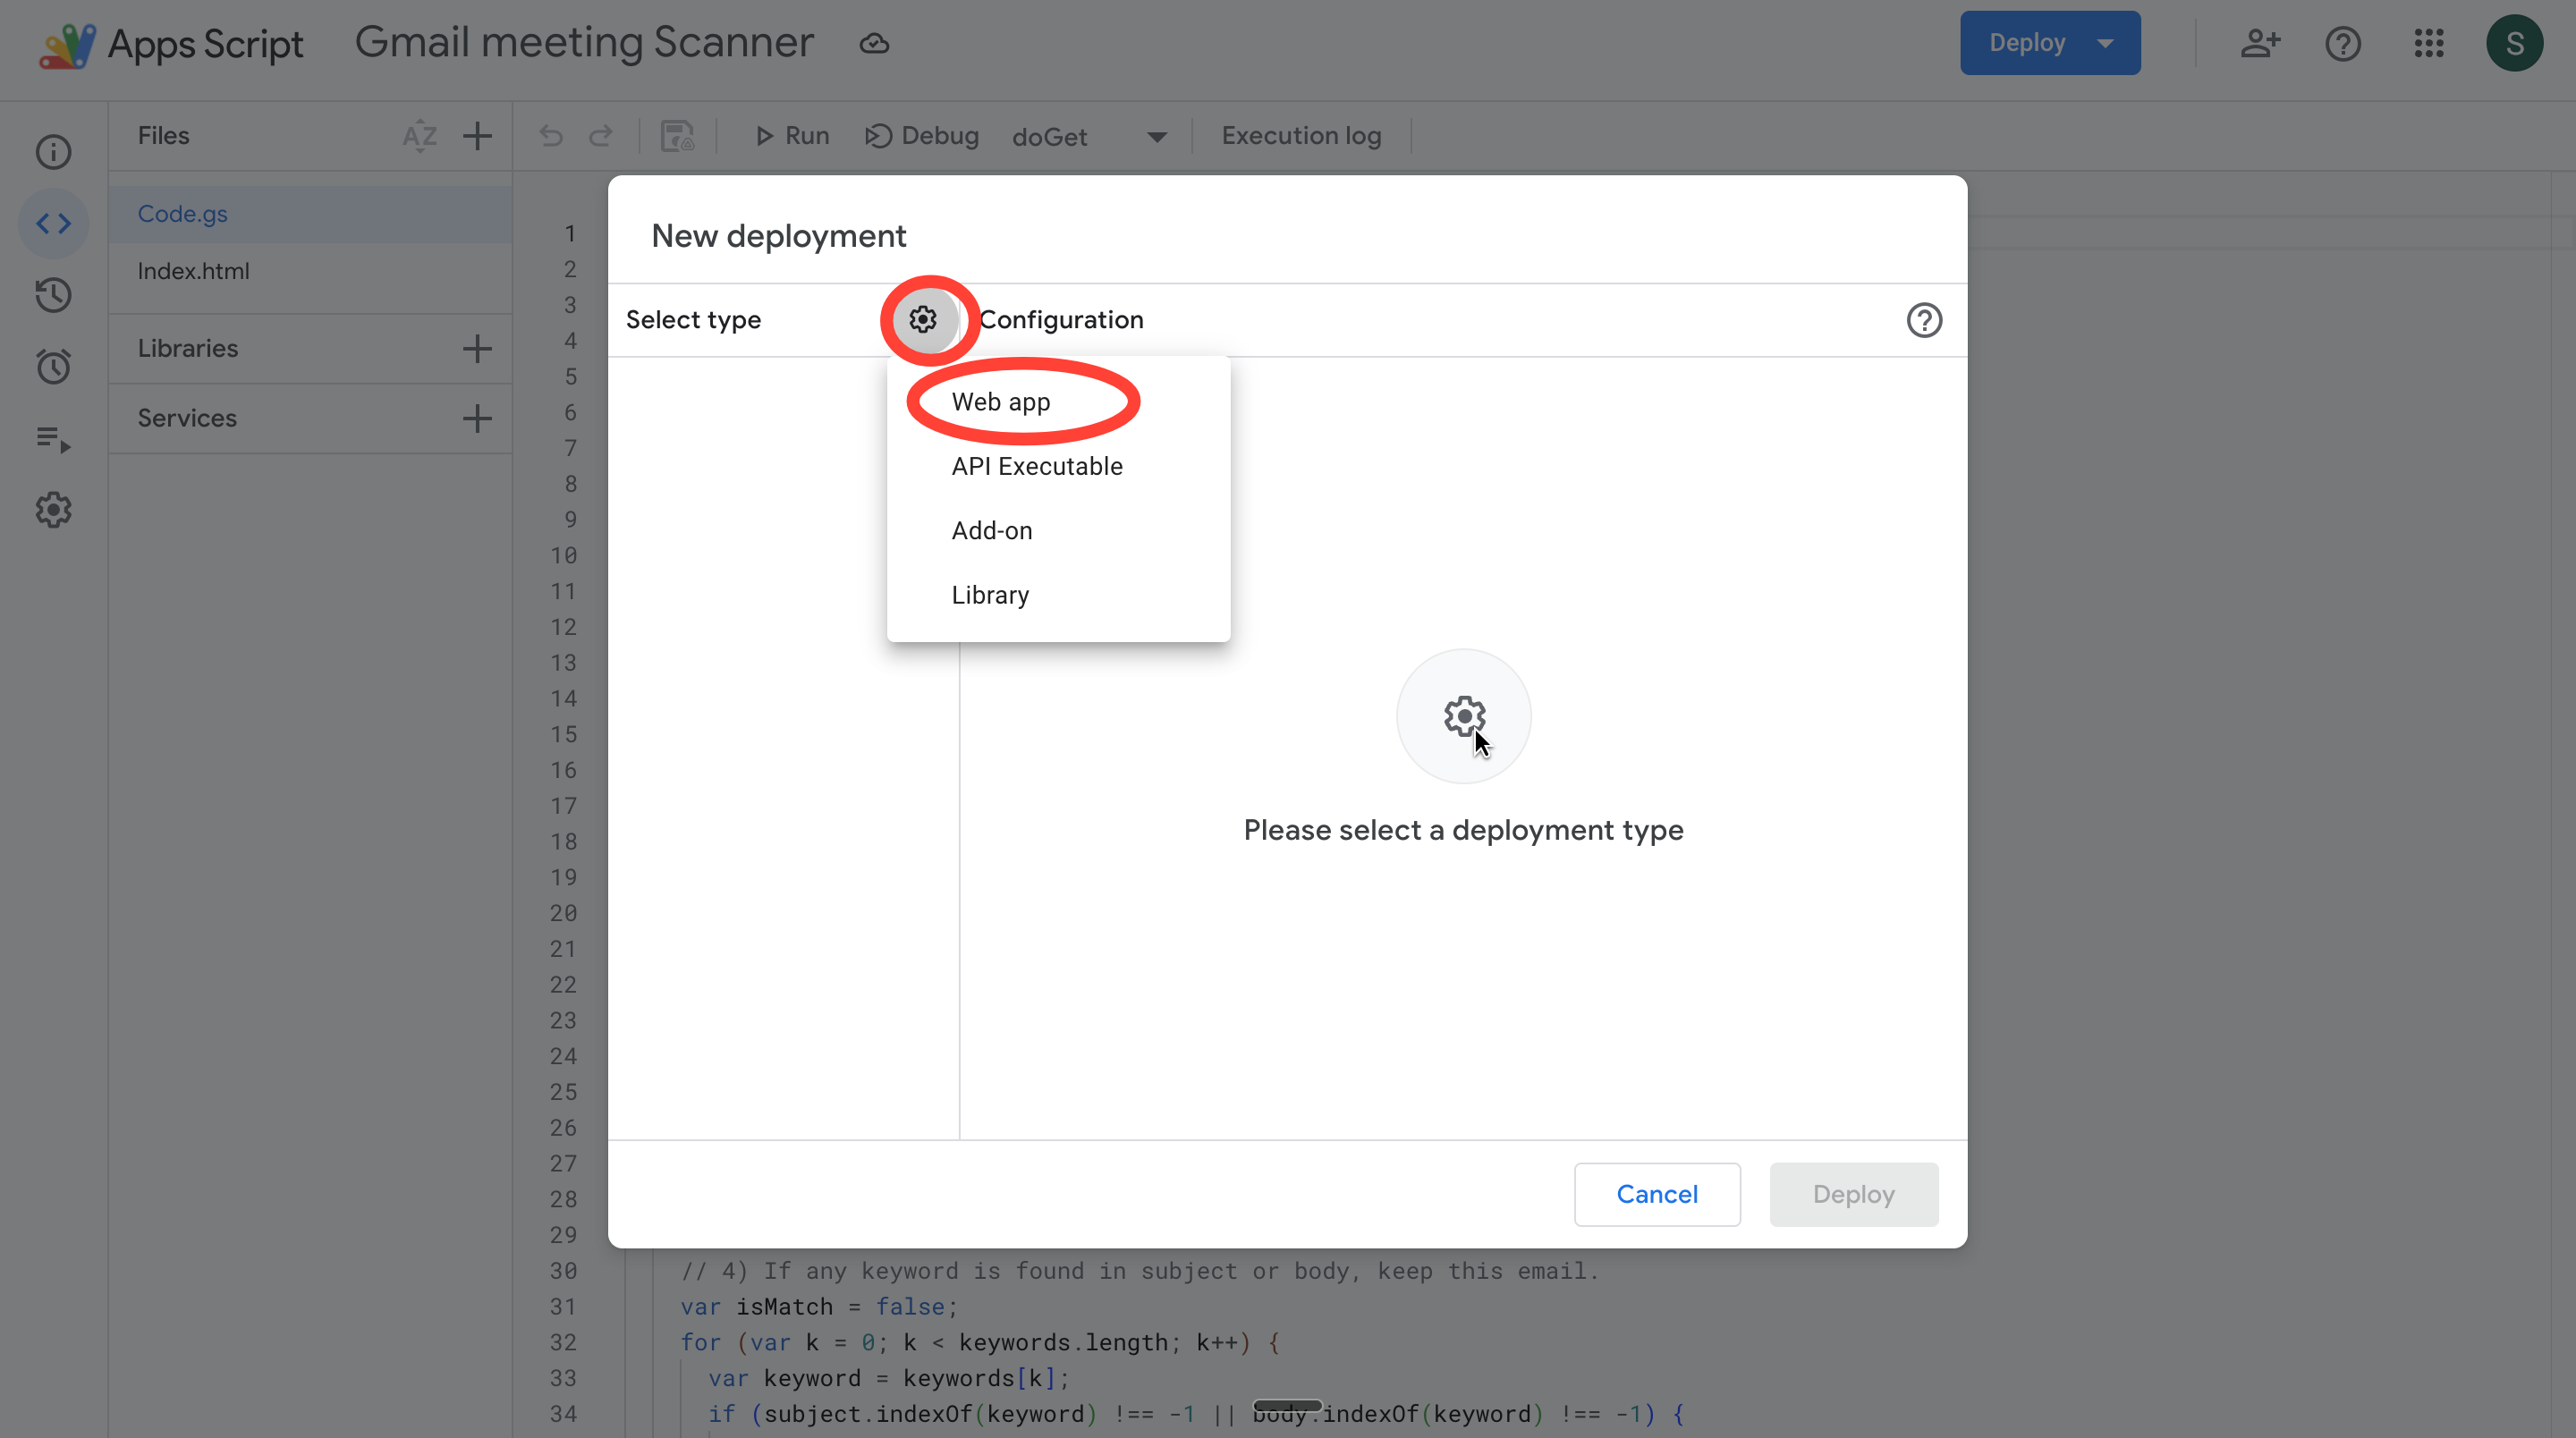
4. If nothing shows up under Select Type in the New deployment dashboard, click on the Settings icon and select Web app.
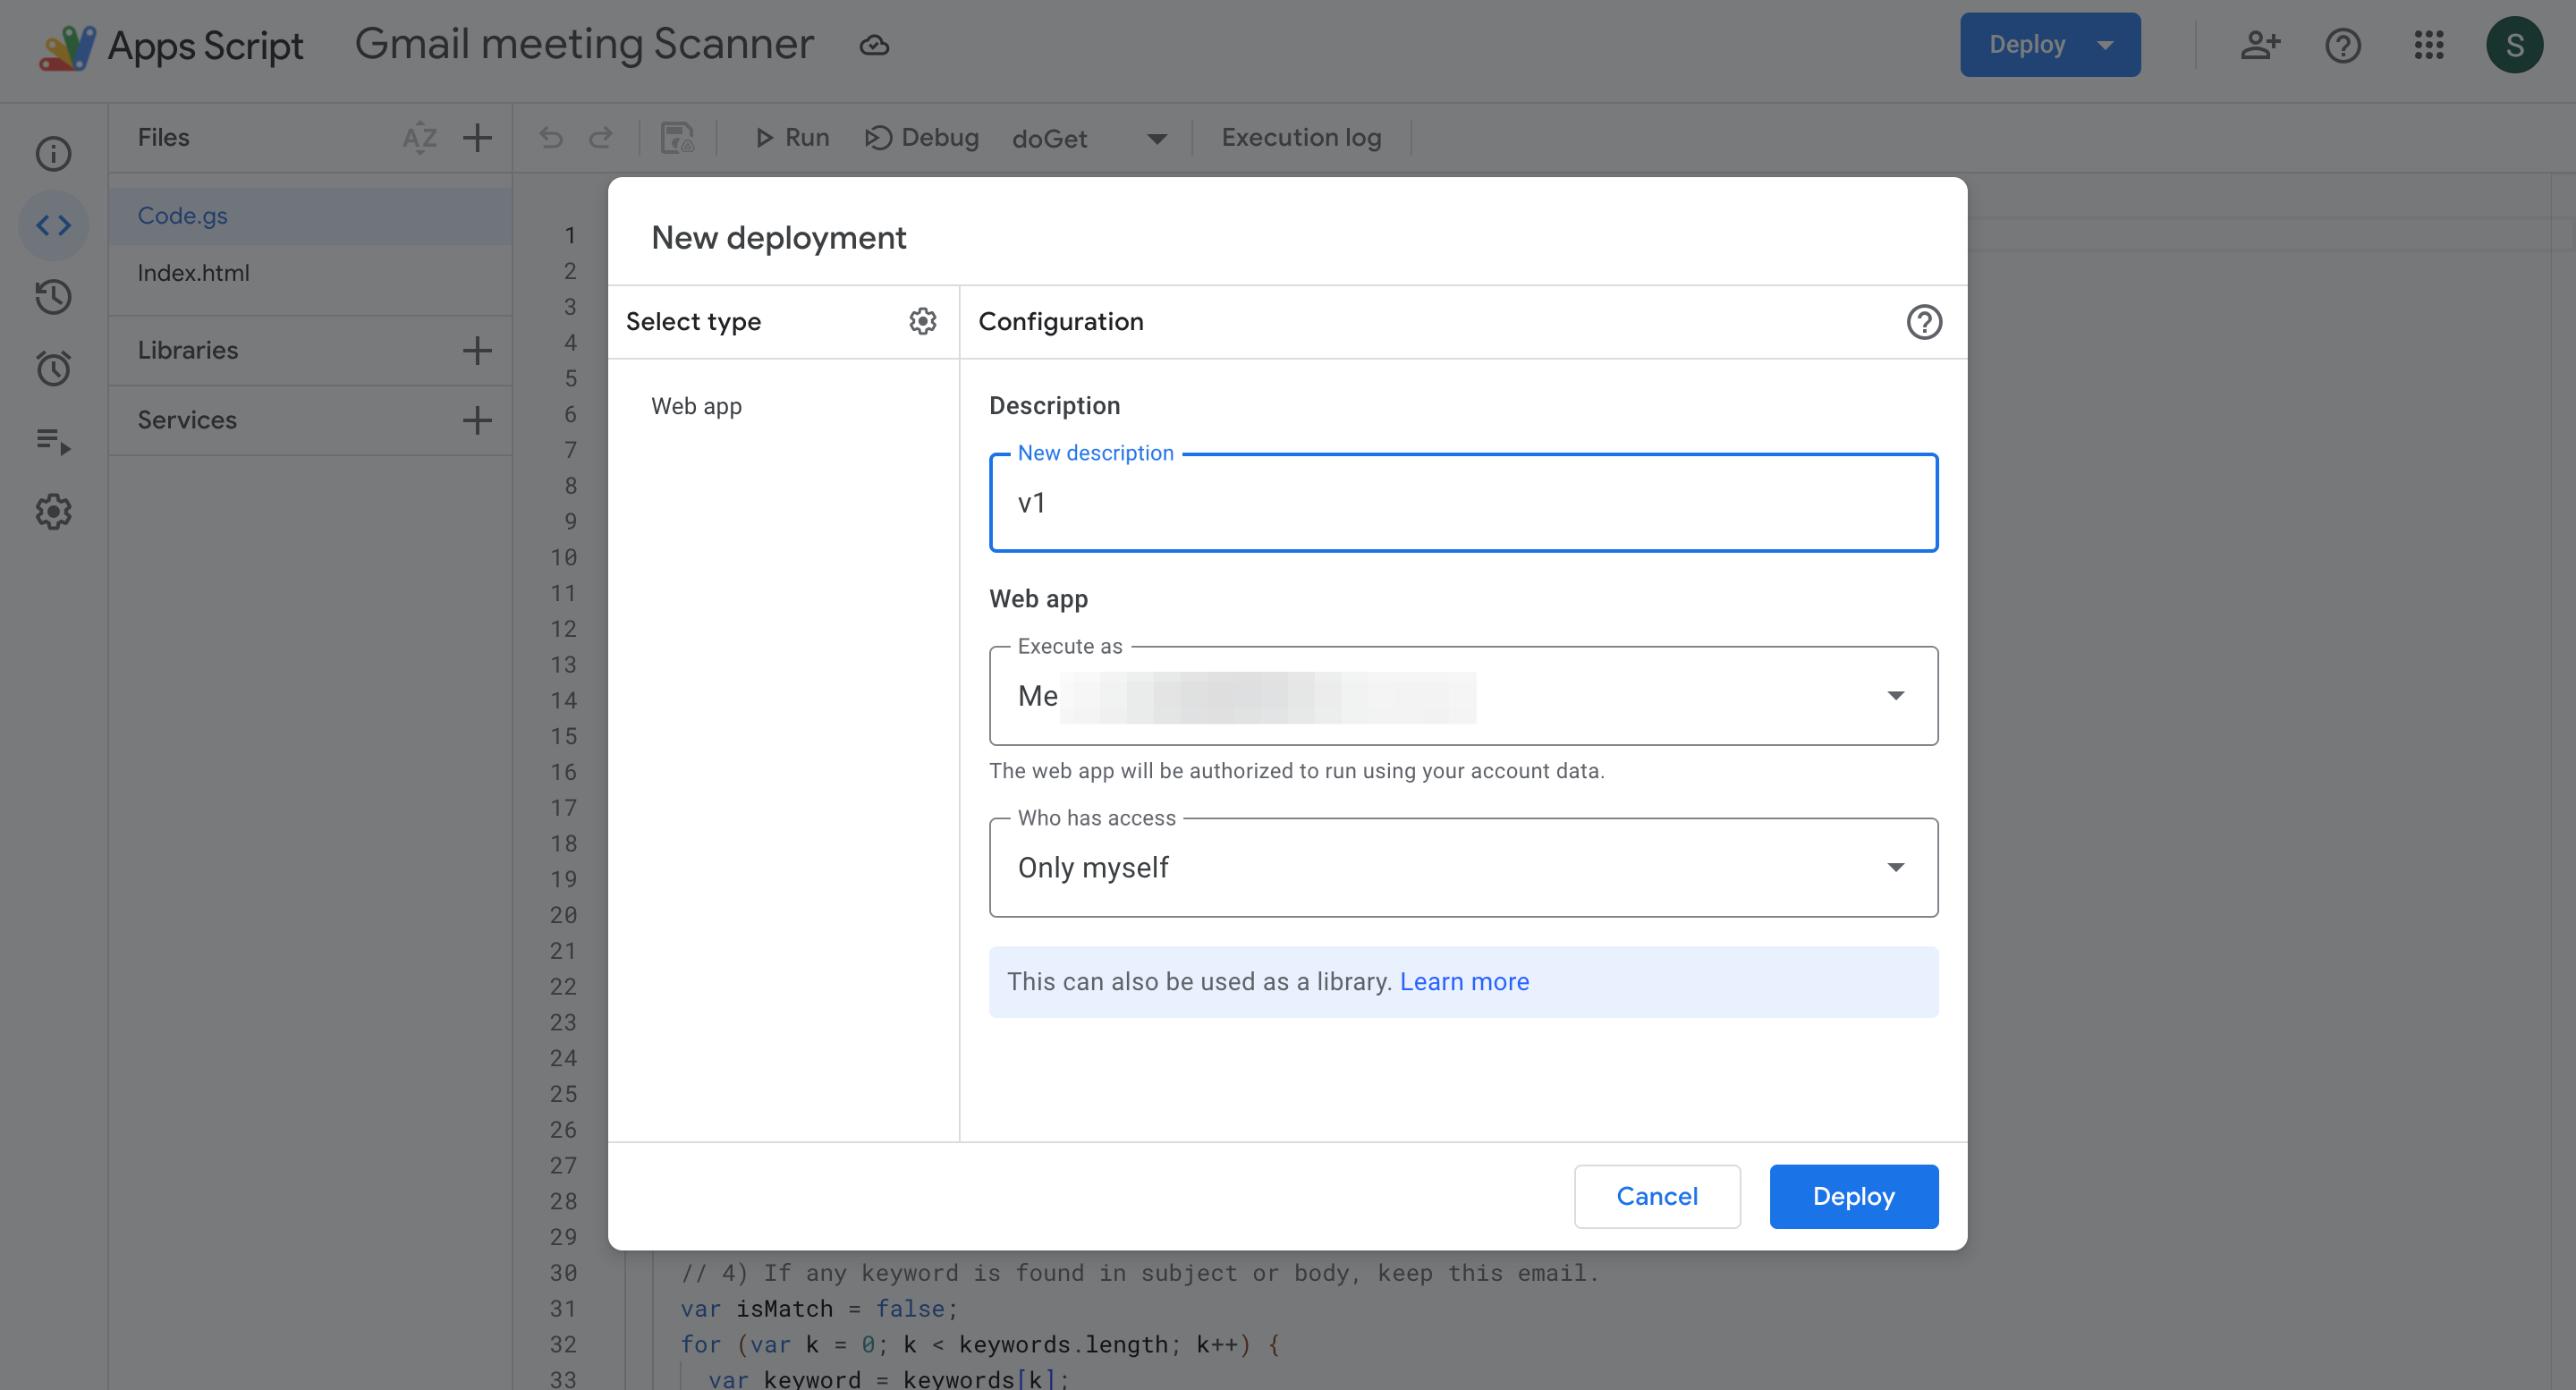
5. You should see the Web app configuration dashboard open up now. Add a description, make sure Execute as is set to Me, and give access only to yourself. This is what your entries should look like.
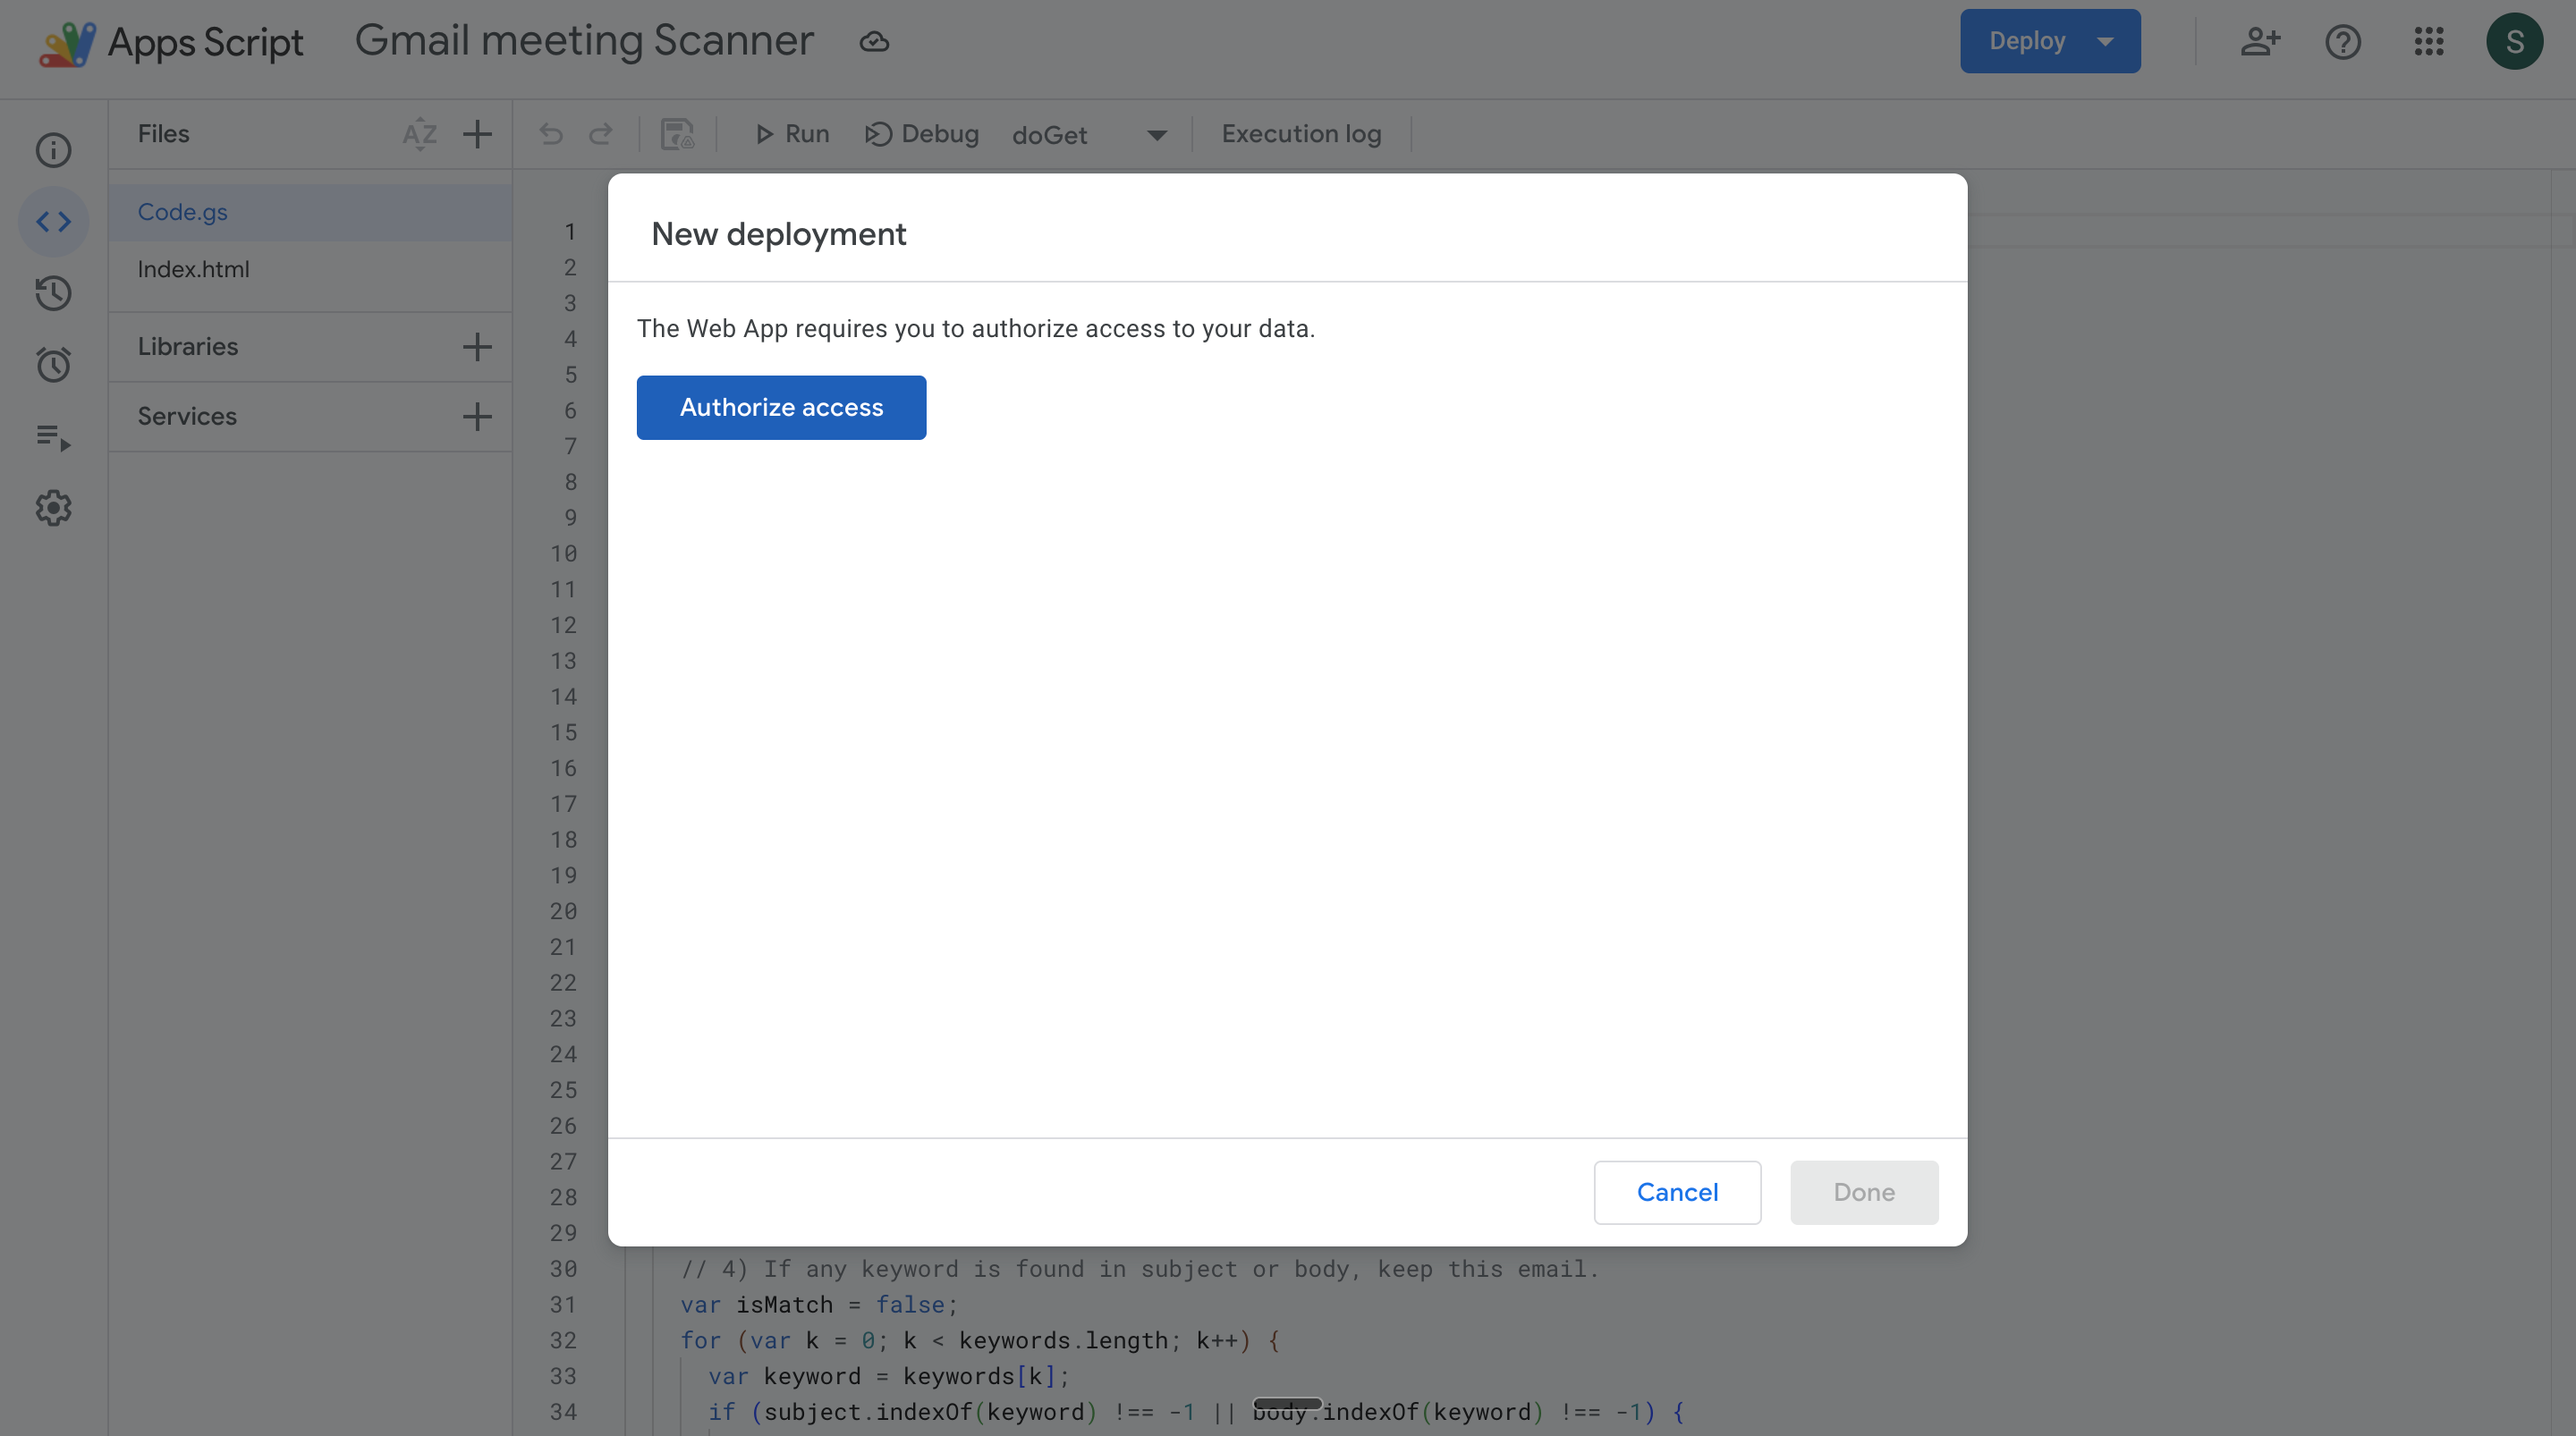
6. Hit Deploy. A new tab to authorise your app should open up. Hit the AUthorize access button.
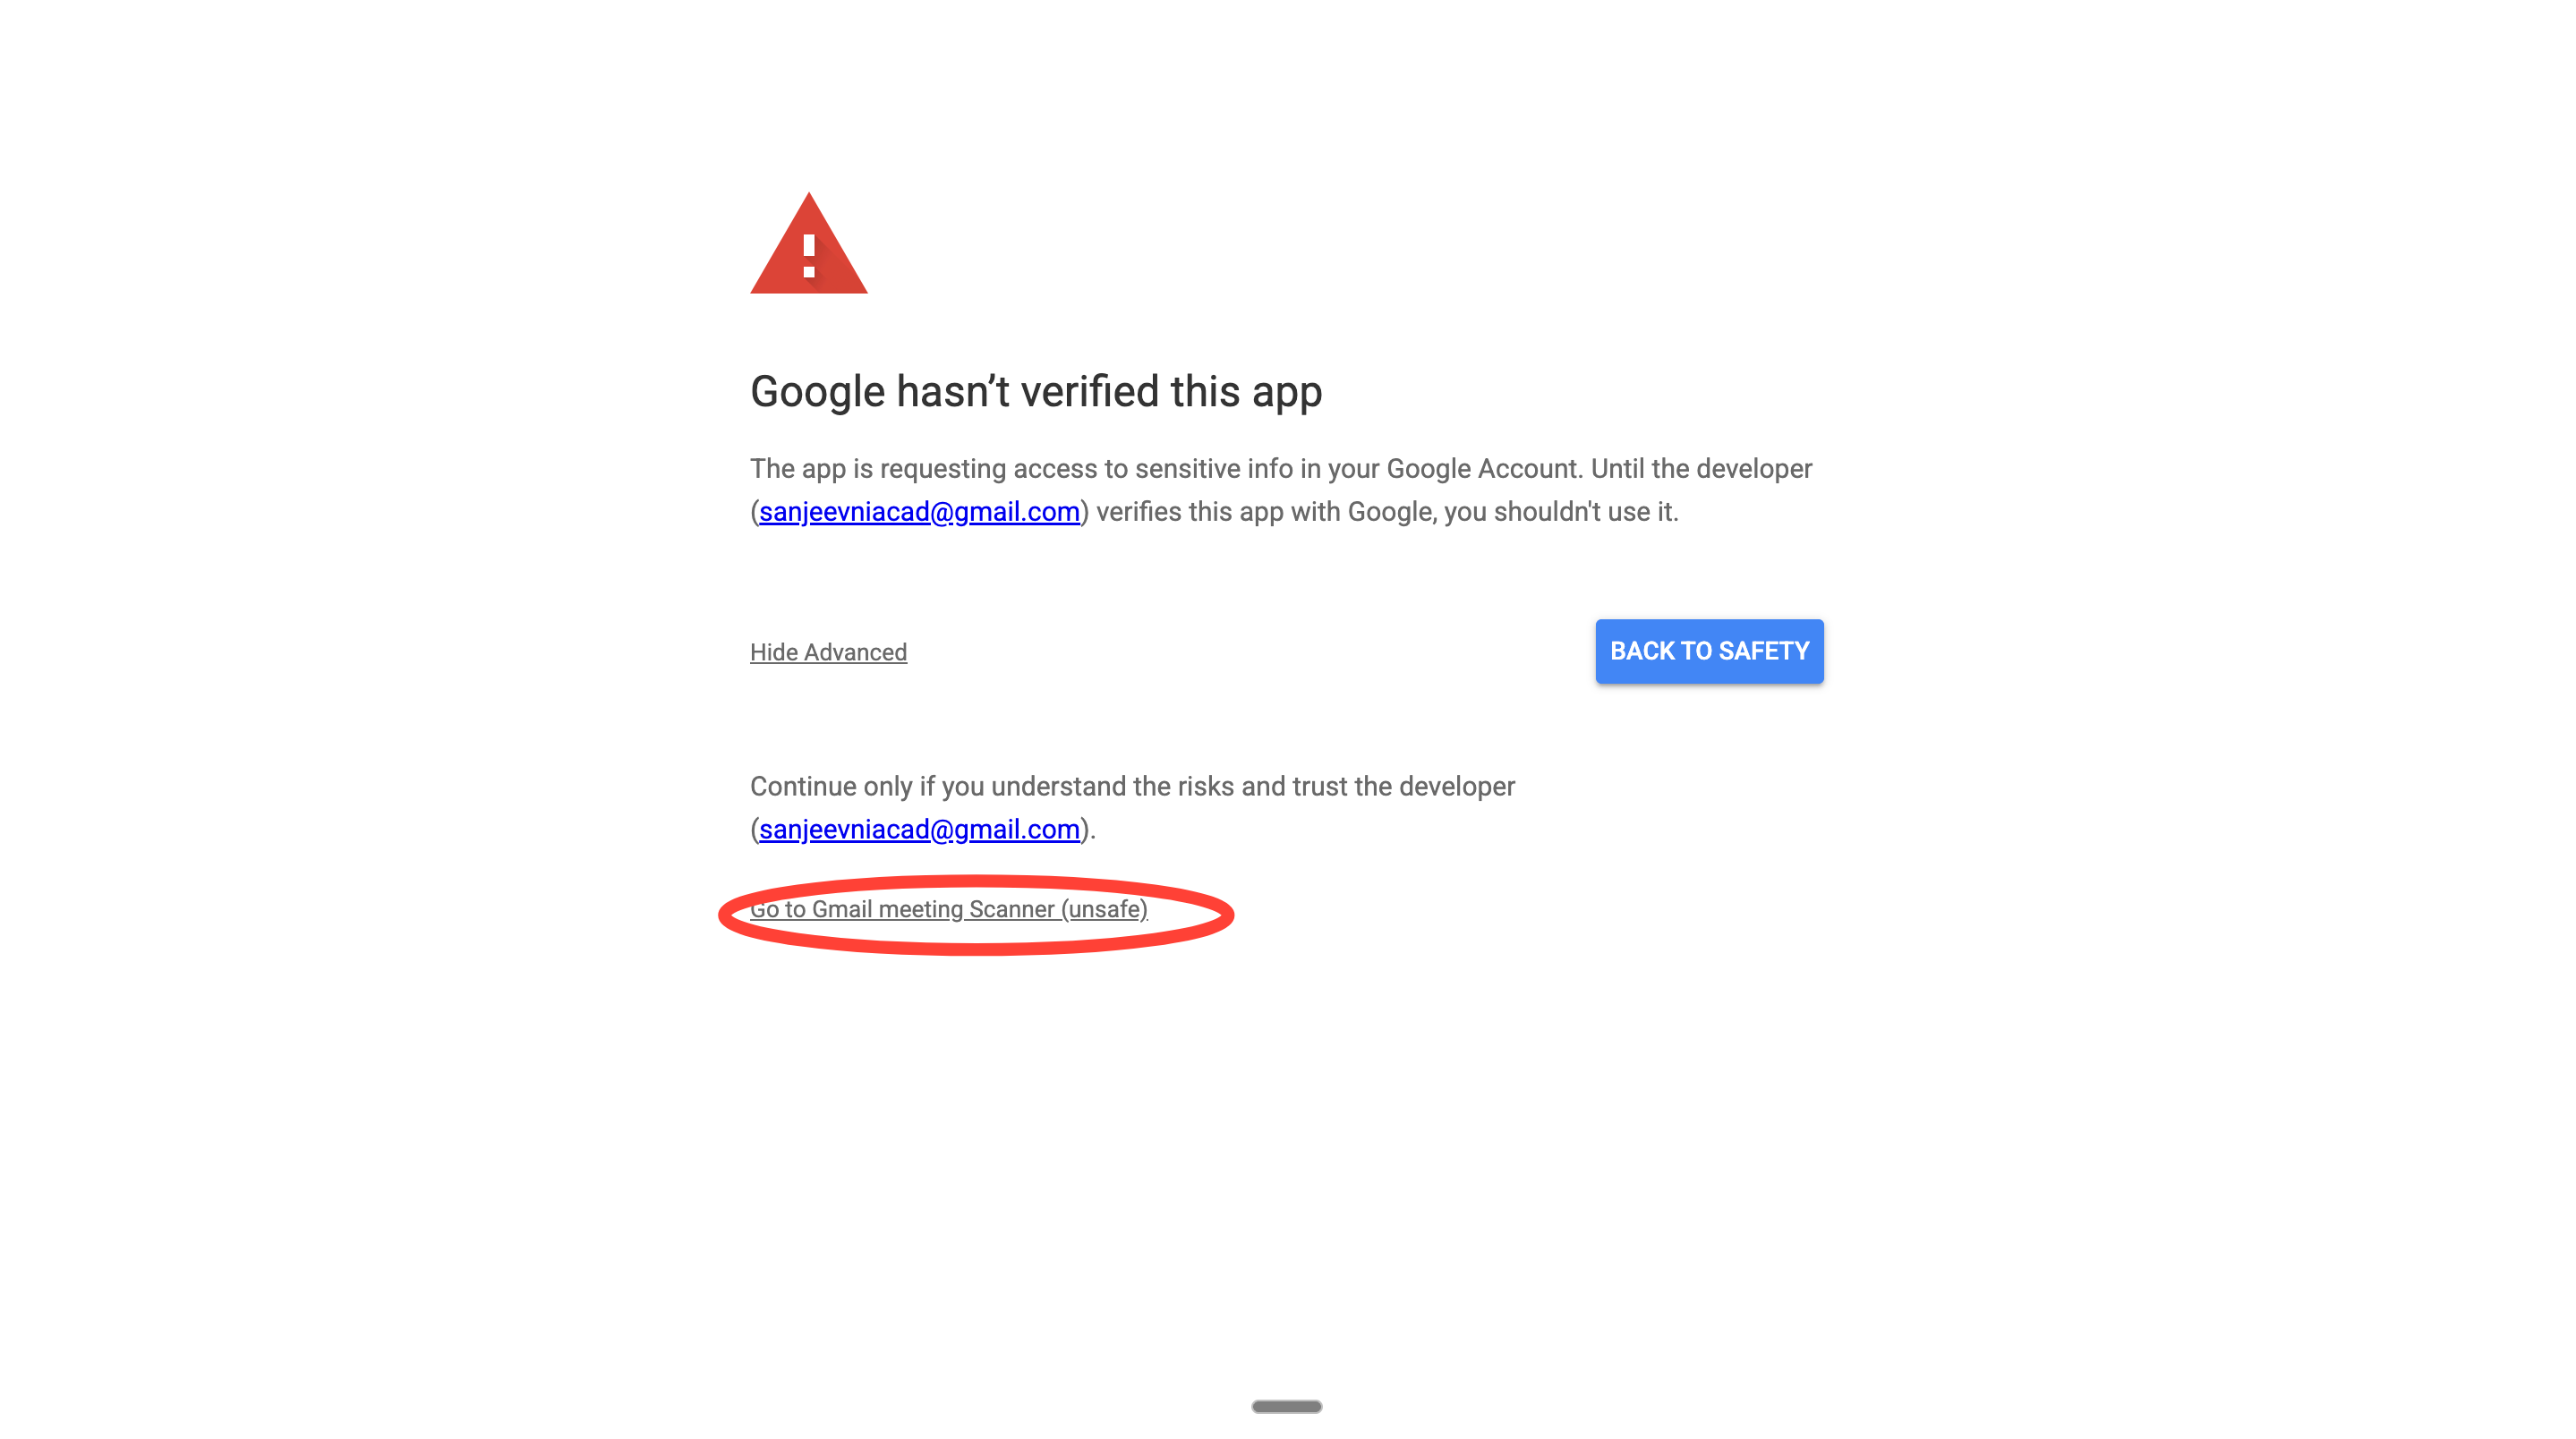
7. Now you’ll see a bunch of permissions to allow Google to run your Apps Script within Gmail. Click on the grey link here. It should show your project name.
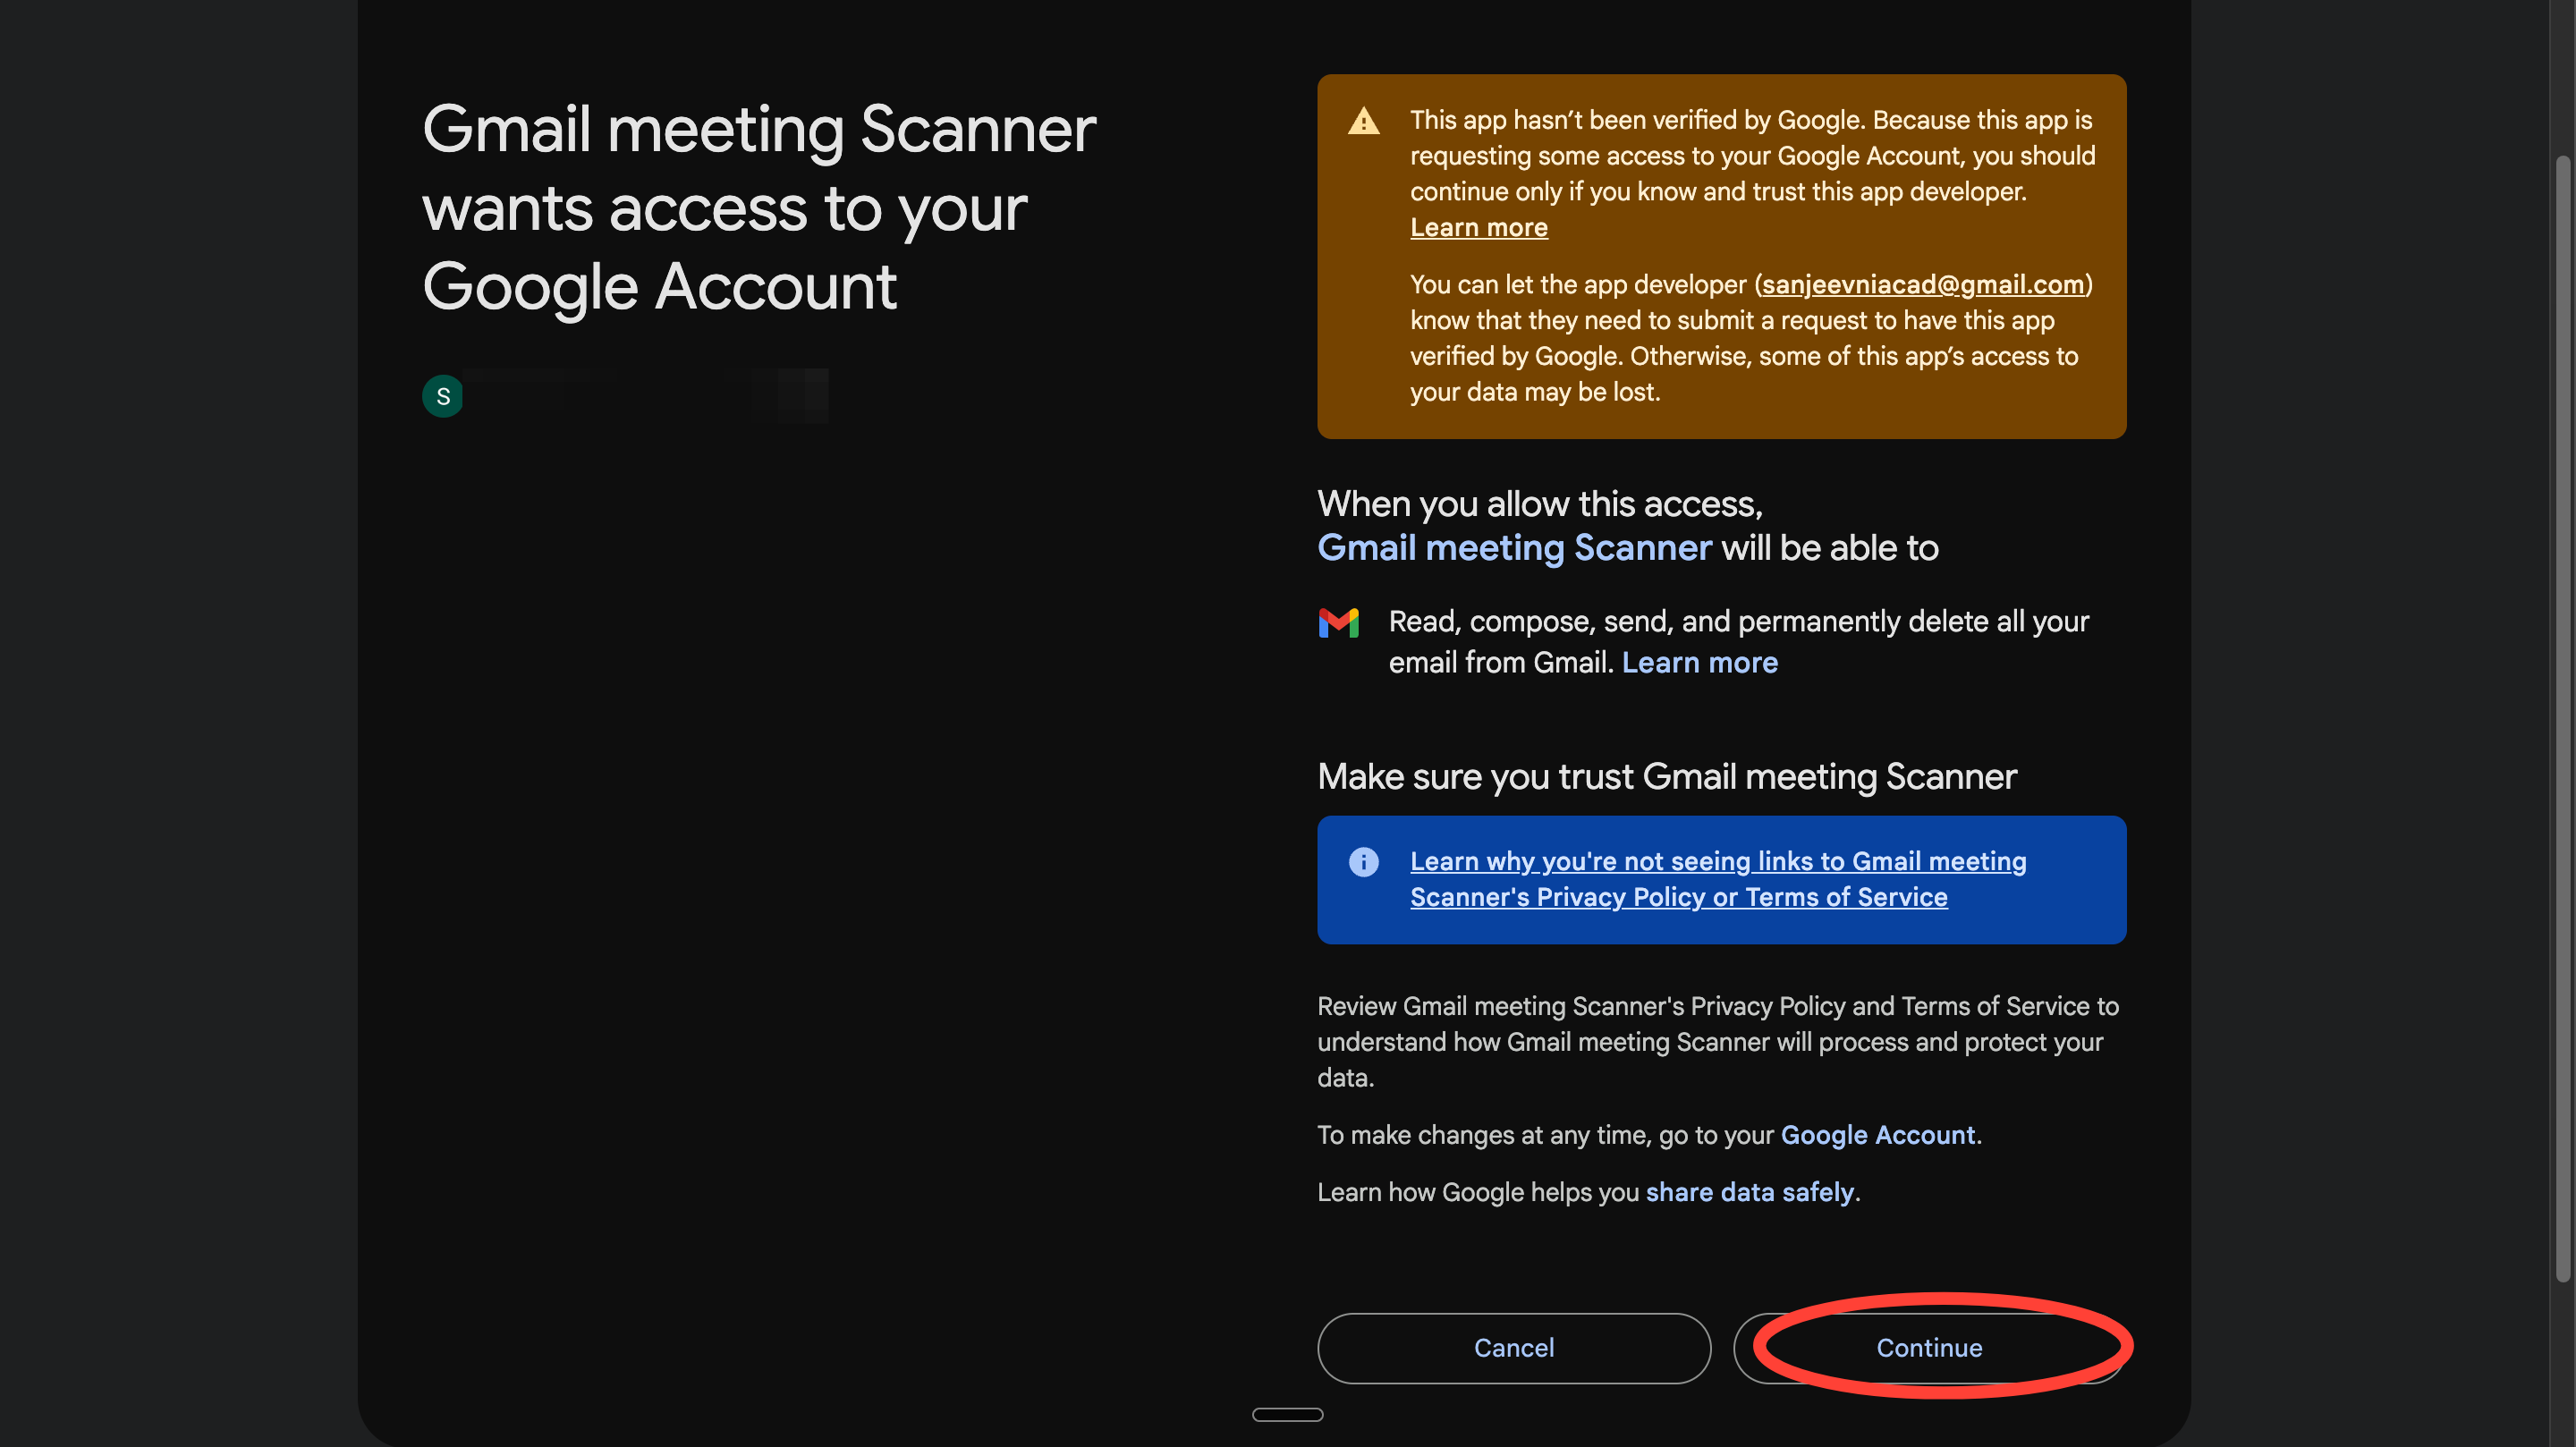
Now, you should see access permissions like this. Hit Continue.
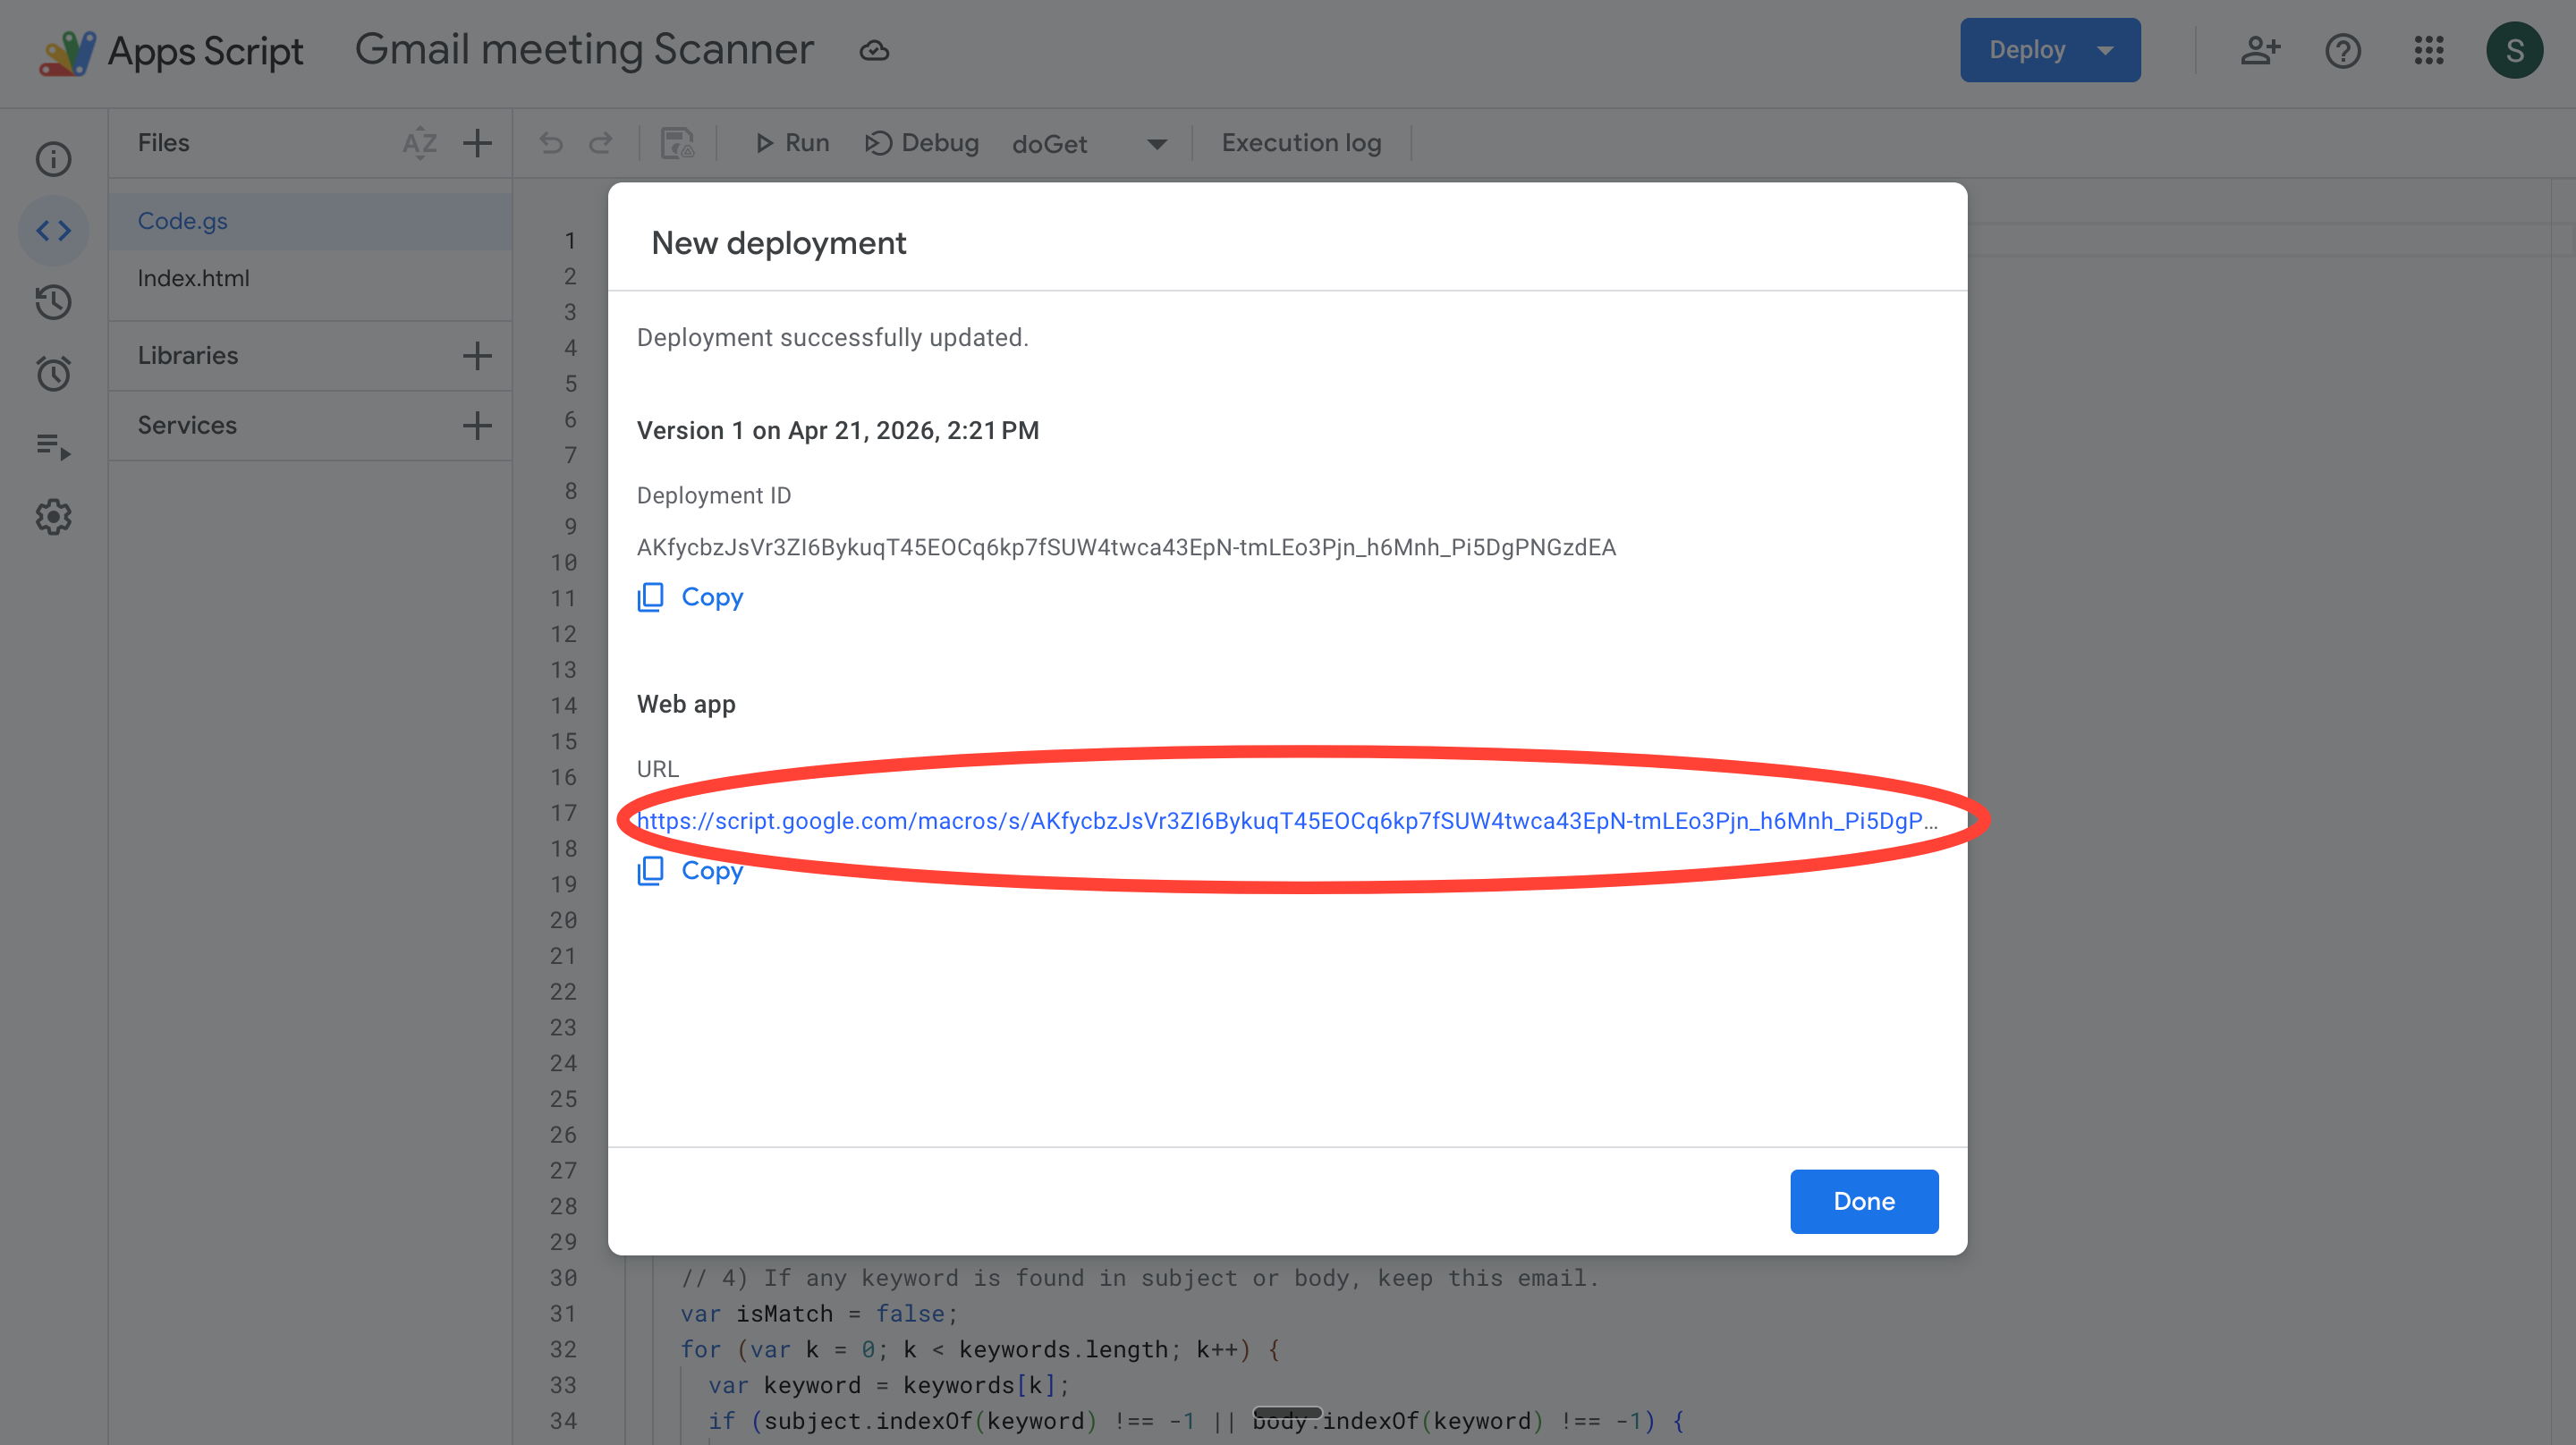
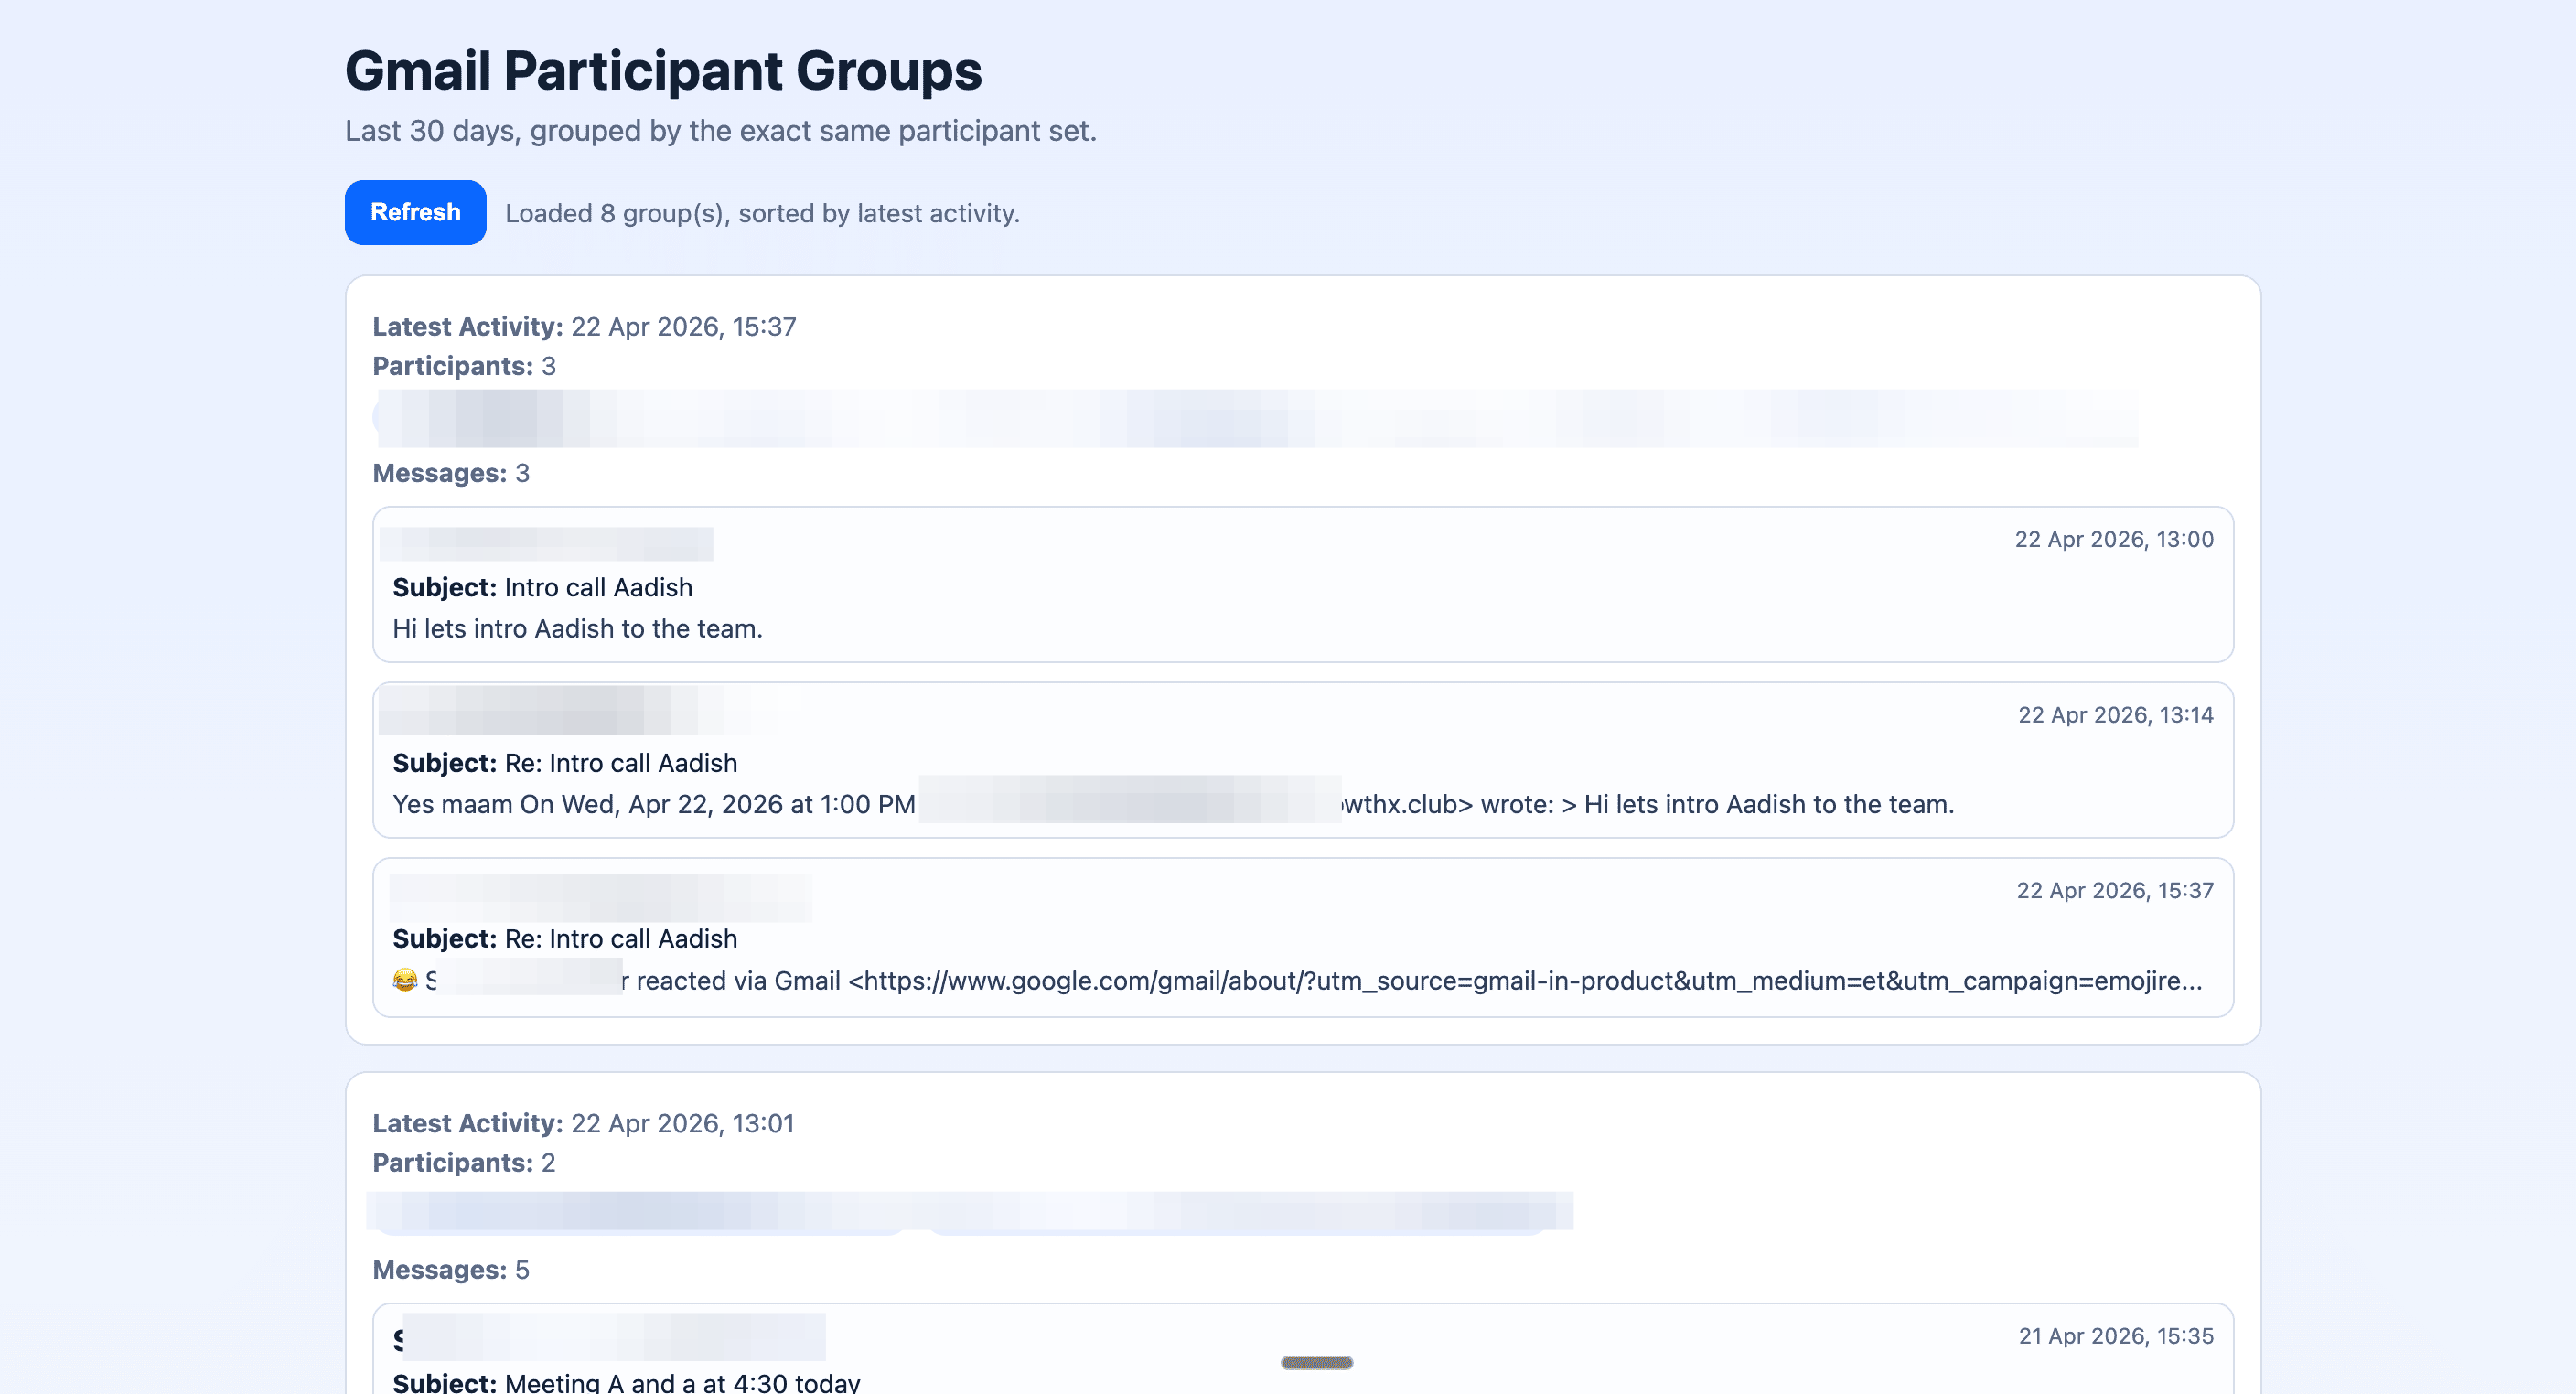
Google Apps Script will now give you a web app deployment link. This will open the HTML page displaying your meetings.
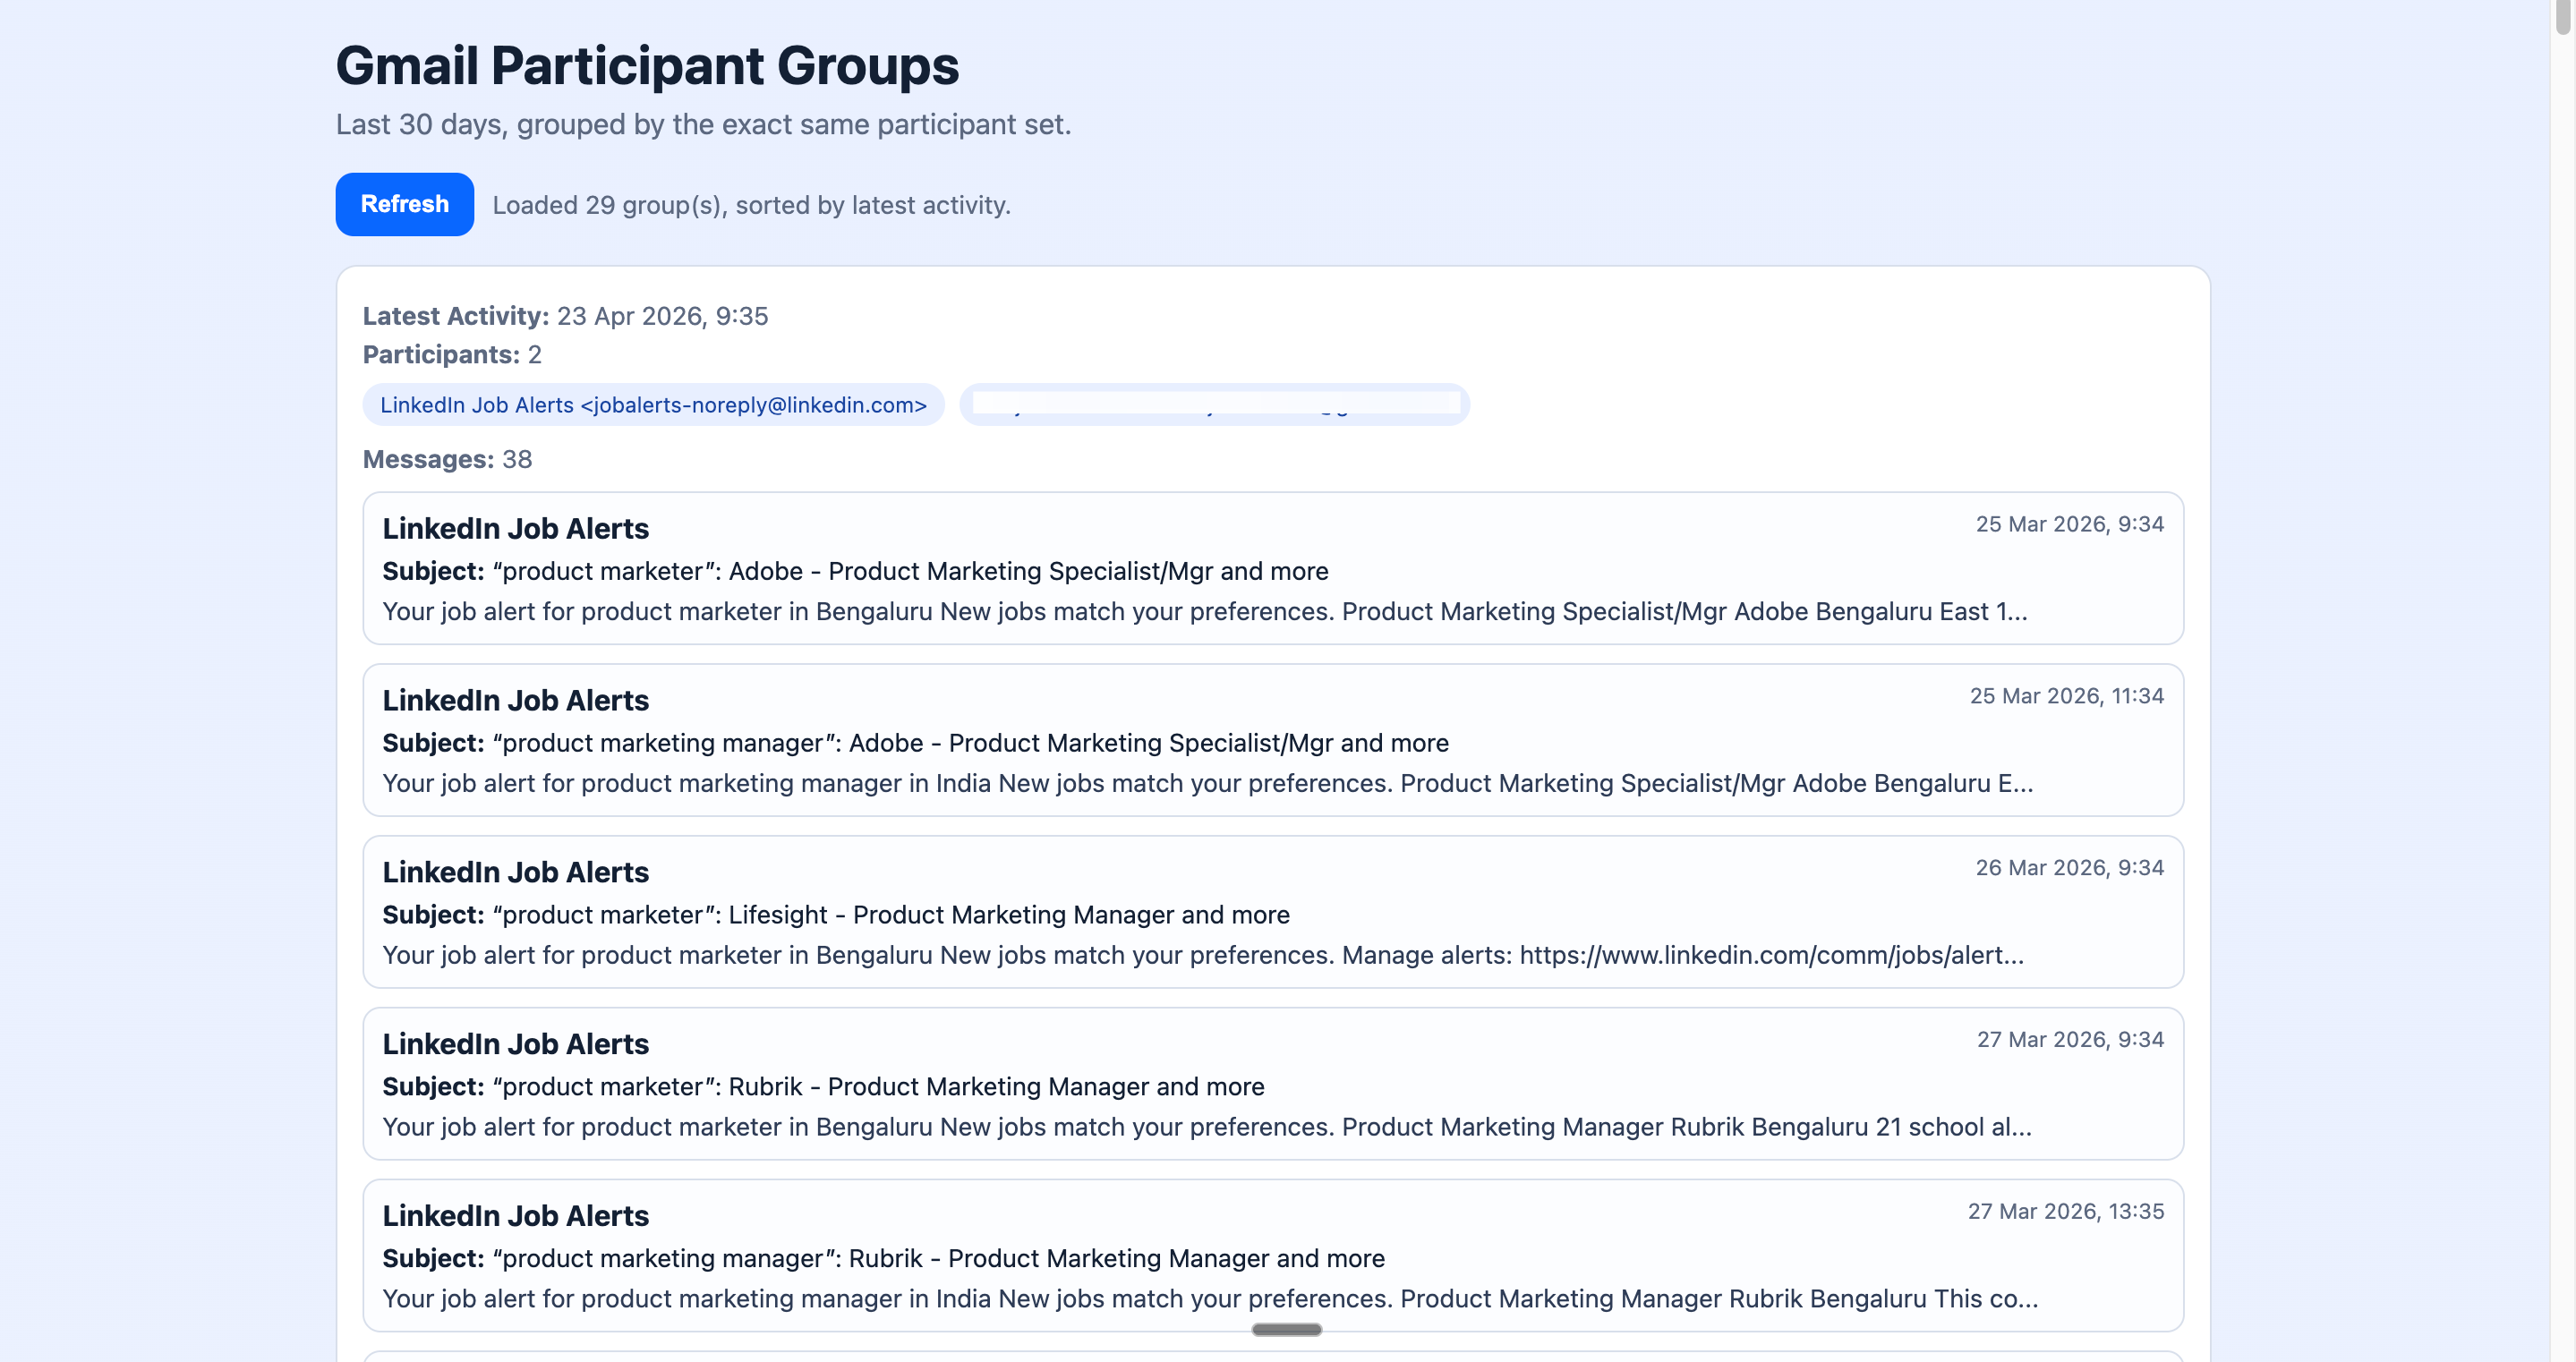
Checkpoint 1.
Here’s what my output looks like right now. It’s fairly messy. 29 groups and none of them meetings. Gemini will eat up too many credits just getting to the right emails. So, our next step is improving the filtering.
Enter this prompt into Codex.
In my existing Google Apps Script function getGroupedThreadsLast30Days(), add a filter that skips threads where the sender is a newsletter, promotional email, or automated mailer. Use common signals like "unsubscribe", "no-reply", "noreply", "newsletter", and "donotreply" to identify and skip these threads. Don't change any other logic.
Now, Codex give you an updated code. Check if it has this at the top.
/**
 * Serves index.html for browser testing.
 * Deploy as Web App, then open the URL.
 */
function doGet() {
  return HtmlService.createHtmlOutputFromFile('index')
    .setTitle('Gmail Participant Groups');
}
Now paste this code into your Code.gs file and hit Test Deployments. Here’s how my email groups look after applying the filtering code.
Step 2: Give your app a memory
Remember our process? We were to group threads with a common sending list and give it to Claude to summarise the information. Herein lies a problem.
Everytime you’d load the page, Claude would summarise the threads. Even for the threads that were already summarized before. This means you’d be burning through credits every single time. That’s why we’re giving the app a memory with Google Sheets.
Here’s how it works: Google Sheet that stores every summary Claude generates. So, the next time you open the app, it reads from the sheet instead of calling Claude again. Claude does the work once, writes it down, and never has to repeat itself unless something new comes in.
The set-up. 1. Go to sheets.google.com and create a new blank spreadsheet. Name it Meeting Brief Storage.
2. Now click on Extensions in the top menu and go to Apps Script. This creates an app linked directly to the Google Sheet. We will now copy both our code and HTML file into this new linked app.
3. A new Apps Script tab will open with a blank Code.gs tab and no HTML tab. We’ll paste our code here.
4. Paste both your Code.gs file and your HTML code from step 1.
Step 3: Update your code to use the sheet as memory
Now we need to tell the app to use the Google Sheet it’s connected to. We’re going to add a few things to your code that:
Automatically create a “Summaries” tab in your sheet
Check if a summary already exists before calling Claude
Save new summaries to the sheet so they’re never generated twice
Here’s what to do: 1. In your Apps Script, go to your Code.gs file. Add this block of code at the very top, before everything else:
var SUMMARY_SHEET_NAME_ = 'Summaries';
var SUMMARY_COLUMNS_ = ['groupKey', 'participants', 'lastMessageDate', 'summary', 'lastUpdated'];
Now add this function anywhere in your Code.gs — it creates the Summaries tab automatically if it doesn’t exist:
function getOrCreateSummariesSheet_() {
  var spreadsheet = SpreadsheetApp.getActiveSpreadsheet();
  var sheet = spreadsheet.getSheetByName(SUMMARY_SHEET_NAME_);
  if (!sheet) {
    sheet = spreadsheet.insertSheet(SUMMARY_SHEET_NAME_);
  }
  ensureSummaryHeaders_(sheet);
  return sheet;
}

function ensureSummaryHeaders_(sheet) {
  var range = sheet.getRange(1, 1, 1, SUMMARY_COLUMNS_.length);
  var existing = range.getValues()[0];
  var needsHeaderWrite = false;
  for (var i = 0; i < SUMMARY_COLUMNS_.length; i++) {
    if (String(existing[i] || '') !== SUMMARY_COLUMNS_[i]) {
      needsHeaderWrite = true;
      break;
    }
  }
  if (needsHeaderWrite) {
    range.setValues([SUMMARY_COLUMNS_]);
  }
}
Hit Save, then redeploy via Deploy > Manage deployments > Edit > New version > Deploy.
Checkpoint.
Open your web app URL. Your email groups should still load as before. Now check your Google Sheet — you should see a new tab called “Summaries” with column headers automatically created.
If you see that tab, your app’s memory is working.
Step 4: Connect Claude to generate your meeting briefs.
This is the moment everything comes together. We’re connecting Sarvam to read your email threads and generate a meeting brief for each one.
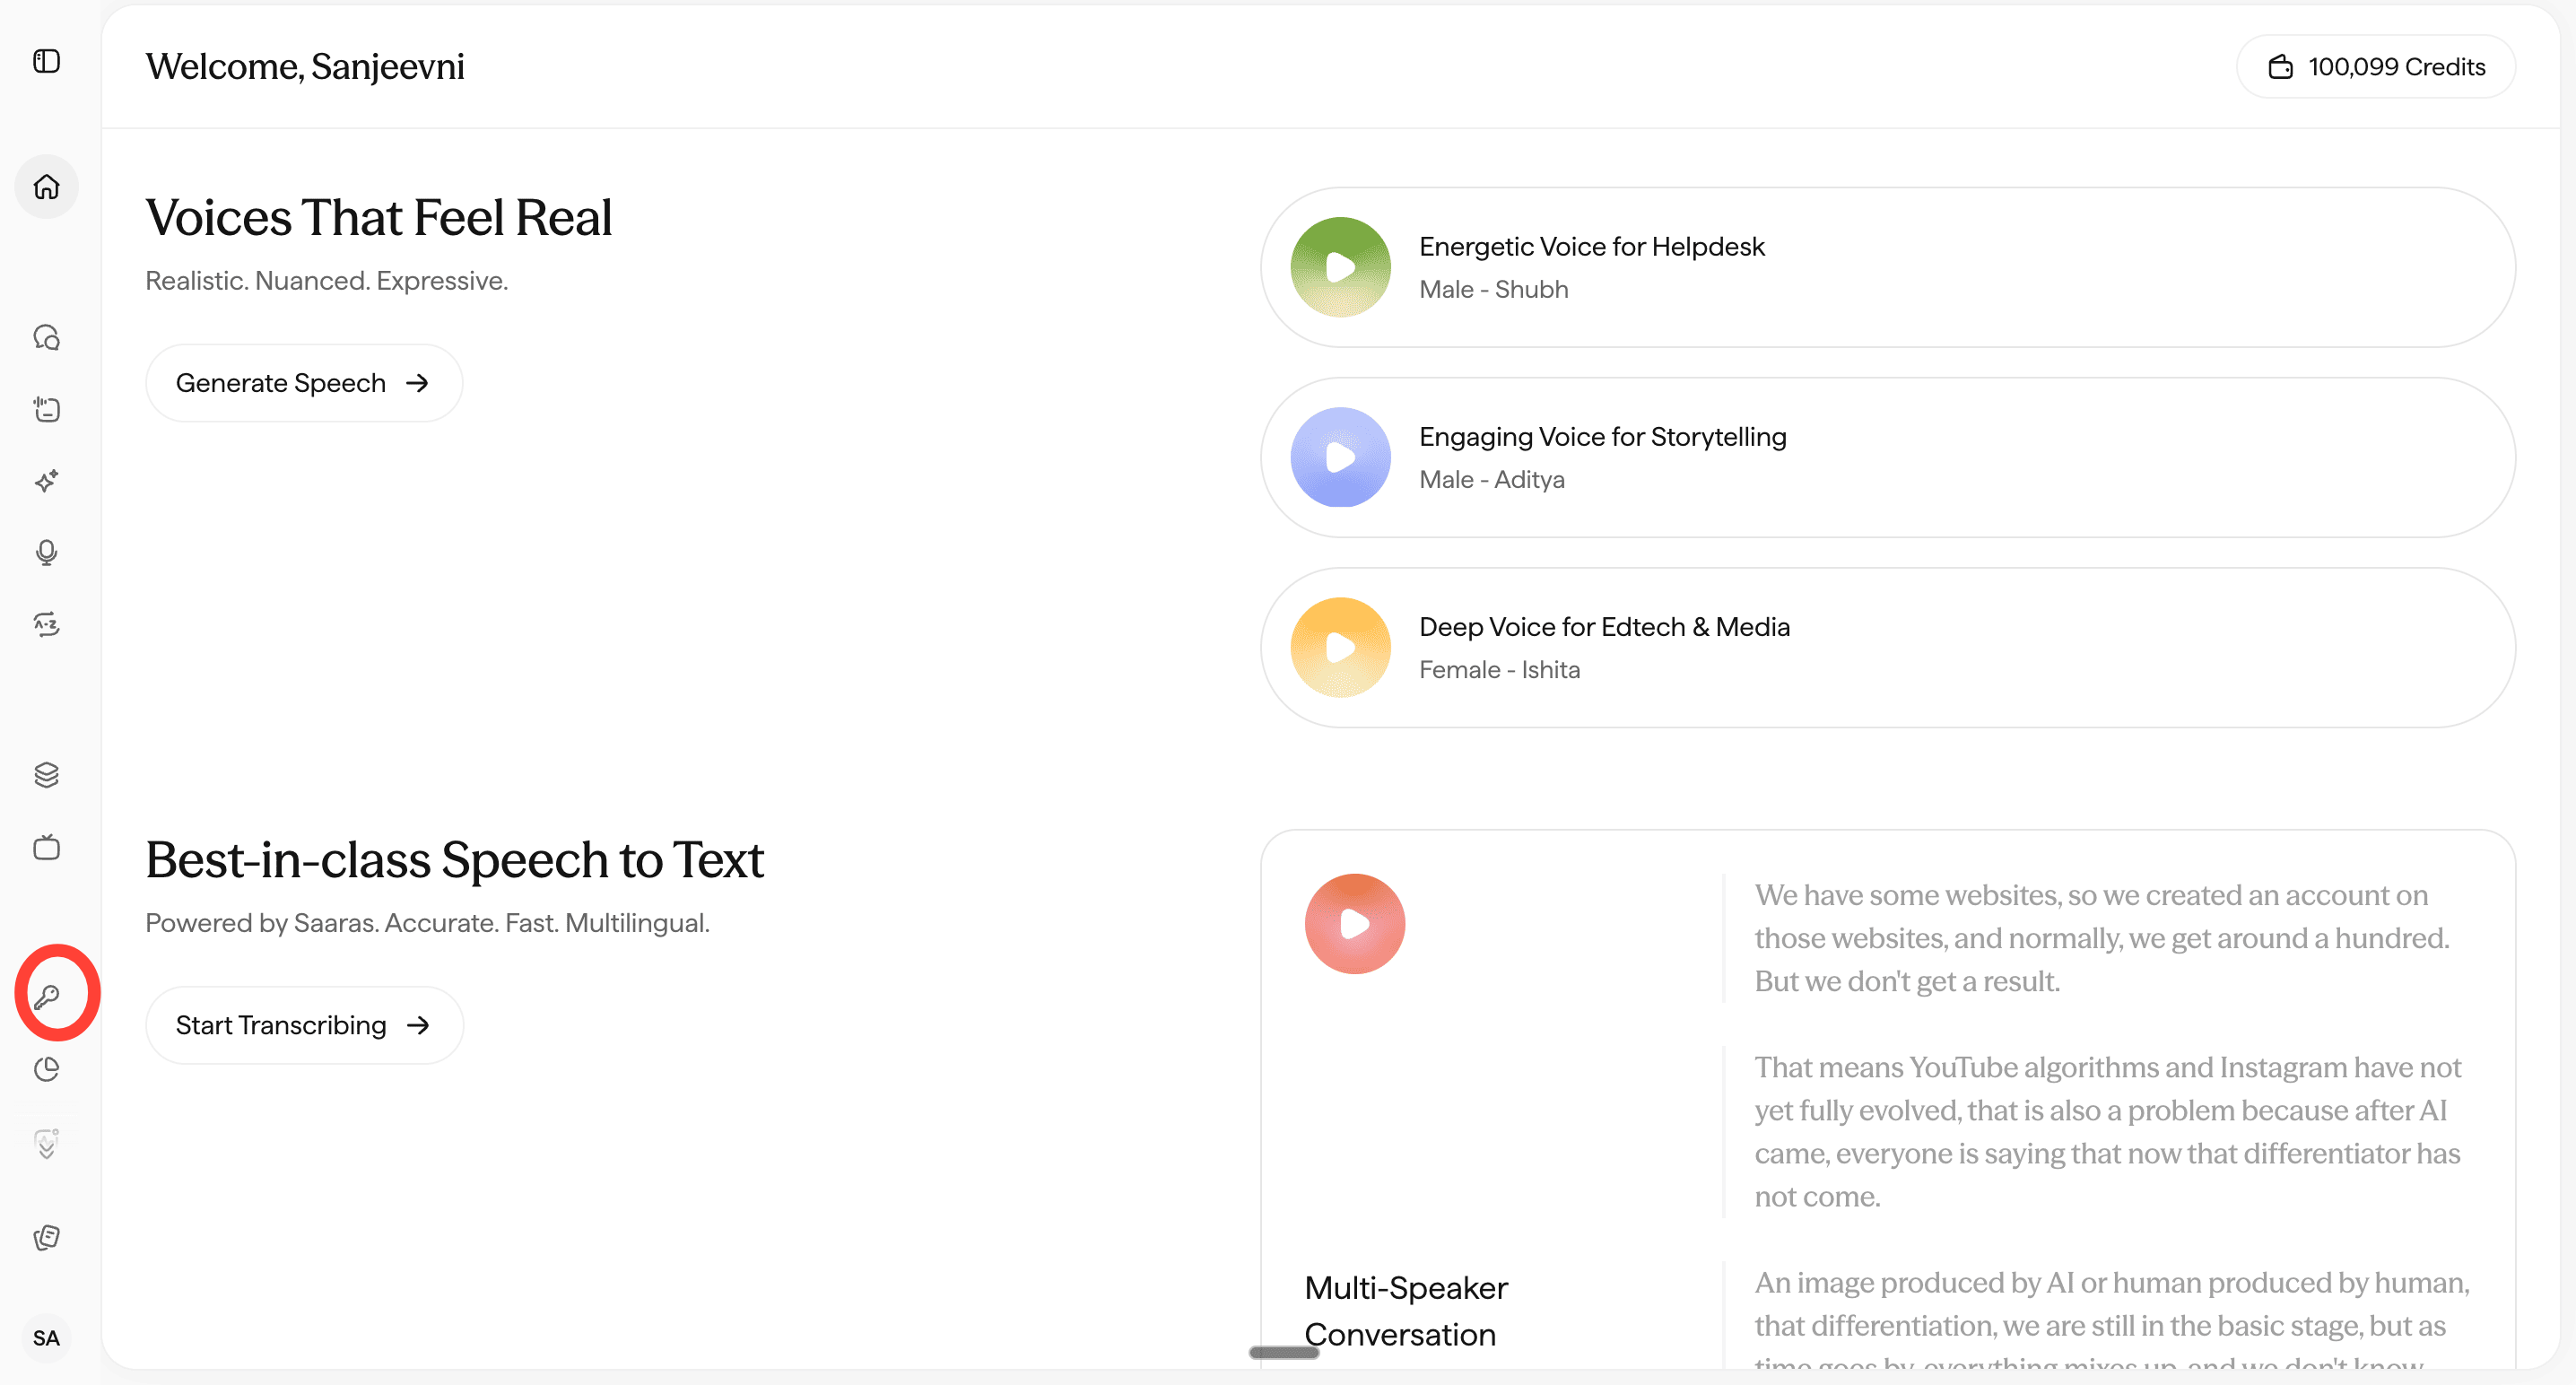
Btw, if you’re a GrowthX member, you’ve got exclusive access to Sarvam’s models now. Head to Perks to claim ~$1,000 in Sarvam AI credits for free.
To get your API Key do this: Go to your Sarvam dashboard Click on the Key icon on the left.
Click on Create Key. Enter a name for your Key. Sarvam will generate a secret key for you. Copy this into your Make workflow now.
Click API Keys in the left menu, then create a new key. Copy it.
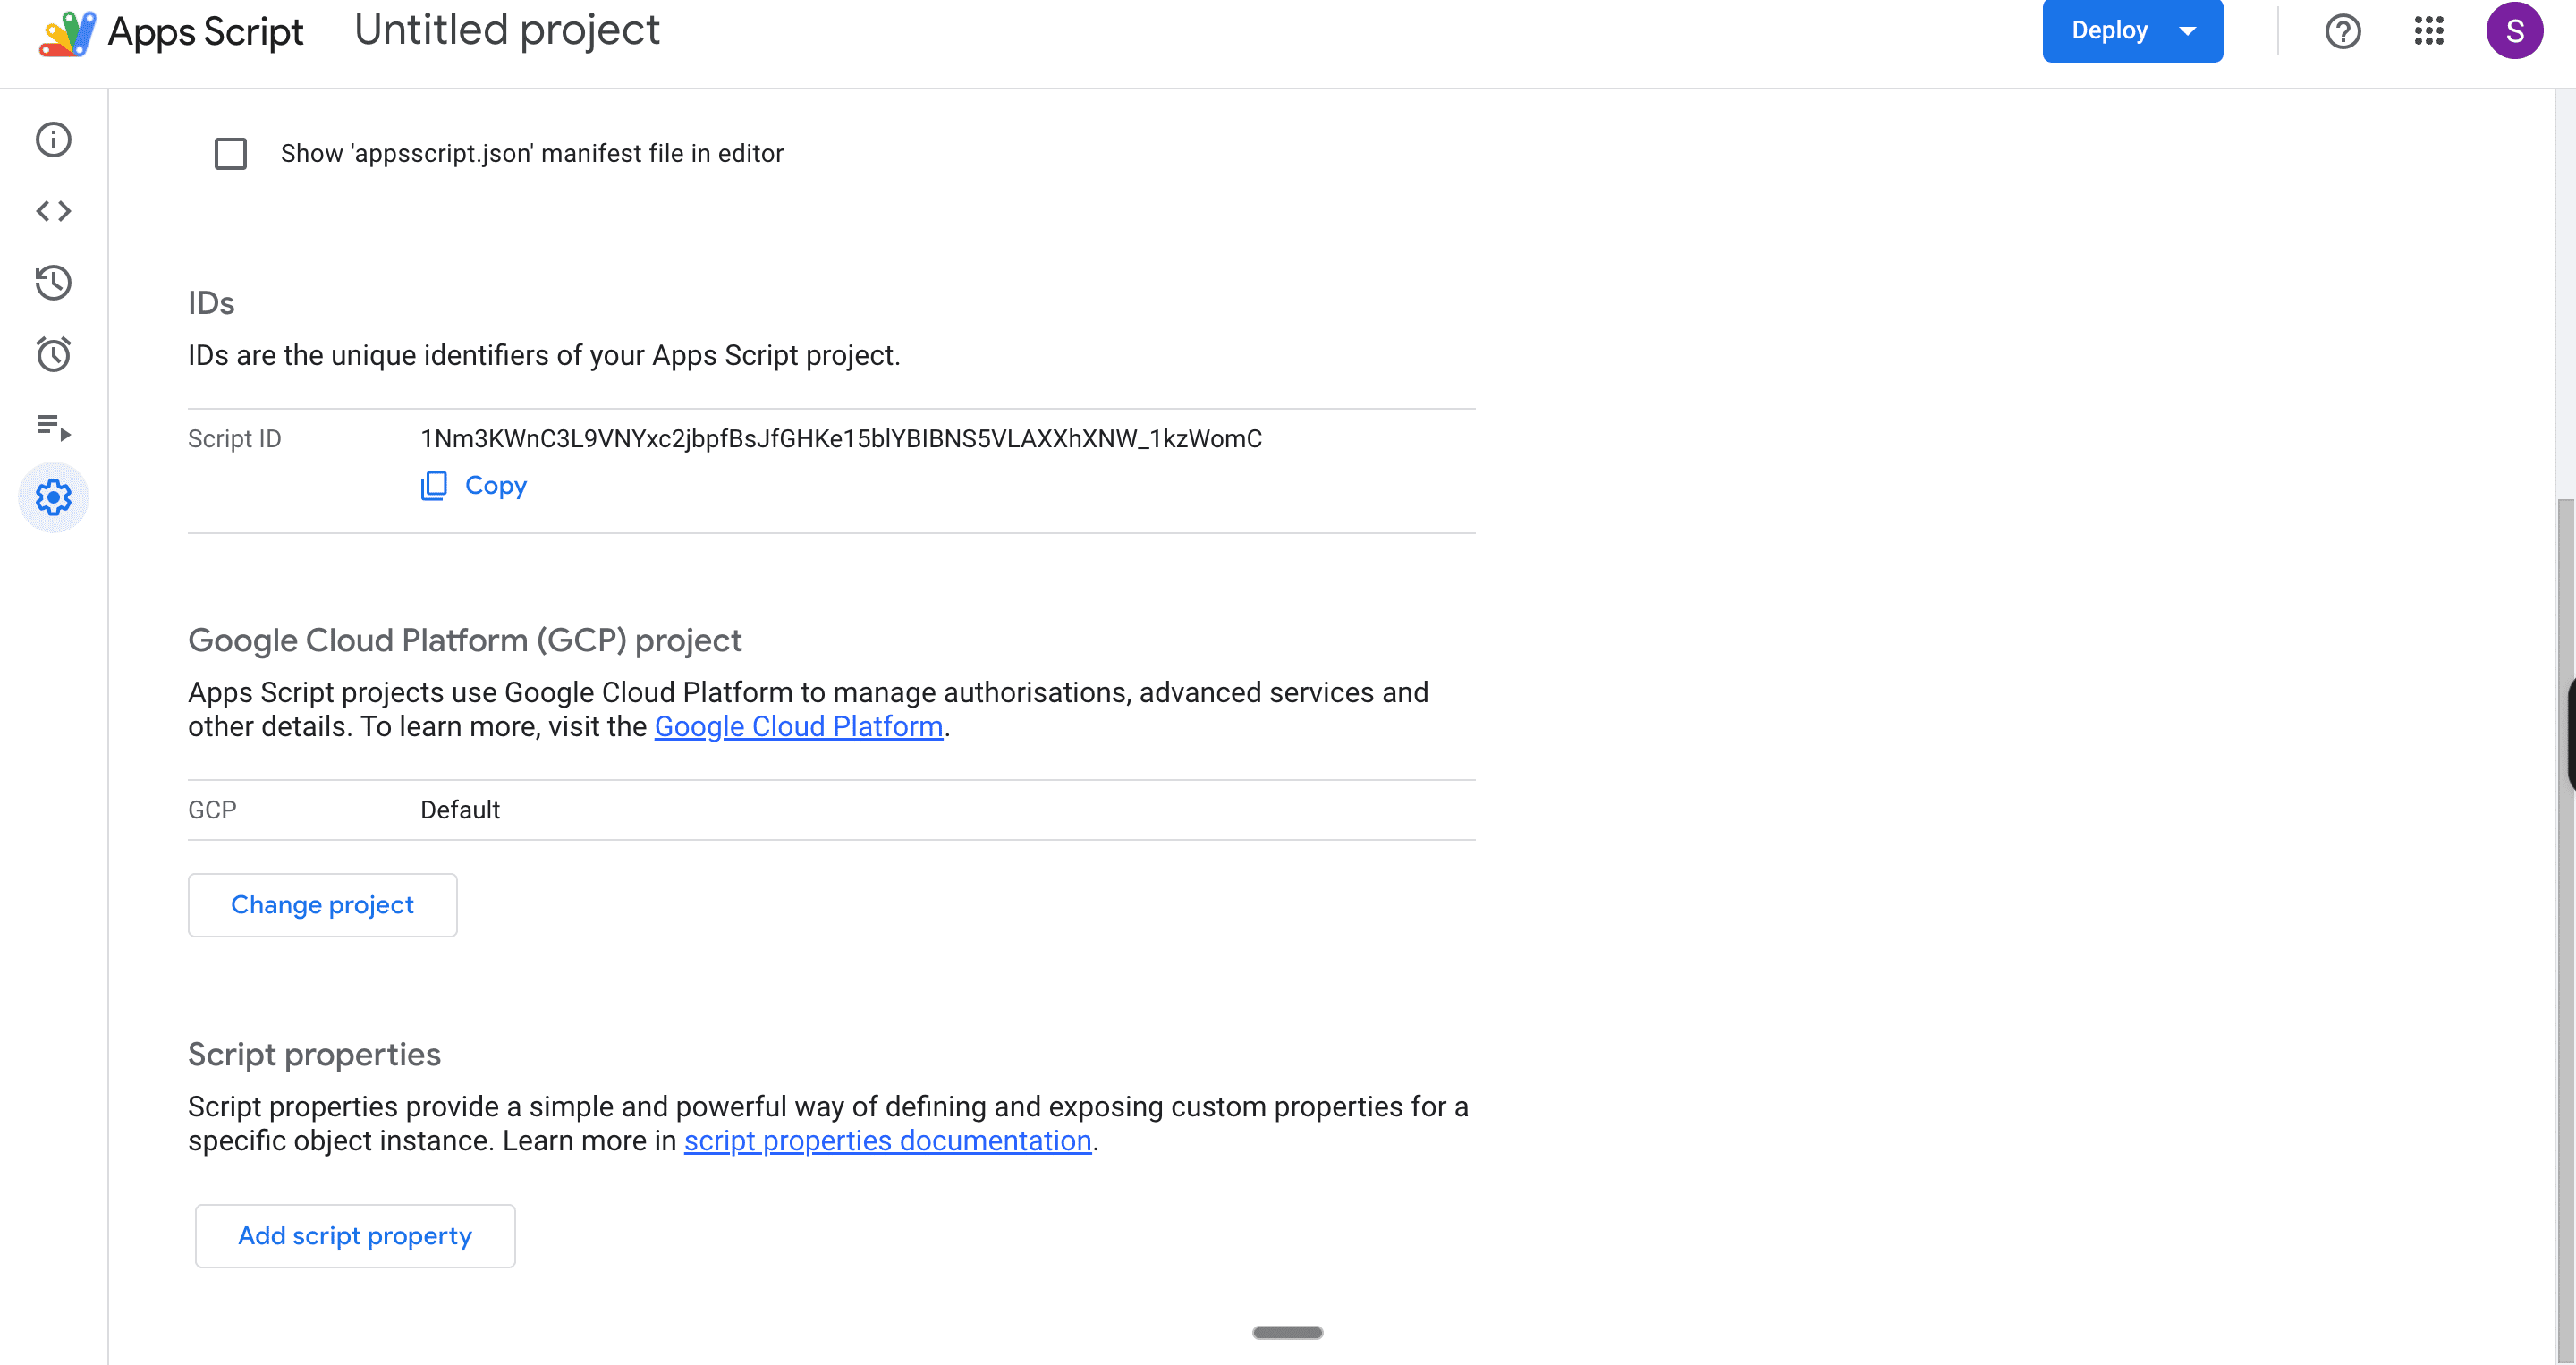
Now, go back to your Apps Script. Click the gear icon on the left sidebar to open Project Settings.
Scroll down to Script Properties and click Add Script property. Set the key name SARVAM_API_KEY and paste your Sarvam key as the value. Hit Save.
Now add Sarvam to your code using Codex. Go to Codex and enter this prompt exactly:
Add two new functions to my existing Code.gs:
1. A function called generateSummaryForGroup(groupKey) that checks if a summary already exists in the Google Sheet for this groupKey. If it does, return it without calling any API. If it doesn’t, fetch the matching group from my existing email grouping function, call summarizeGroupWithSarvam(), save the result to the sheet, and return it.
2. A function called summarizeGroupWithSarvam(group) that calls the Sarvam API at https://api.sarvam.ai/v1/chat/completions using the SARVAM_API_KEY from Script Properties, sends the last 10 messages from the group as context, and returns a meeting brief in three sections: what was discussed, what is pending, and what is important before the meeting.
Do not change any existing functions. Just add these two at the bottom.
Paste the two new functions Codex gives you at the bottom of your Code.gs and hit Save.
⚠️ Remember: any time you update Code.gs, ask Codex to update your HTML file too so they stay in sync.
Step 5: Add the Generate Brief button to your webpage
Right now, your app loads your email groups, but has no way to trigger a summary. We’re going to add a “Generate Brief” button to each group. When clicked, it calls Sarvam once, saves the result to your sheet, and displays it — without reloading the page.
Here’s what to do: Go to Codex and enter this prompt exactly:
Update my existing index.html to add a Generate Brief button to each email group. When clicked, the button should:
Call a server-side function called generateSummaryForGroup(groupKey) passing the group’s unique key
Display the summary inside the group card without reloading the page
Show a loading state on the button while waiting
If a summary already exists for the group, show it automatically and change the button label to “Regenerate Brief”
If new messages have arrived since the last summary, show a warning that says “New messages detected. Regenerate to refresh.”
Do not change the existing layout or styling. Just add the summary section and button to each group card.
Paste the updated HTML Codex into your index.html file, replacing everything that was there before.
Hit Save, then redeploy via Deploy > Manage deployments > Edit > New version > Deploy. Now open the provided URL.
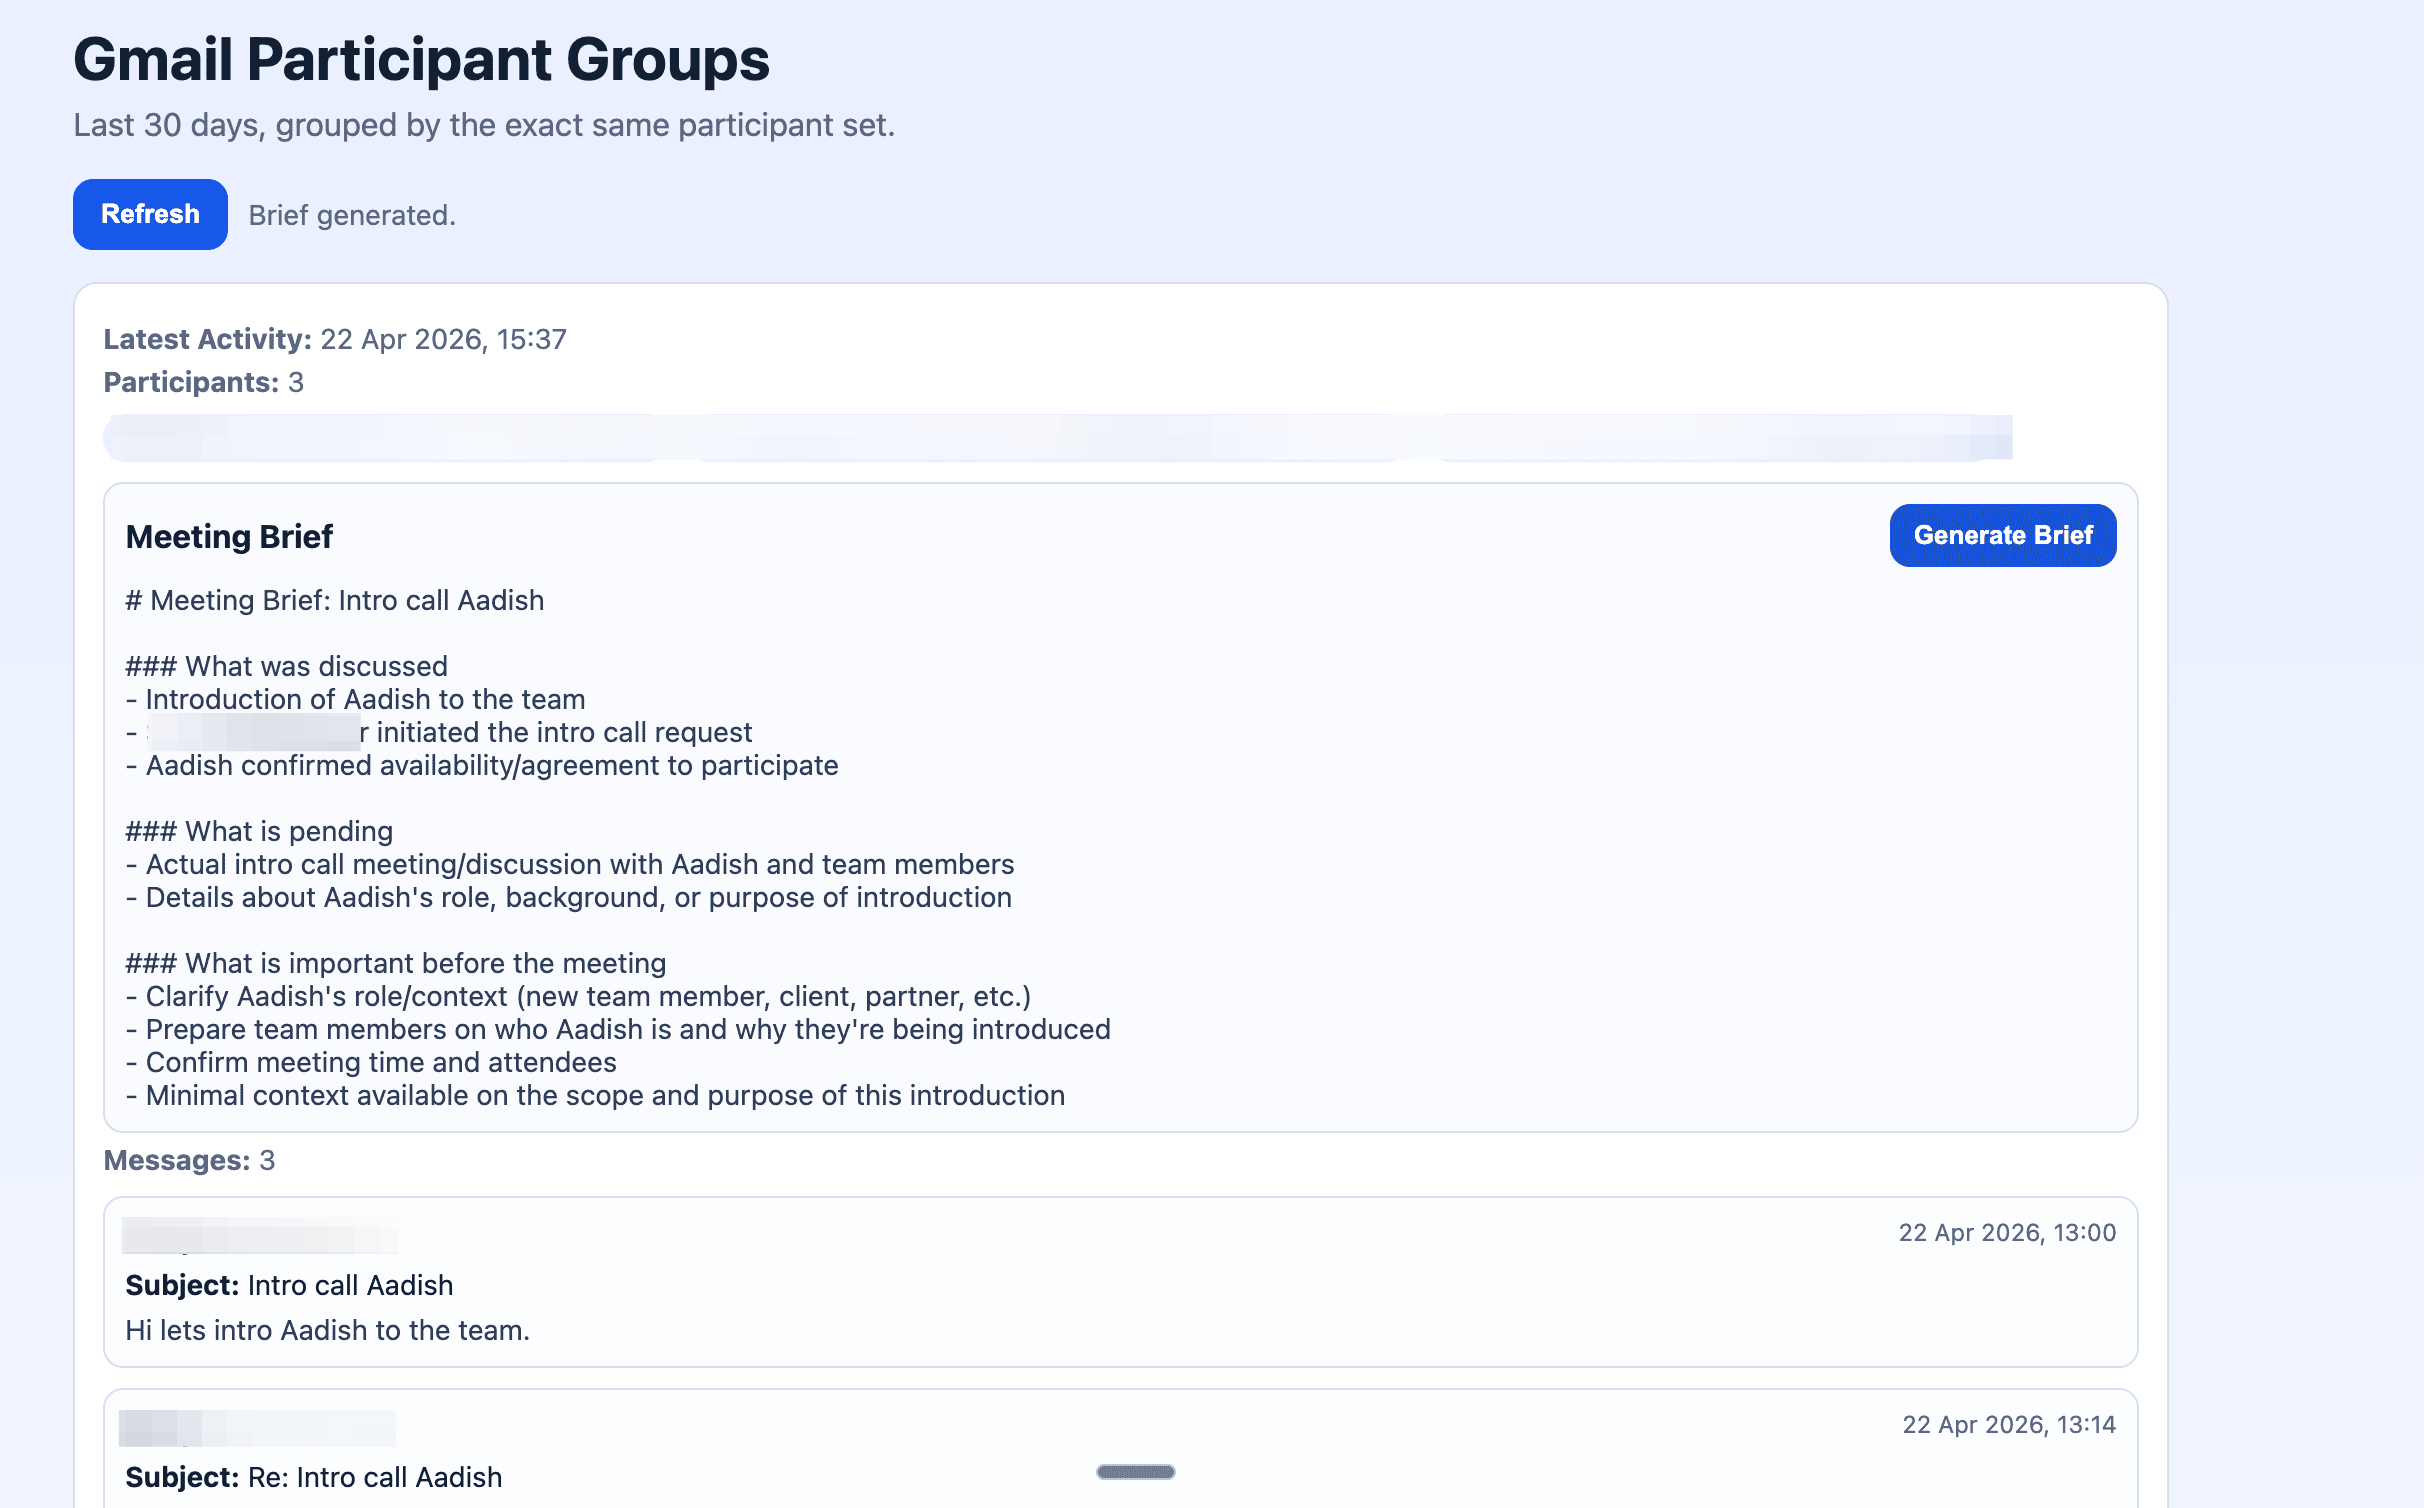
This is what my tool looks like.
It’s not perfect but it is a start.
The grouping isn’t always clean. The app doesn’t know your calendar. It doesn’t know who you’re meeting today — it just groups email threads by participant and lets you generate a summary for any of them.
But it works. Pull up any thread, click Generate Brief, and you’re prepared in seconds.
The obvious next steps: calendar integration, WhatsApp notifications, passive context building. But those are upgrades. The foundation is already working.
Are you building out the rest?
Liked this edition? Share it with someone who wants to dip their hands into coding. It’s free :)