Your compute costs? Covered. Choice of models? Everything on the internet. Track? Yours to pick (viral consumer, hack for good, multi-agent as a service). Plus, $100K in cash and credits. There are no excuses. Applications close in 48 hours.
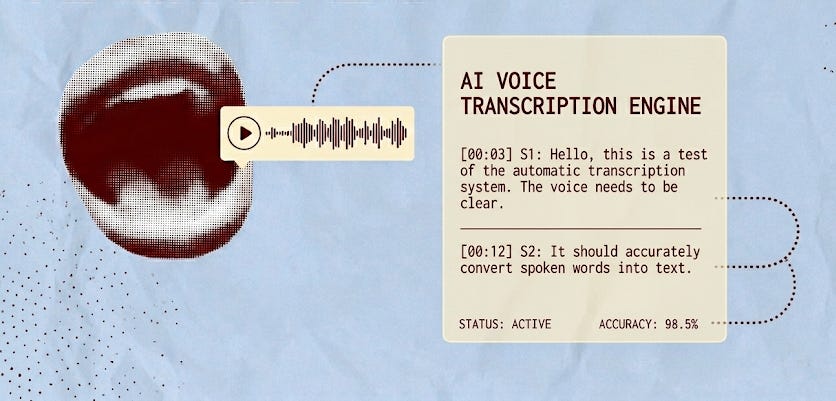
We’re solving the gibberish transcript problem with meeting notes by building a tool that understands what we say and provides a summary and next steps for every recorded meeting.
It’s a simple workflow, one you can build in 40 minutes, even if you don’t know a single line of code. Open this email on Substack by clicking the title. It’s going to be a long one.
Note: We won’t build an entire app from scratch. Instead, we’ll build the note-taker on WhatsApp — it already has everything we need: voice recording and text. We’ll only set up the backend: connect WhatsApp to a voice LLM, then refine the transcript with a text LLM.
For this, we’ll use Make, Twilio, Sarvam and Gemini. All have generous free tiers, so you can finish building a simple app like this one without any issues.
Step 1: Set up your executor.
We’re using Make because it’s straightforward, doesn’t require switching between different tools, and, most importantly, doesn’t require us to write code to install, deploy, or maintain anything.
1. First, click this link. It’ll take you to Make’s Sign-in page, which should look like this.
2. Select Continue with Google. This will let you log in directly with your Google Account. Congratulations, your Make account is ready.
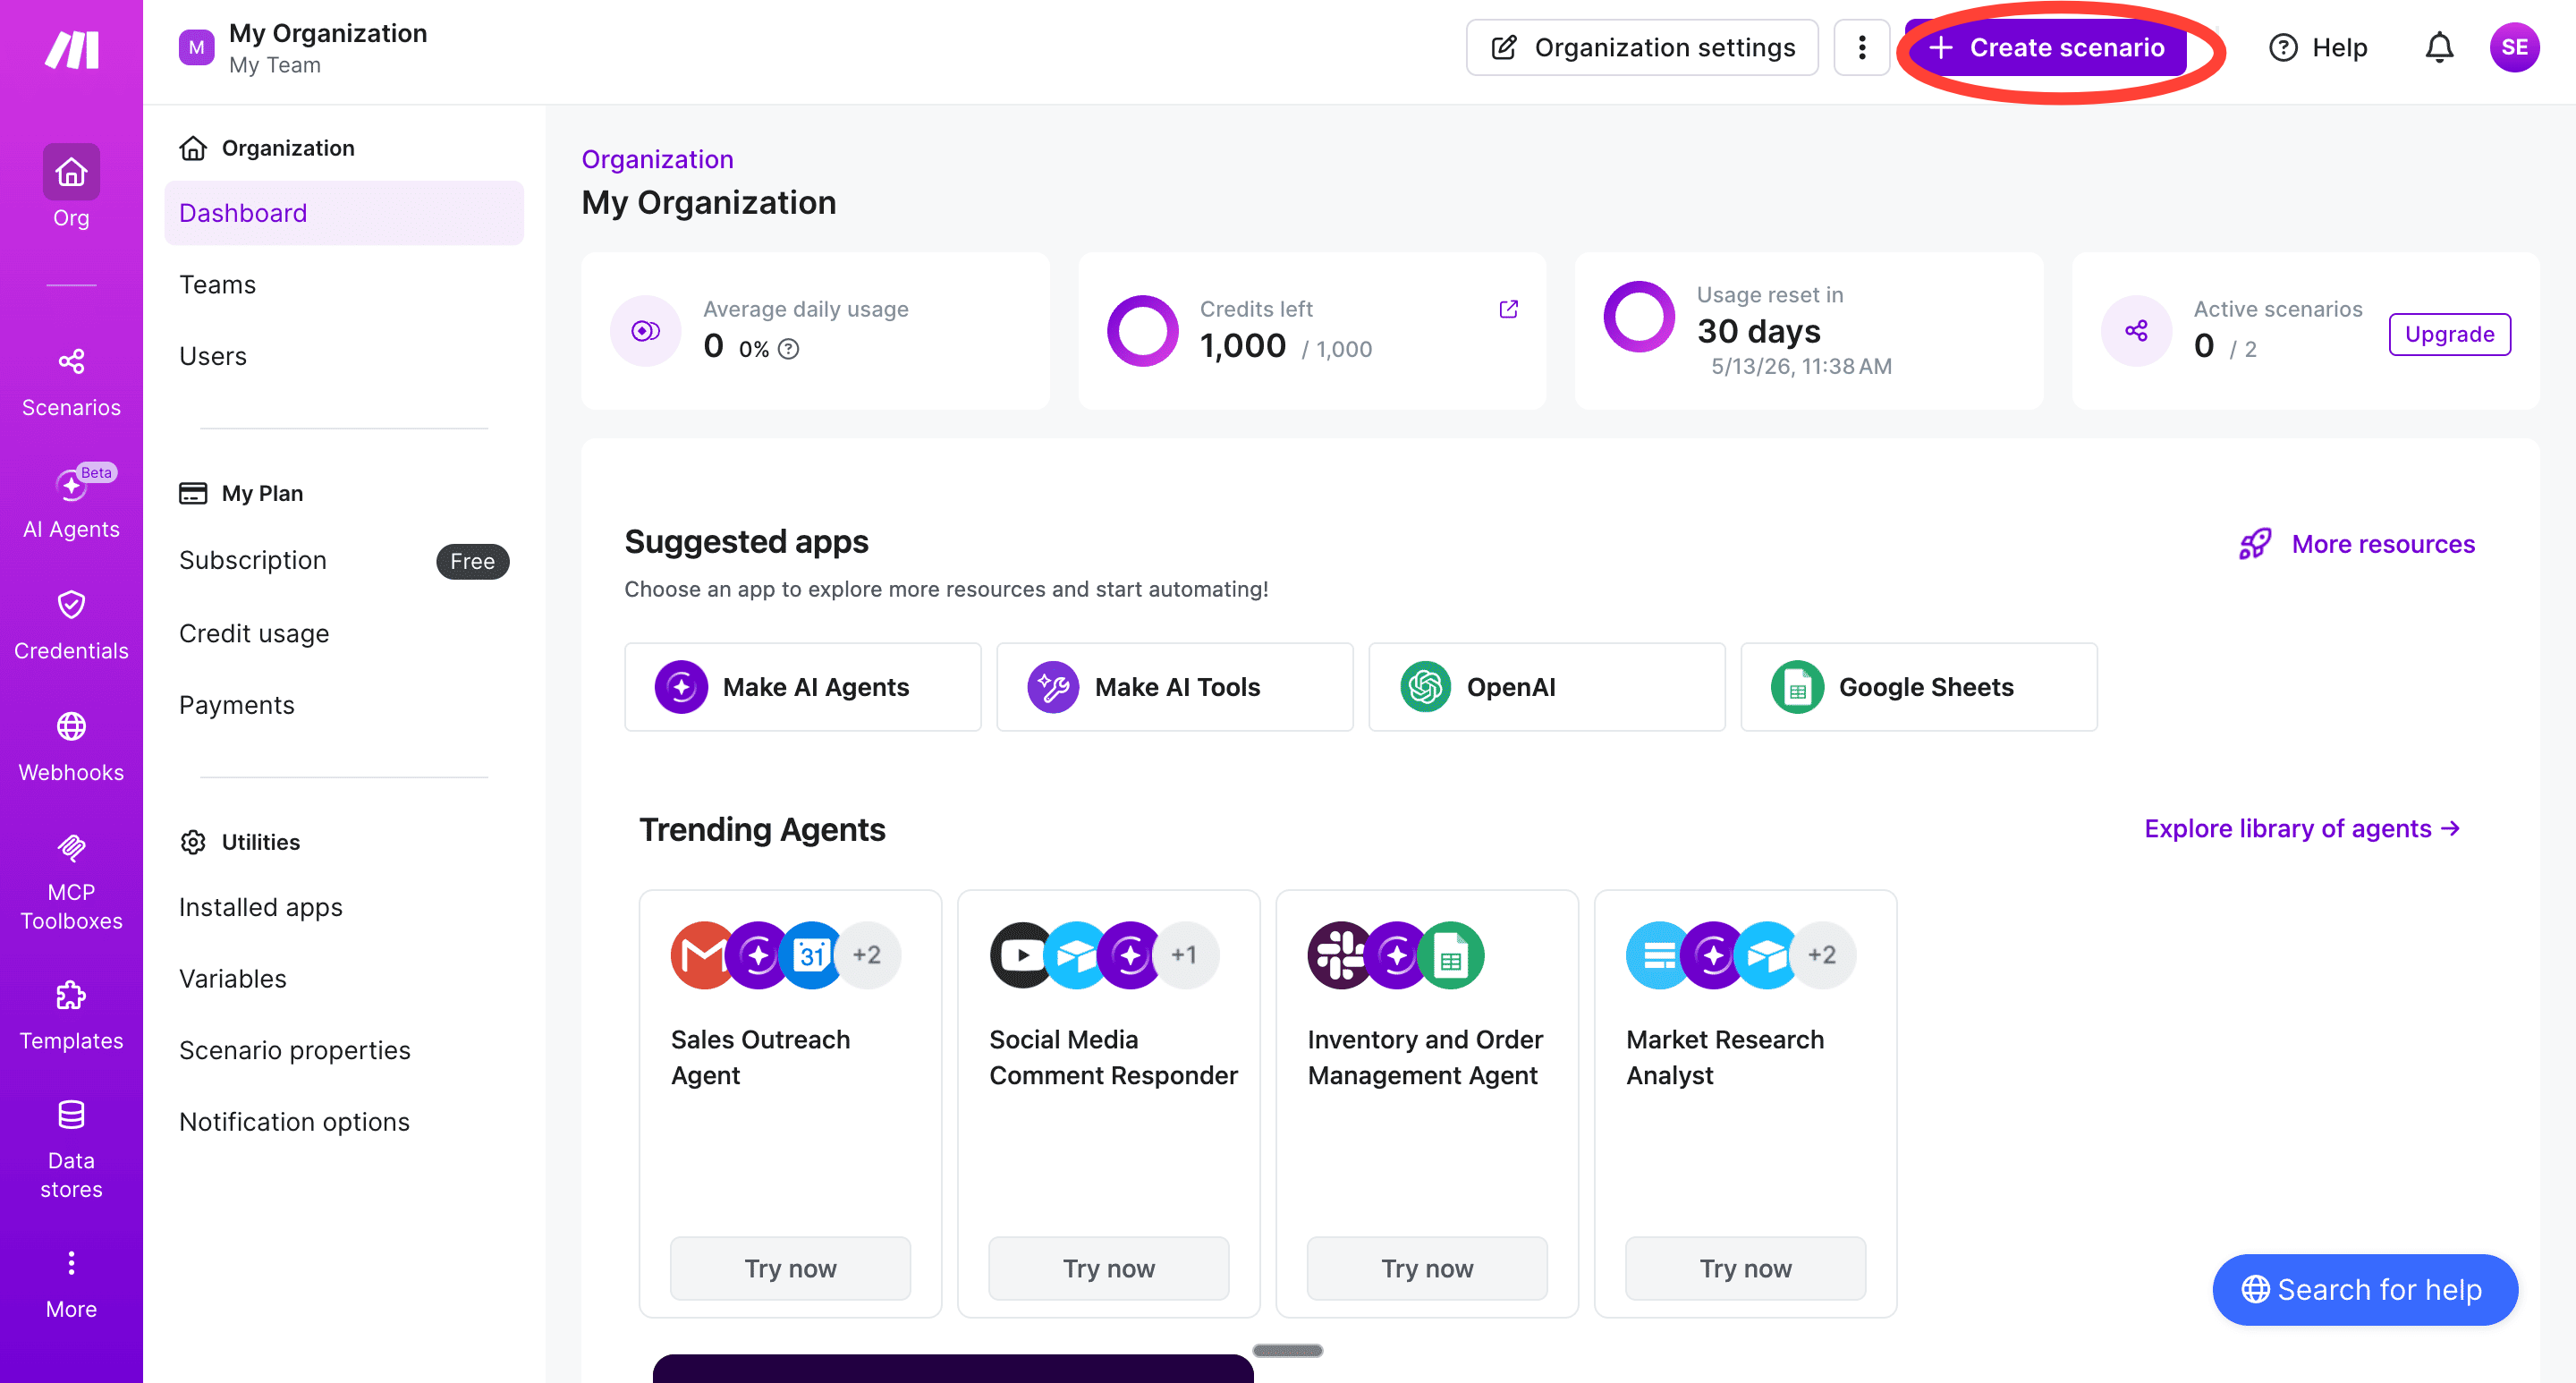
Building your automation (Scenario) 1. Click on the Create scenario button.
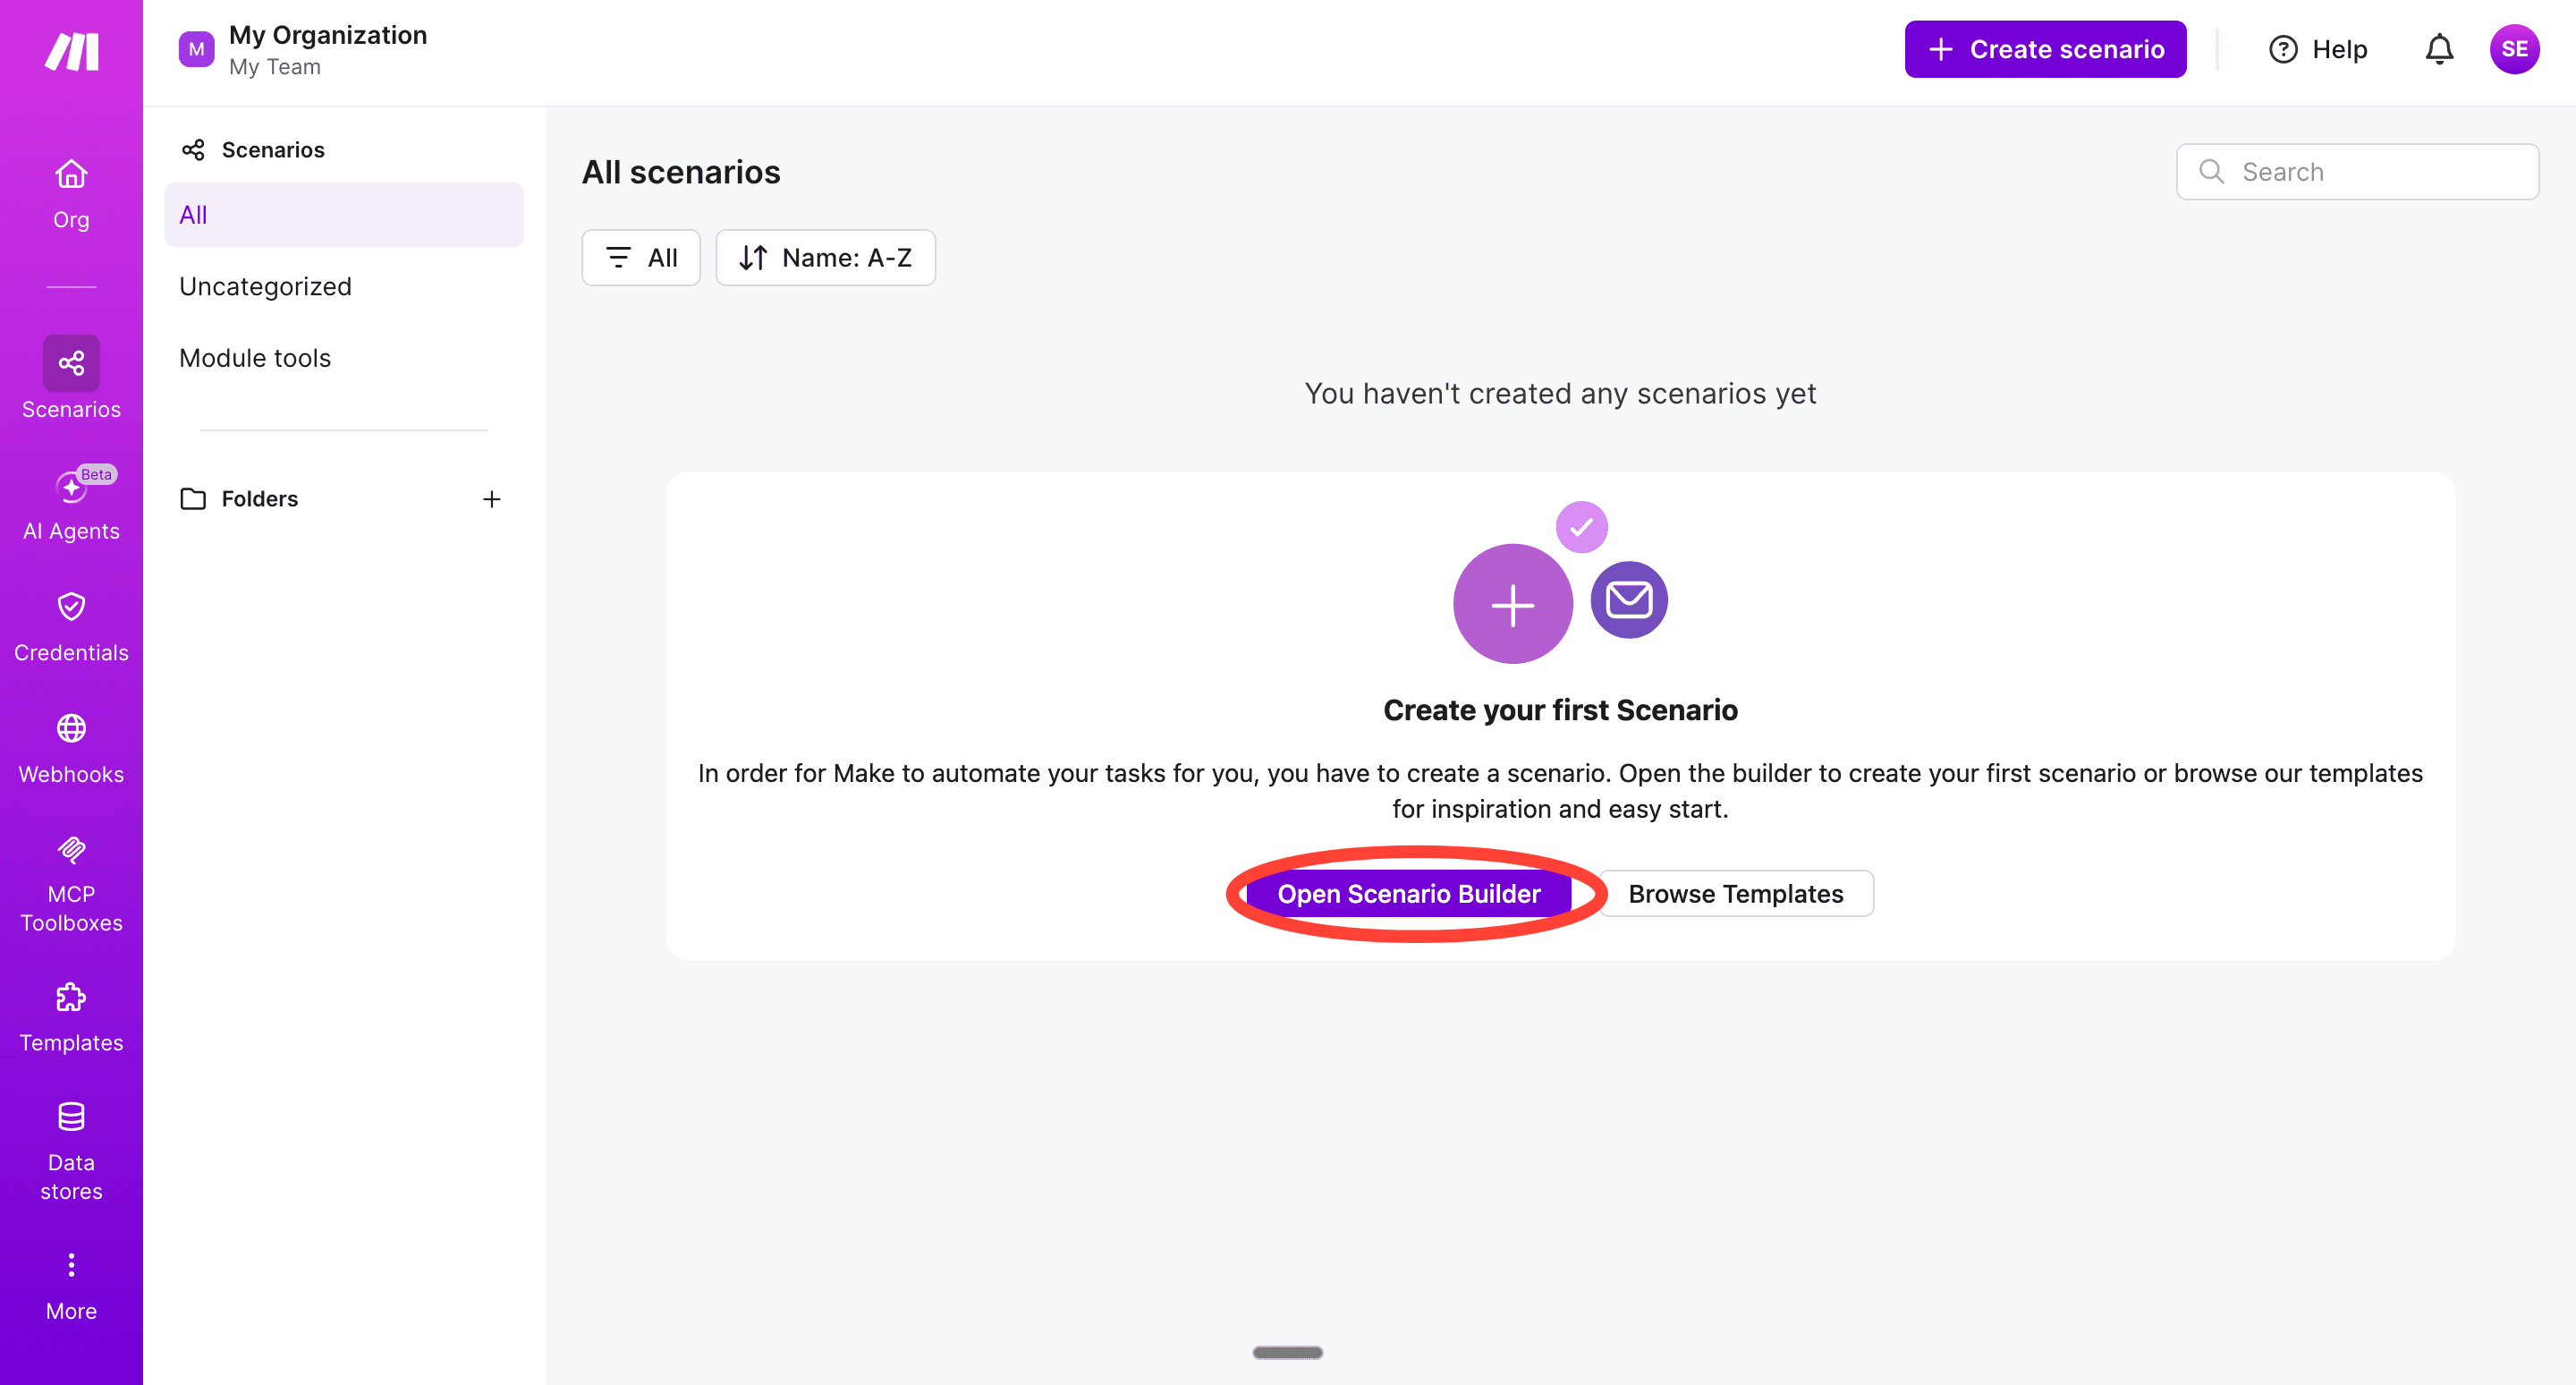
Now, click on Open Scenario Builder.
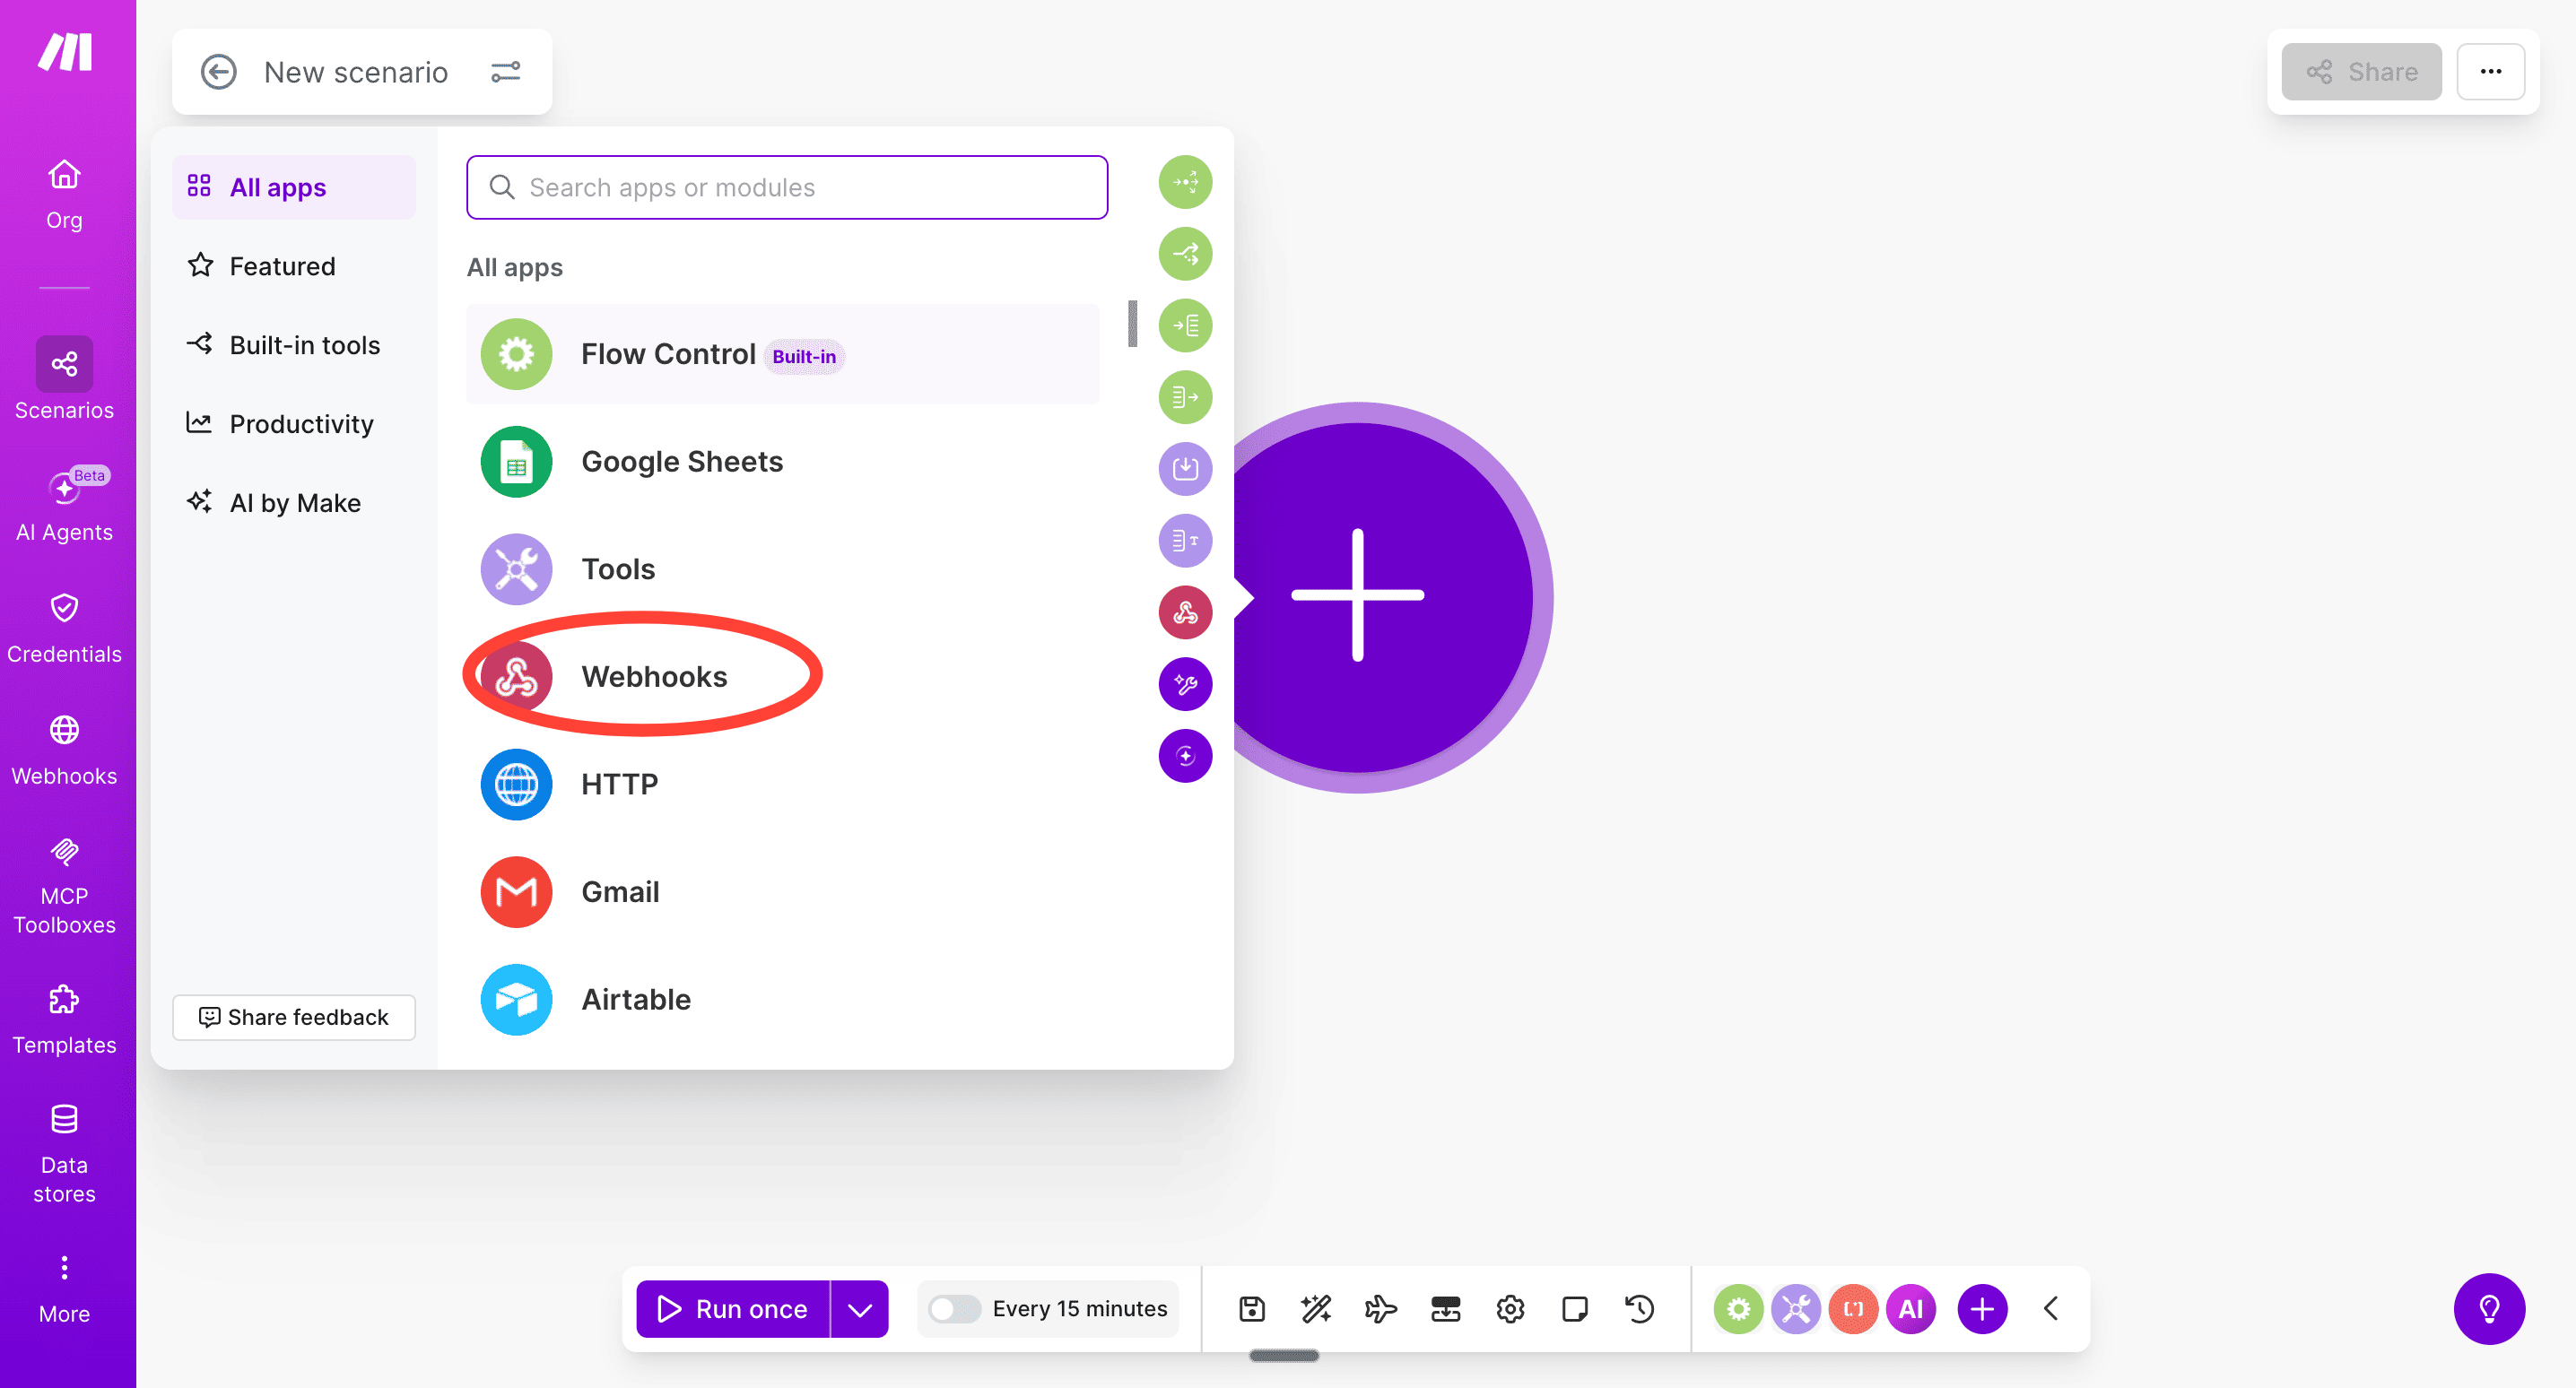
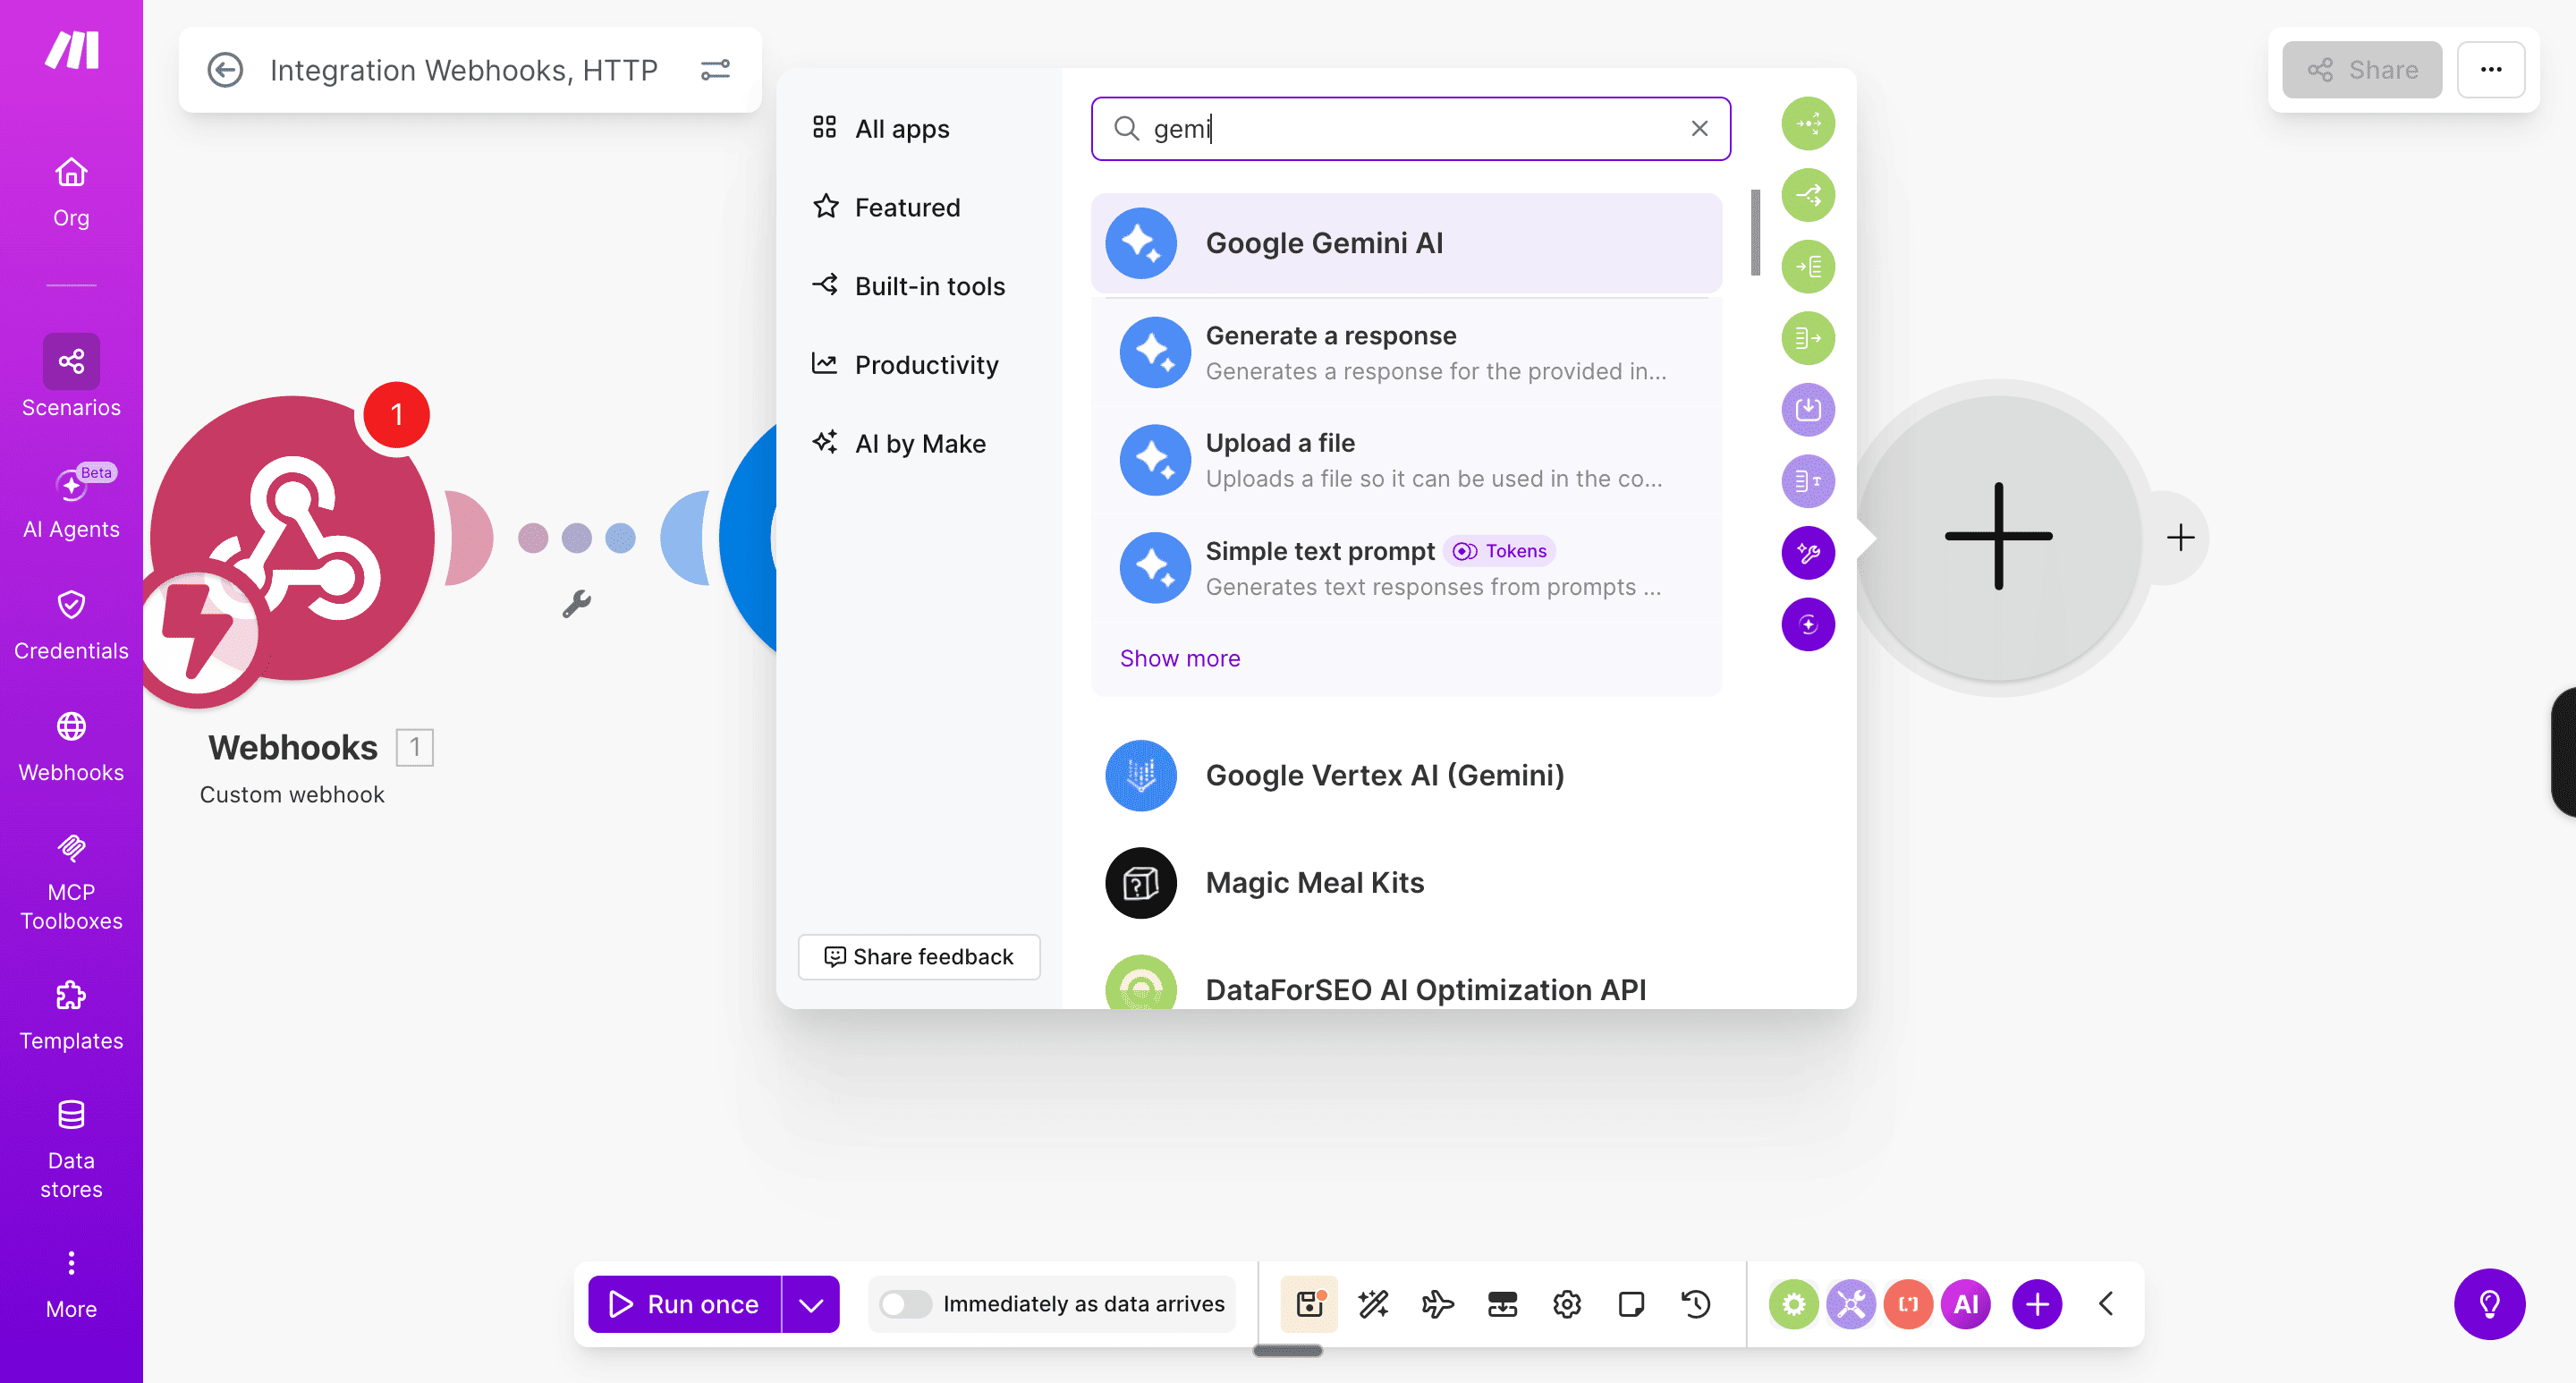
You should see an empty canvas with a large “+” in the middle, like this. Click it, then select Webhooks from the pop-up menu.
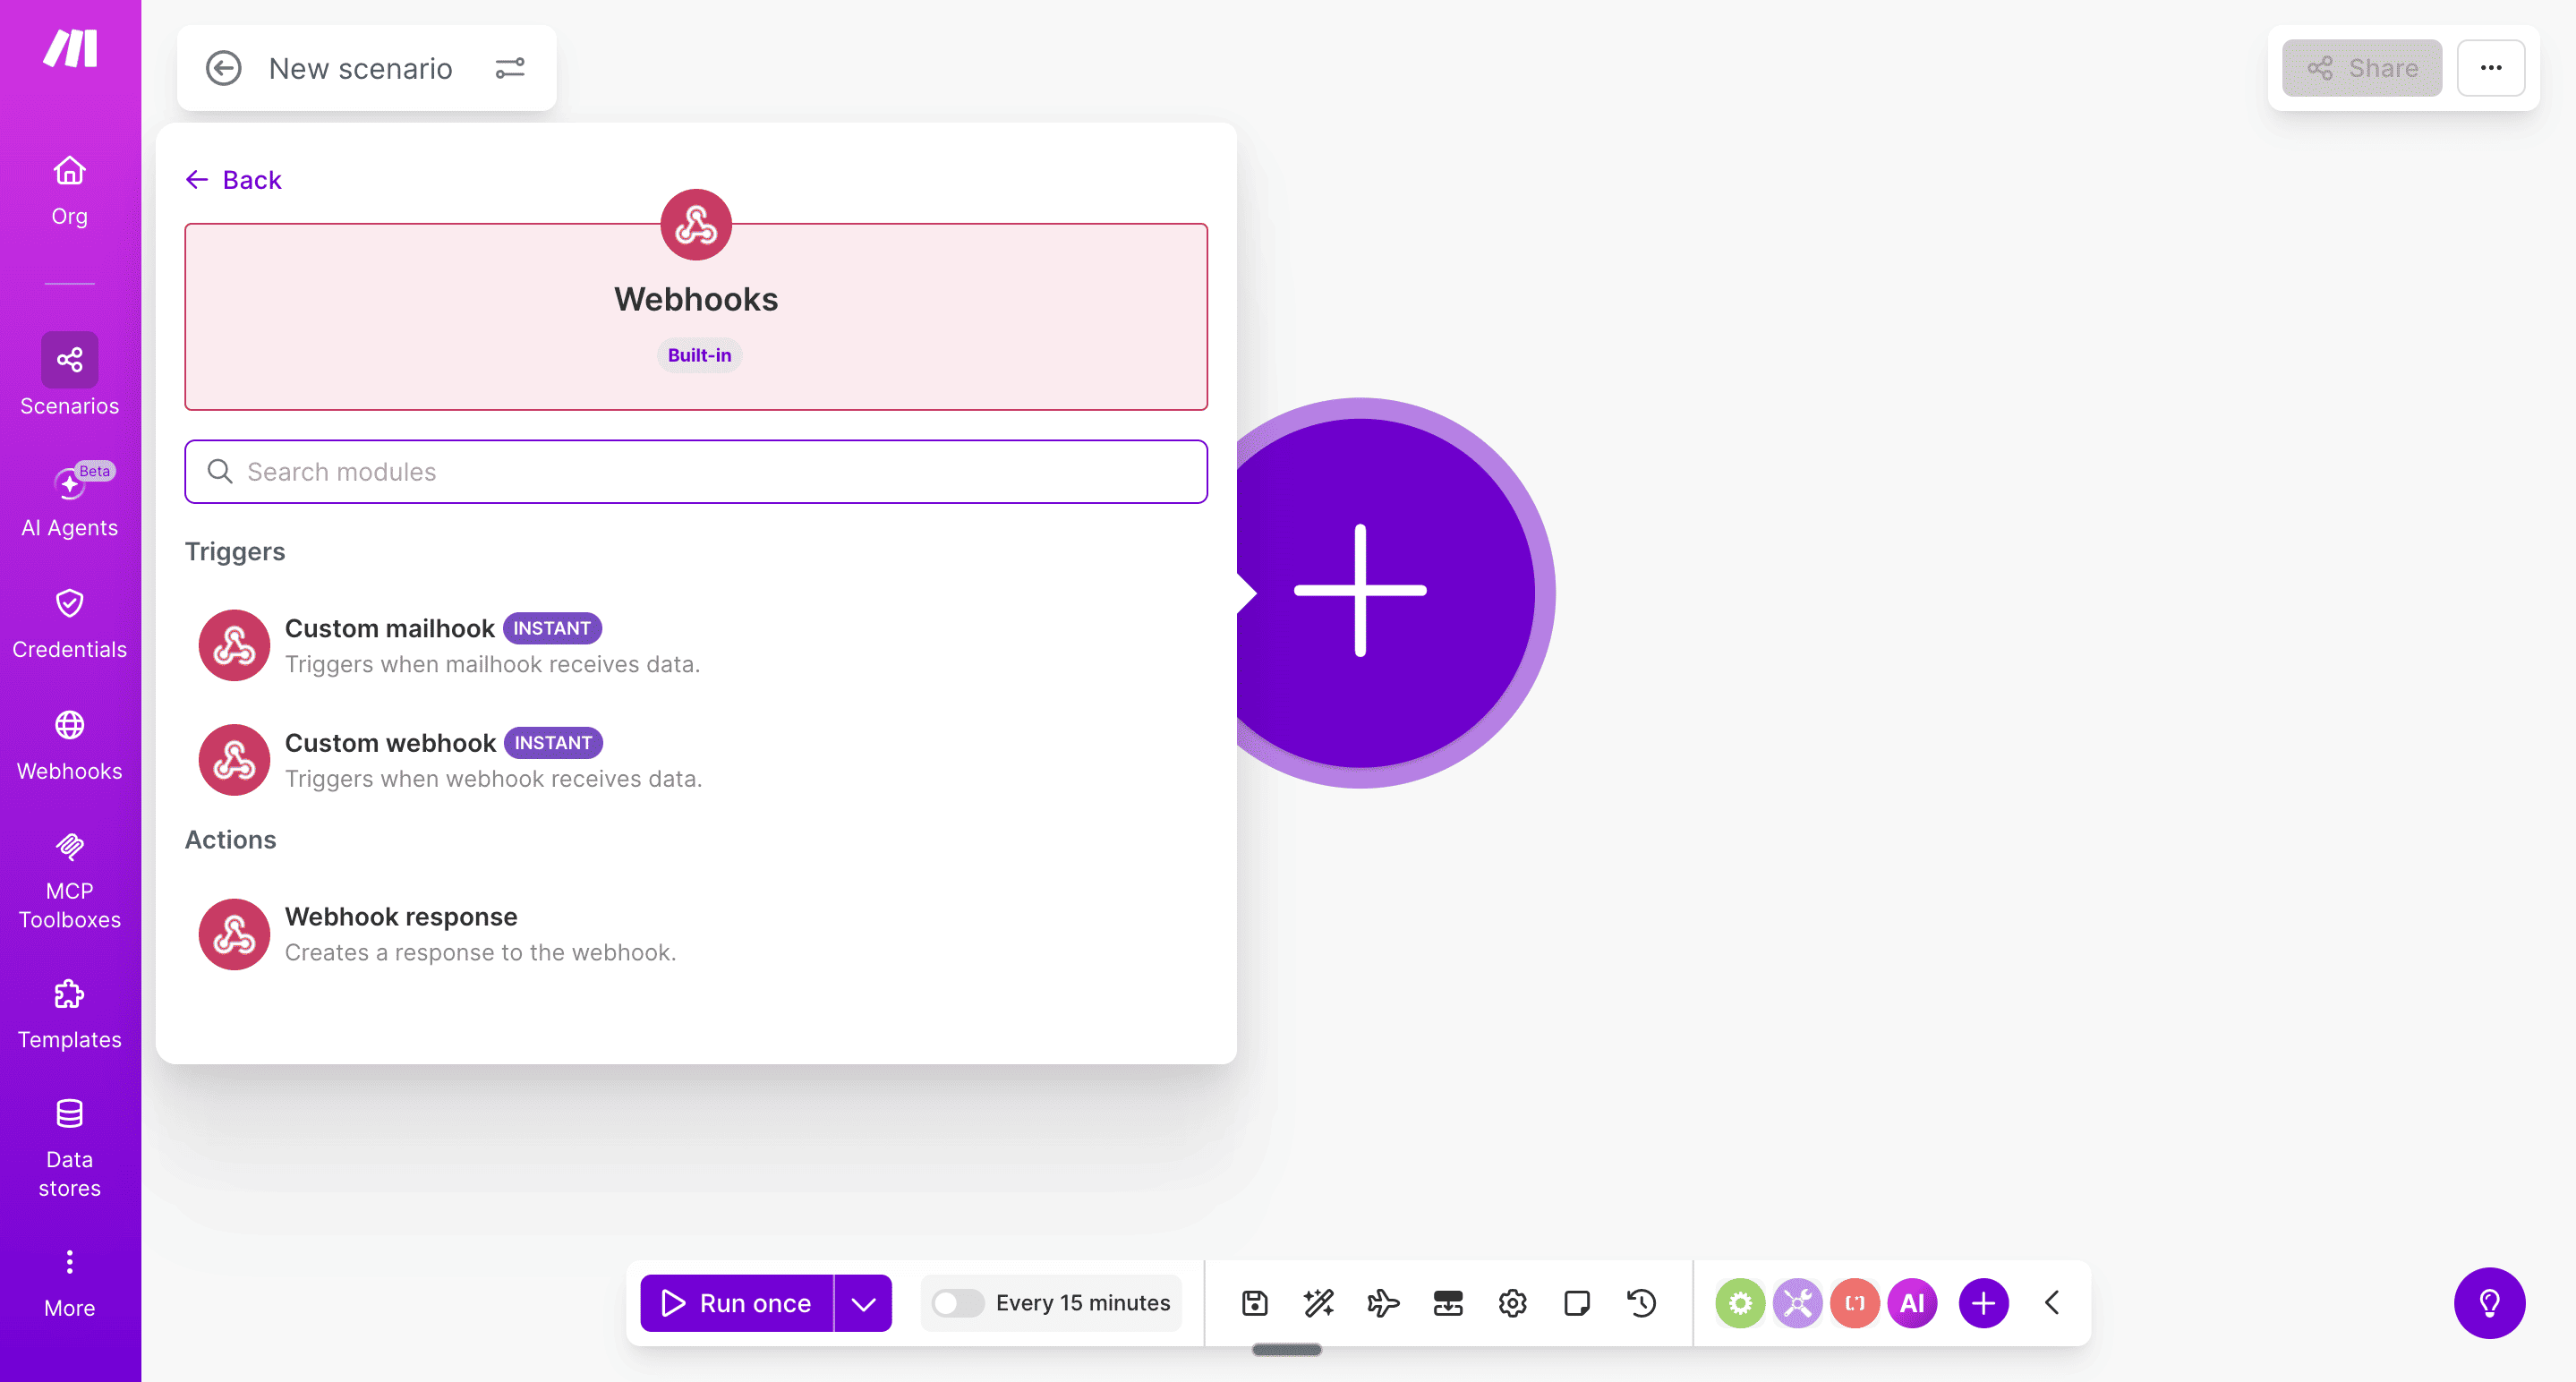
You should now see a webhook icon. Click it, then click Create a webhook.
Wait, what’s a webhook? A webhook is the bridge between the outside world and your automation. In this case, when you send a voice recording to your Twilio number, Twilio sends that data to Make via a webhook. That triggers the automation that processes it through Sarvam and Gemini.
Select Custom webhook from the pop-up dropdown.
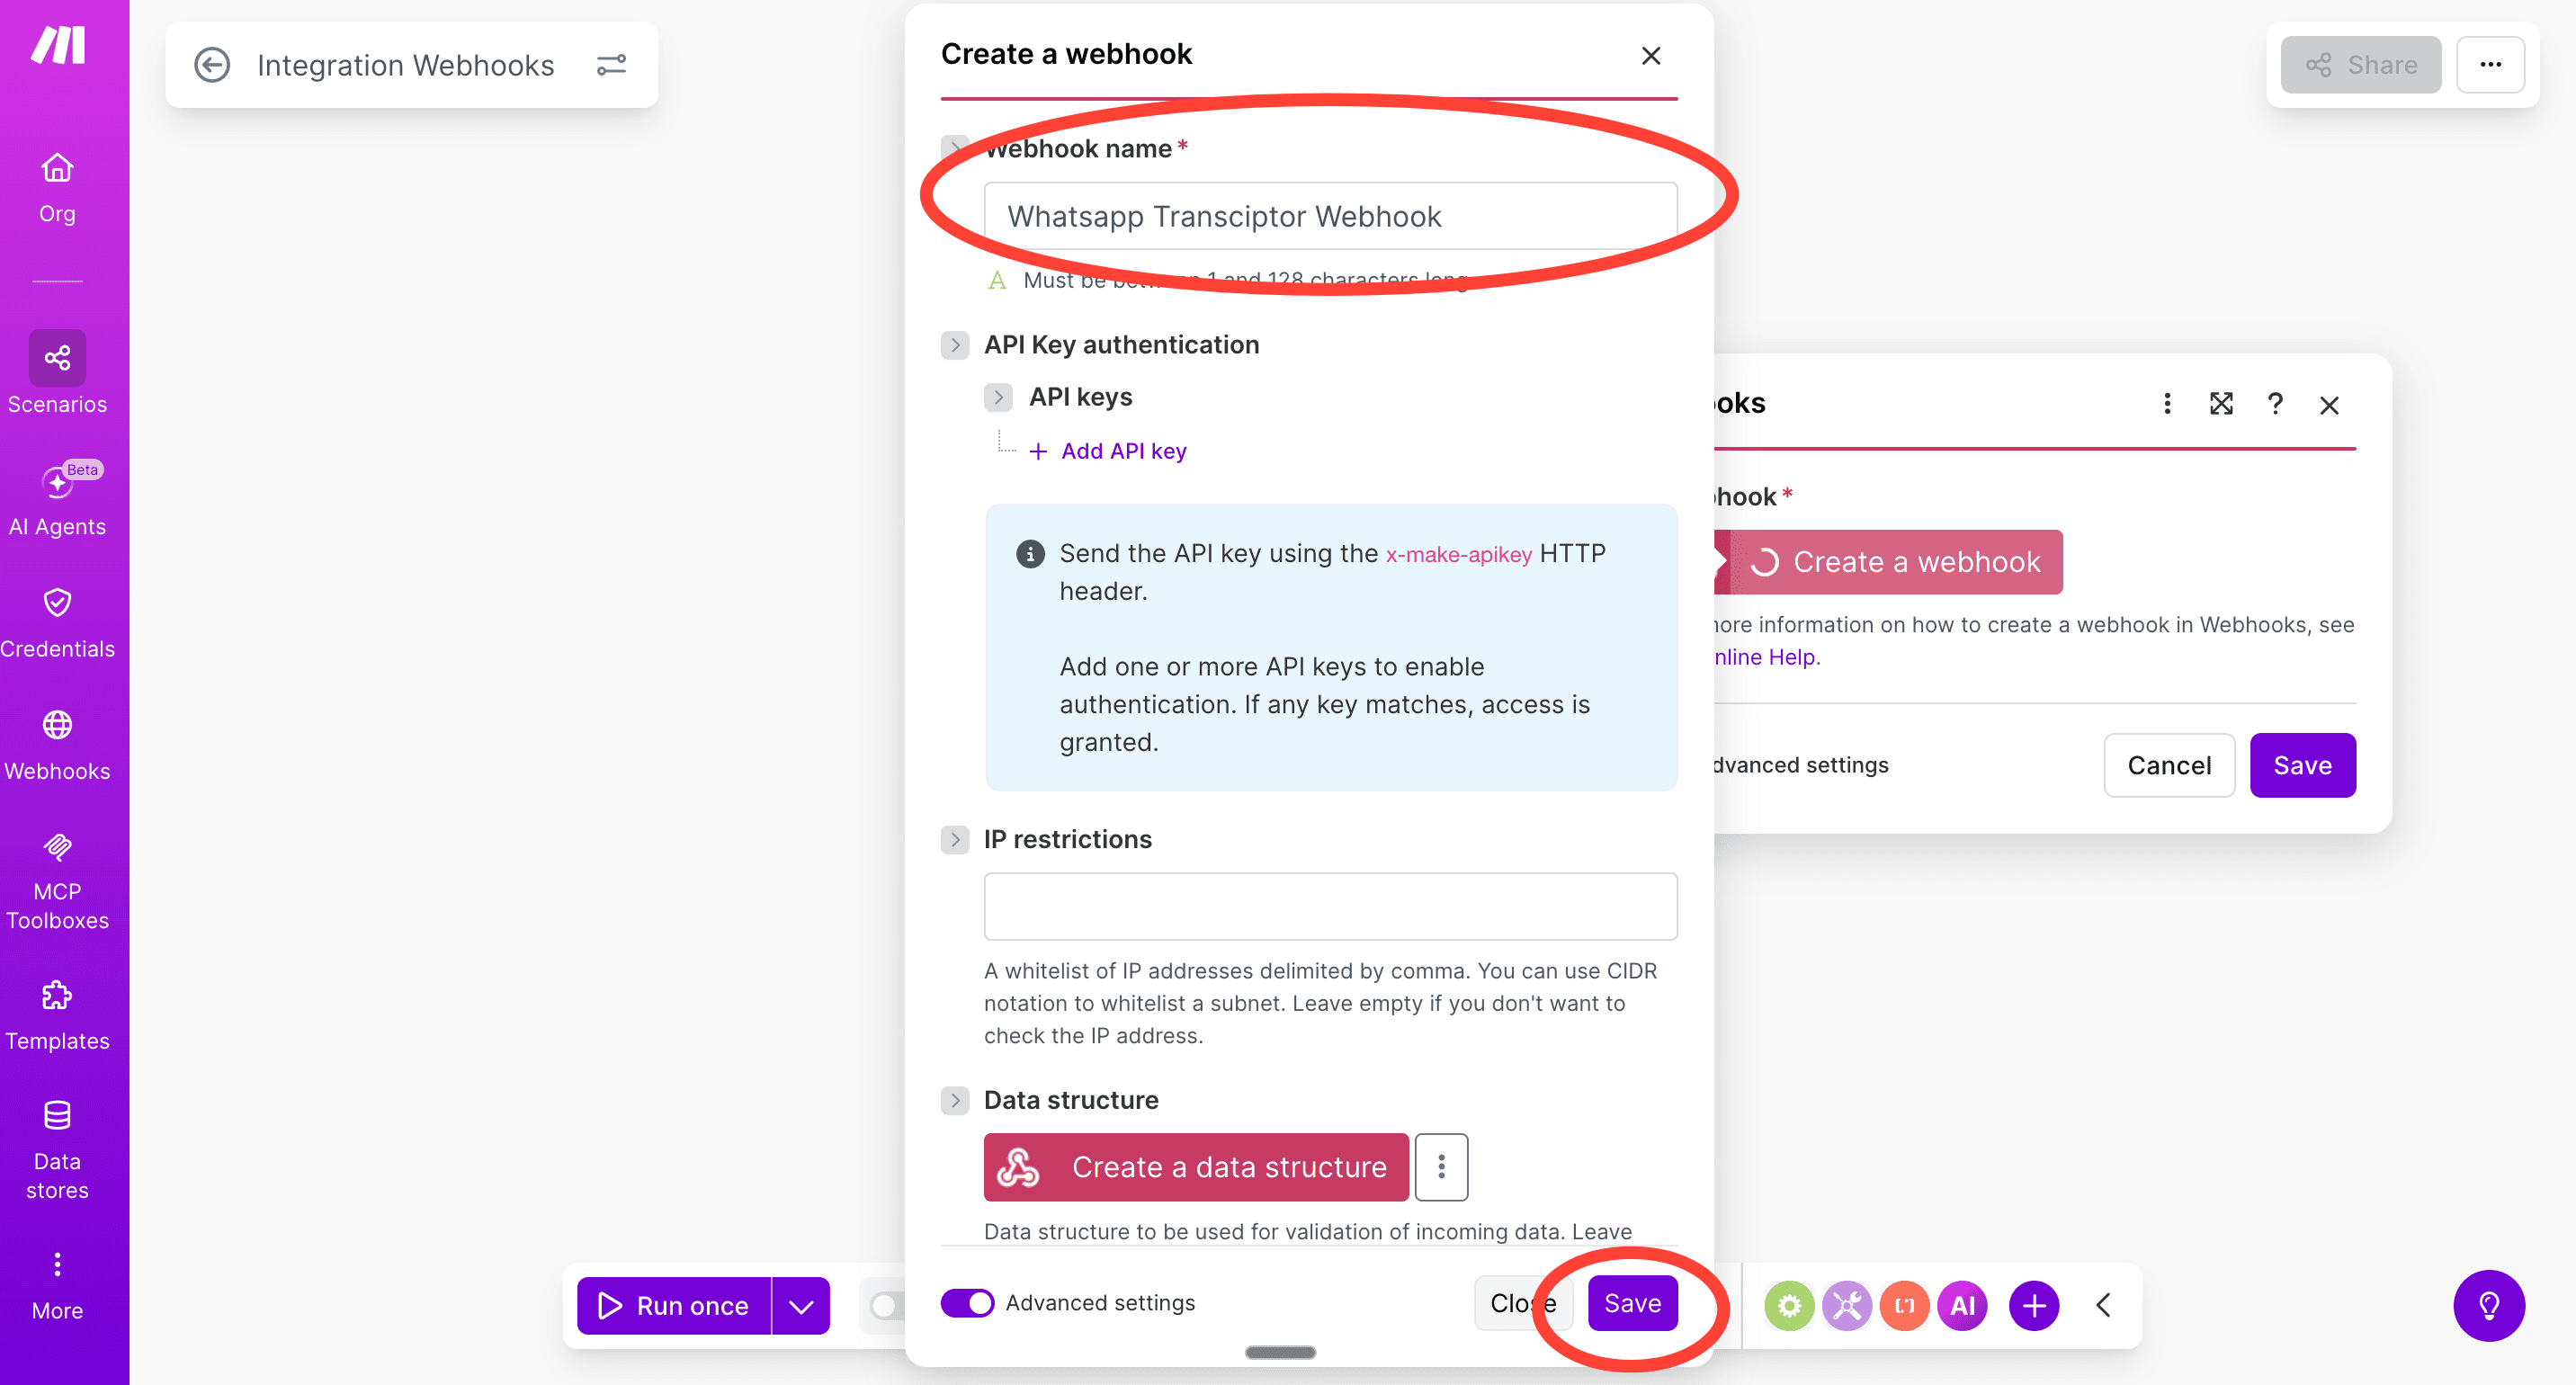
Now, you’ll see a new pop-up with the Create a webhook button. Click it. Now enter the webhook name and click Save.
Copy the link that appears. Here’s what mine looks like.
Why do we need to set up a new chat? We need a WhatsApp number that could receive voice notes and forward them to Make. WhatsApp does not let you build bots directly — you have to go through an approved API provider like Twilio.
1. Create a free Twilio account by signing up using this link. Once again, you can Sign up with Google to skip adding all the information.
2. Now go to console.twilio.com. If you created a new Twilio account, you should be able to sign in automatically.
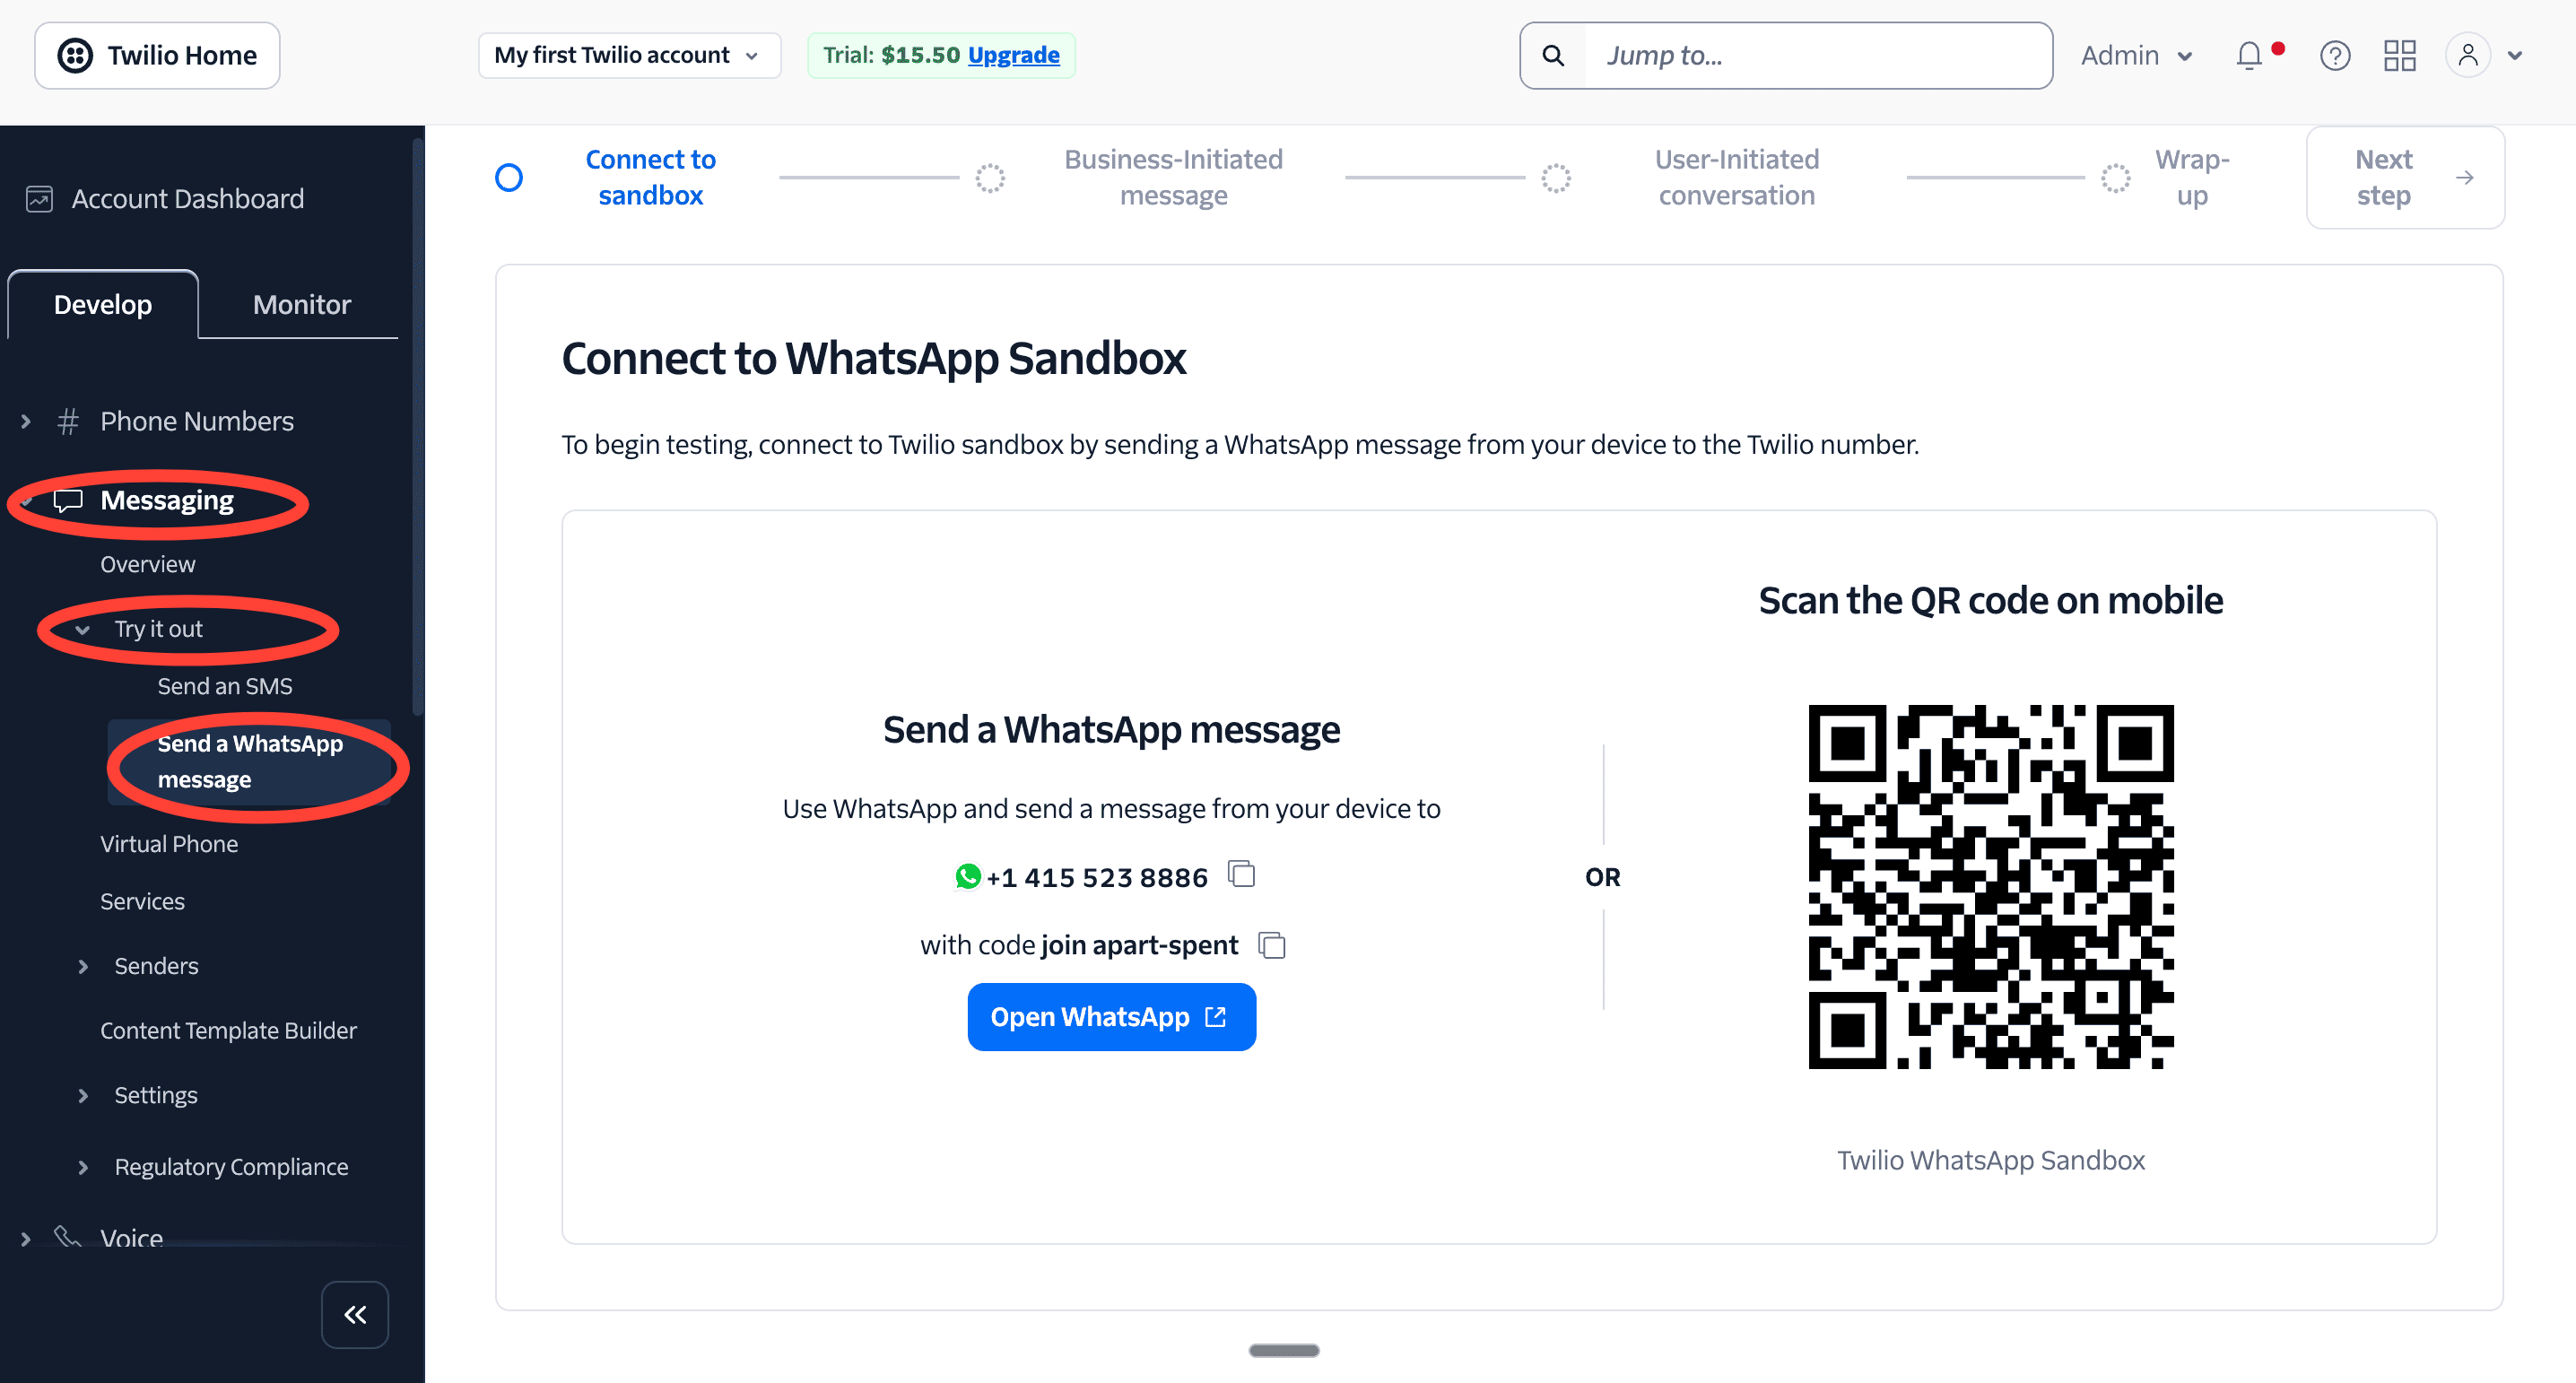
3. Now check the Develop tab on the left. Click on Messaging, click on the Try it out drop-down and select Send a WhatsApp message. This will open up the Connect to WhatsApp Sandbox.
Wait, what’s the Sandbox? It’s where developers test WhatsApp integrations without long Meta’s business approval process. Plus, it’s free and activates in under a minute.
Now, you’ll see a WhatsApp number + a code on the right side.
Now, save the WhatsApp Number. Name it Transcriber Bot. Next, send a message to the Transcriber bot with the exact same code you copied from the WhatsApp Sandbox. Mine was:
join apart-spent
Your WhatsApp bot is now ready!
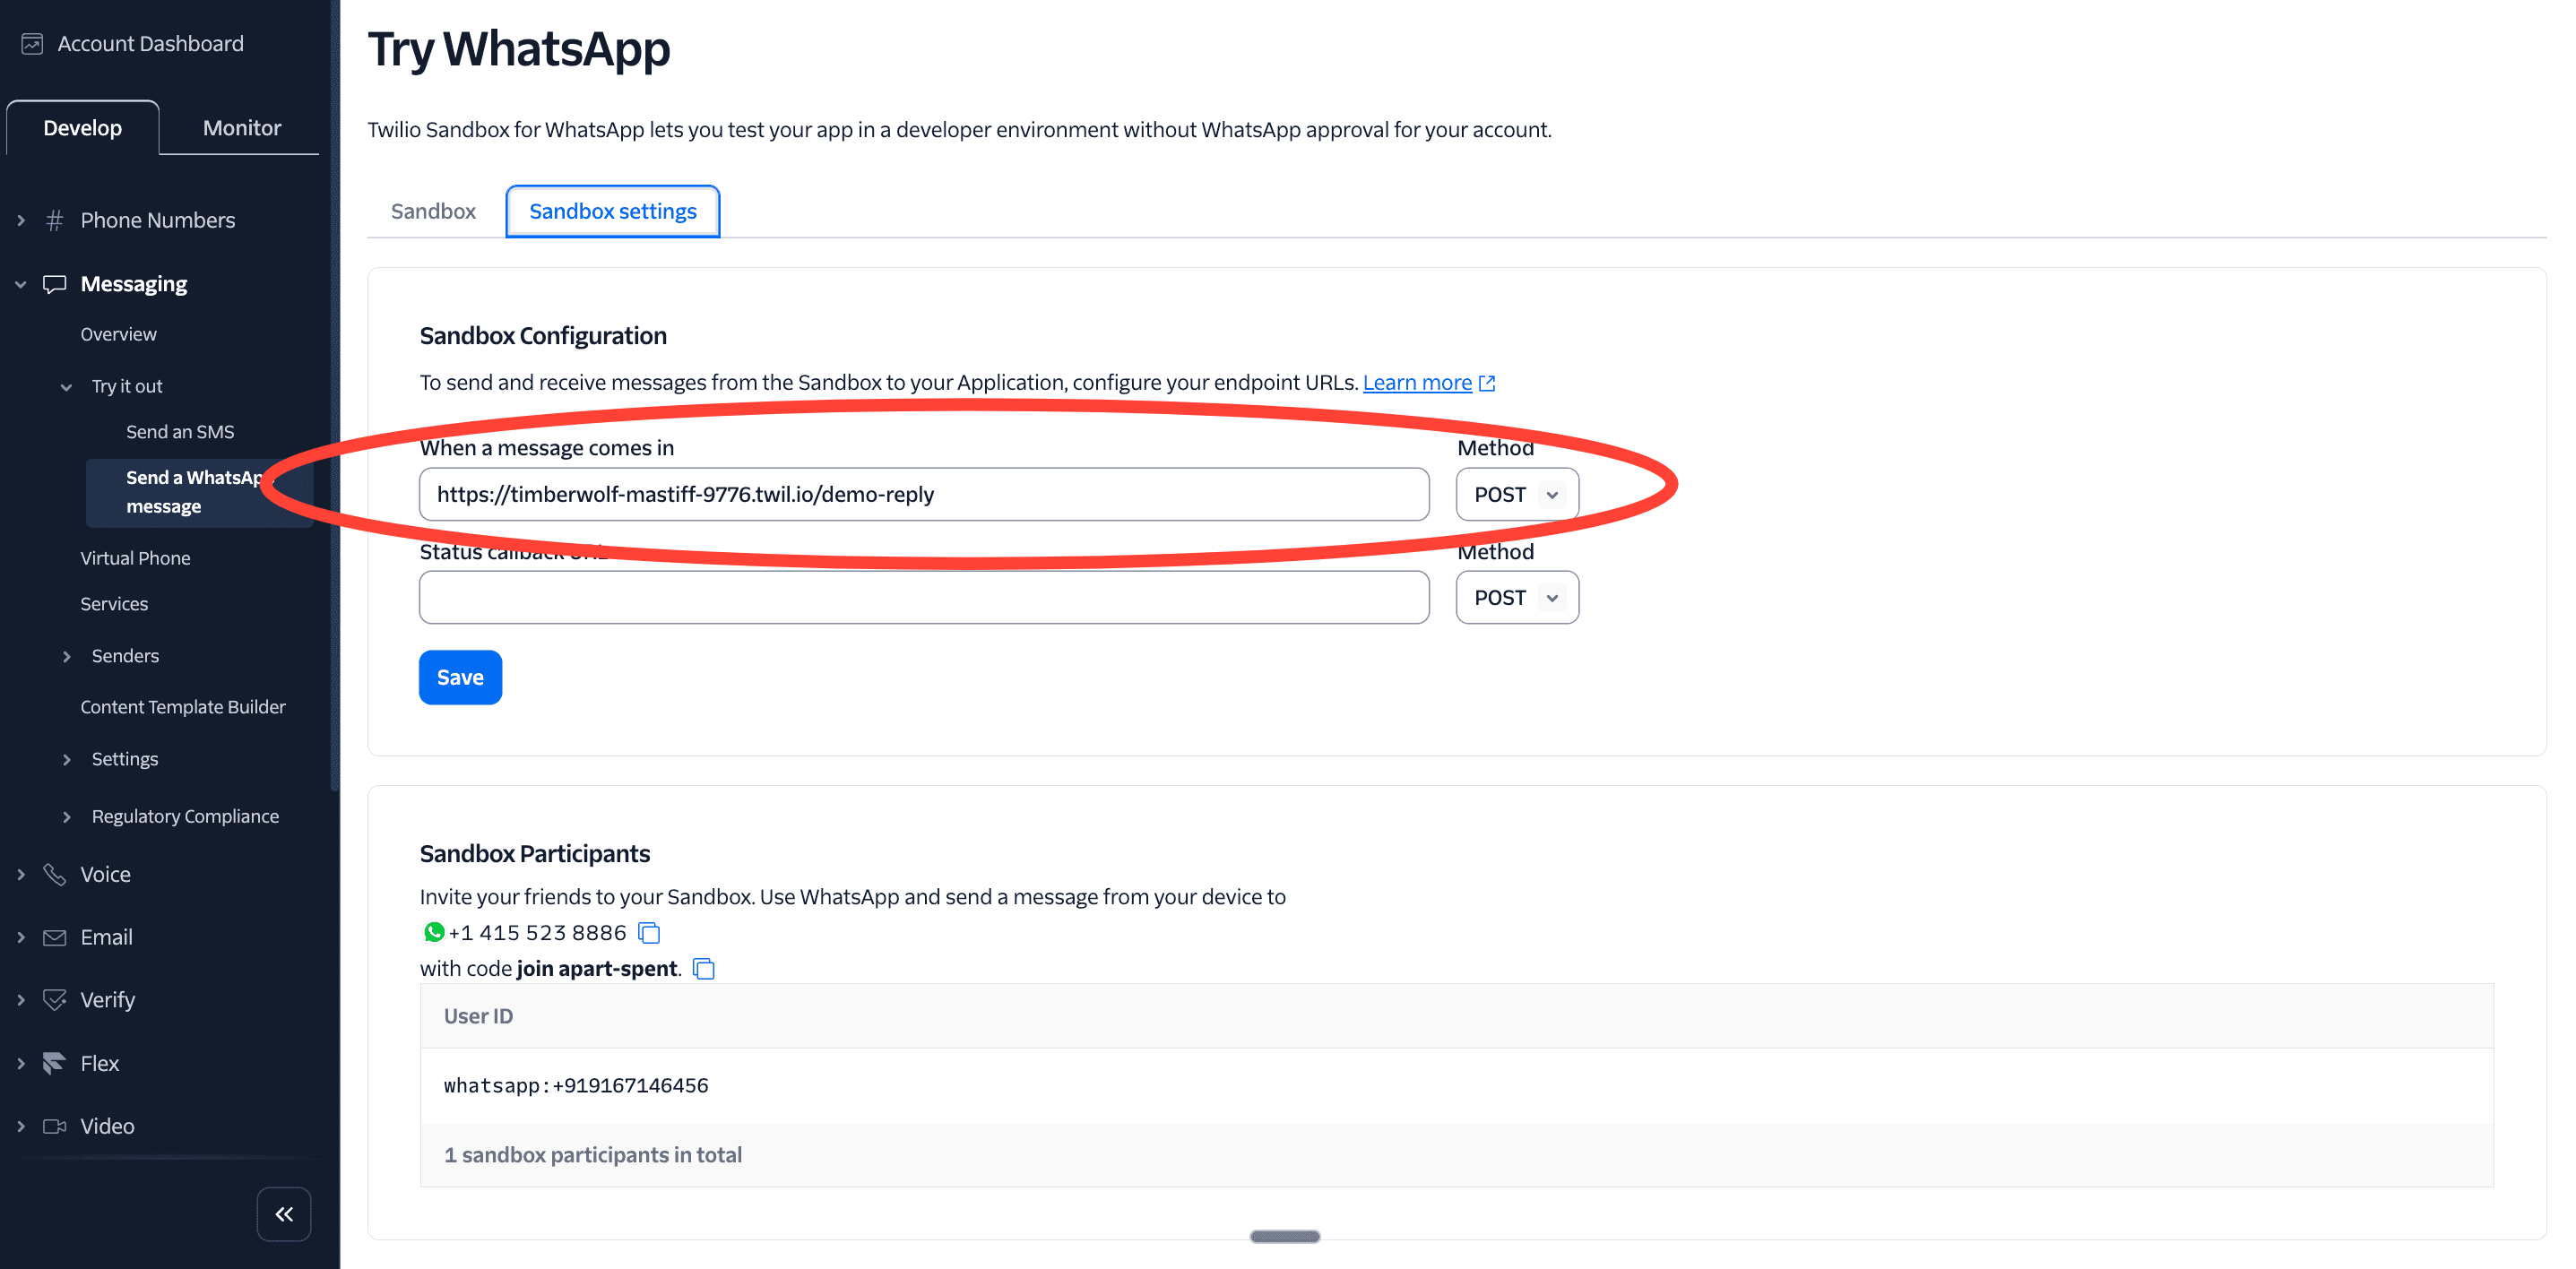
Connecting the Transcriber Bot to the Make Webhook. Go back to Twilio and switch from the Sandbox Tab to the Sandbox Settings tab.
You should see a section titled “When the message comes in” with a dummy URL in the input box. Like this.
Paste your Make URL here — the one that looks like this.
Now, every time you send a WhatsApp message to your Transcriber Bot, it’ll initiate the Make workflow.
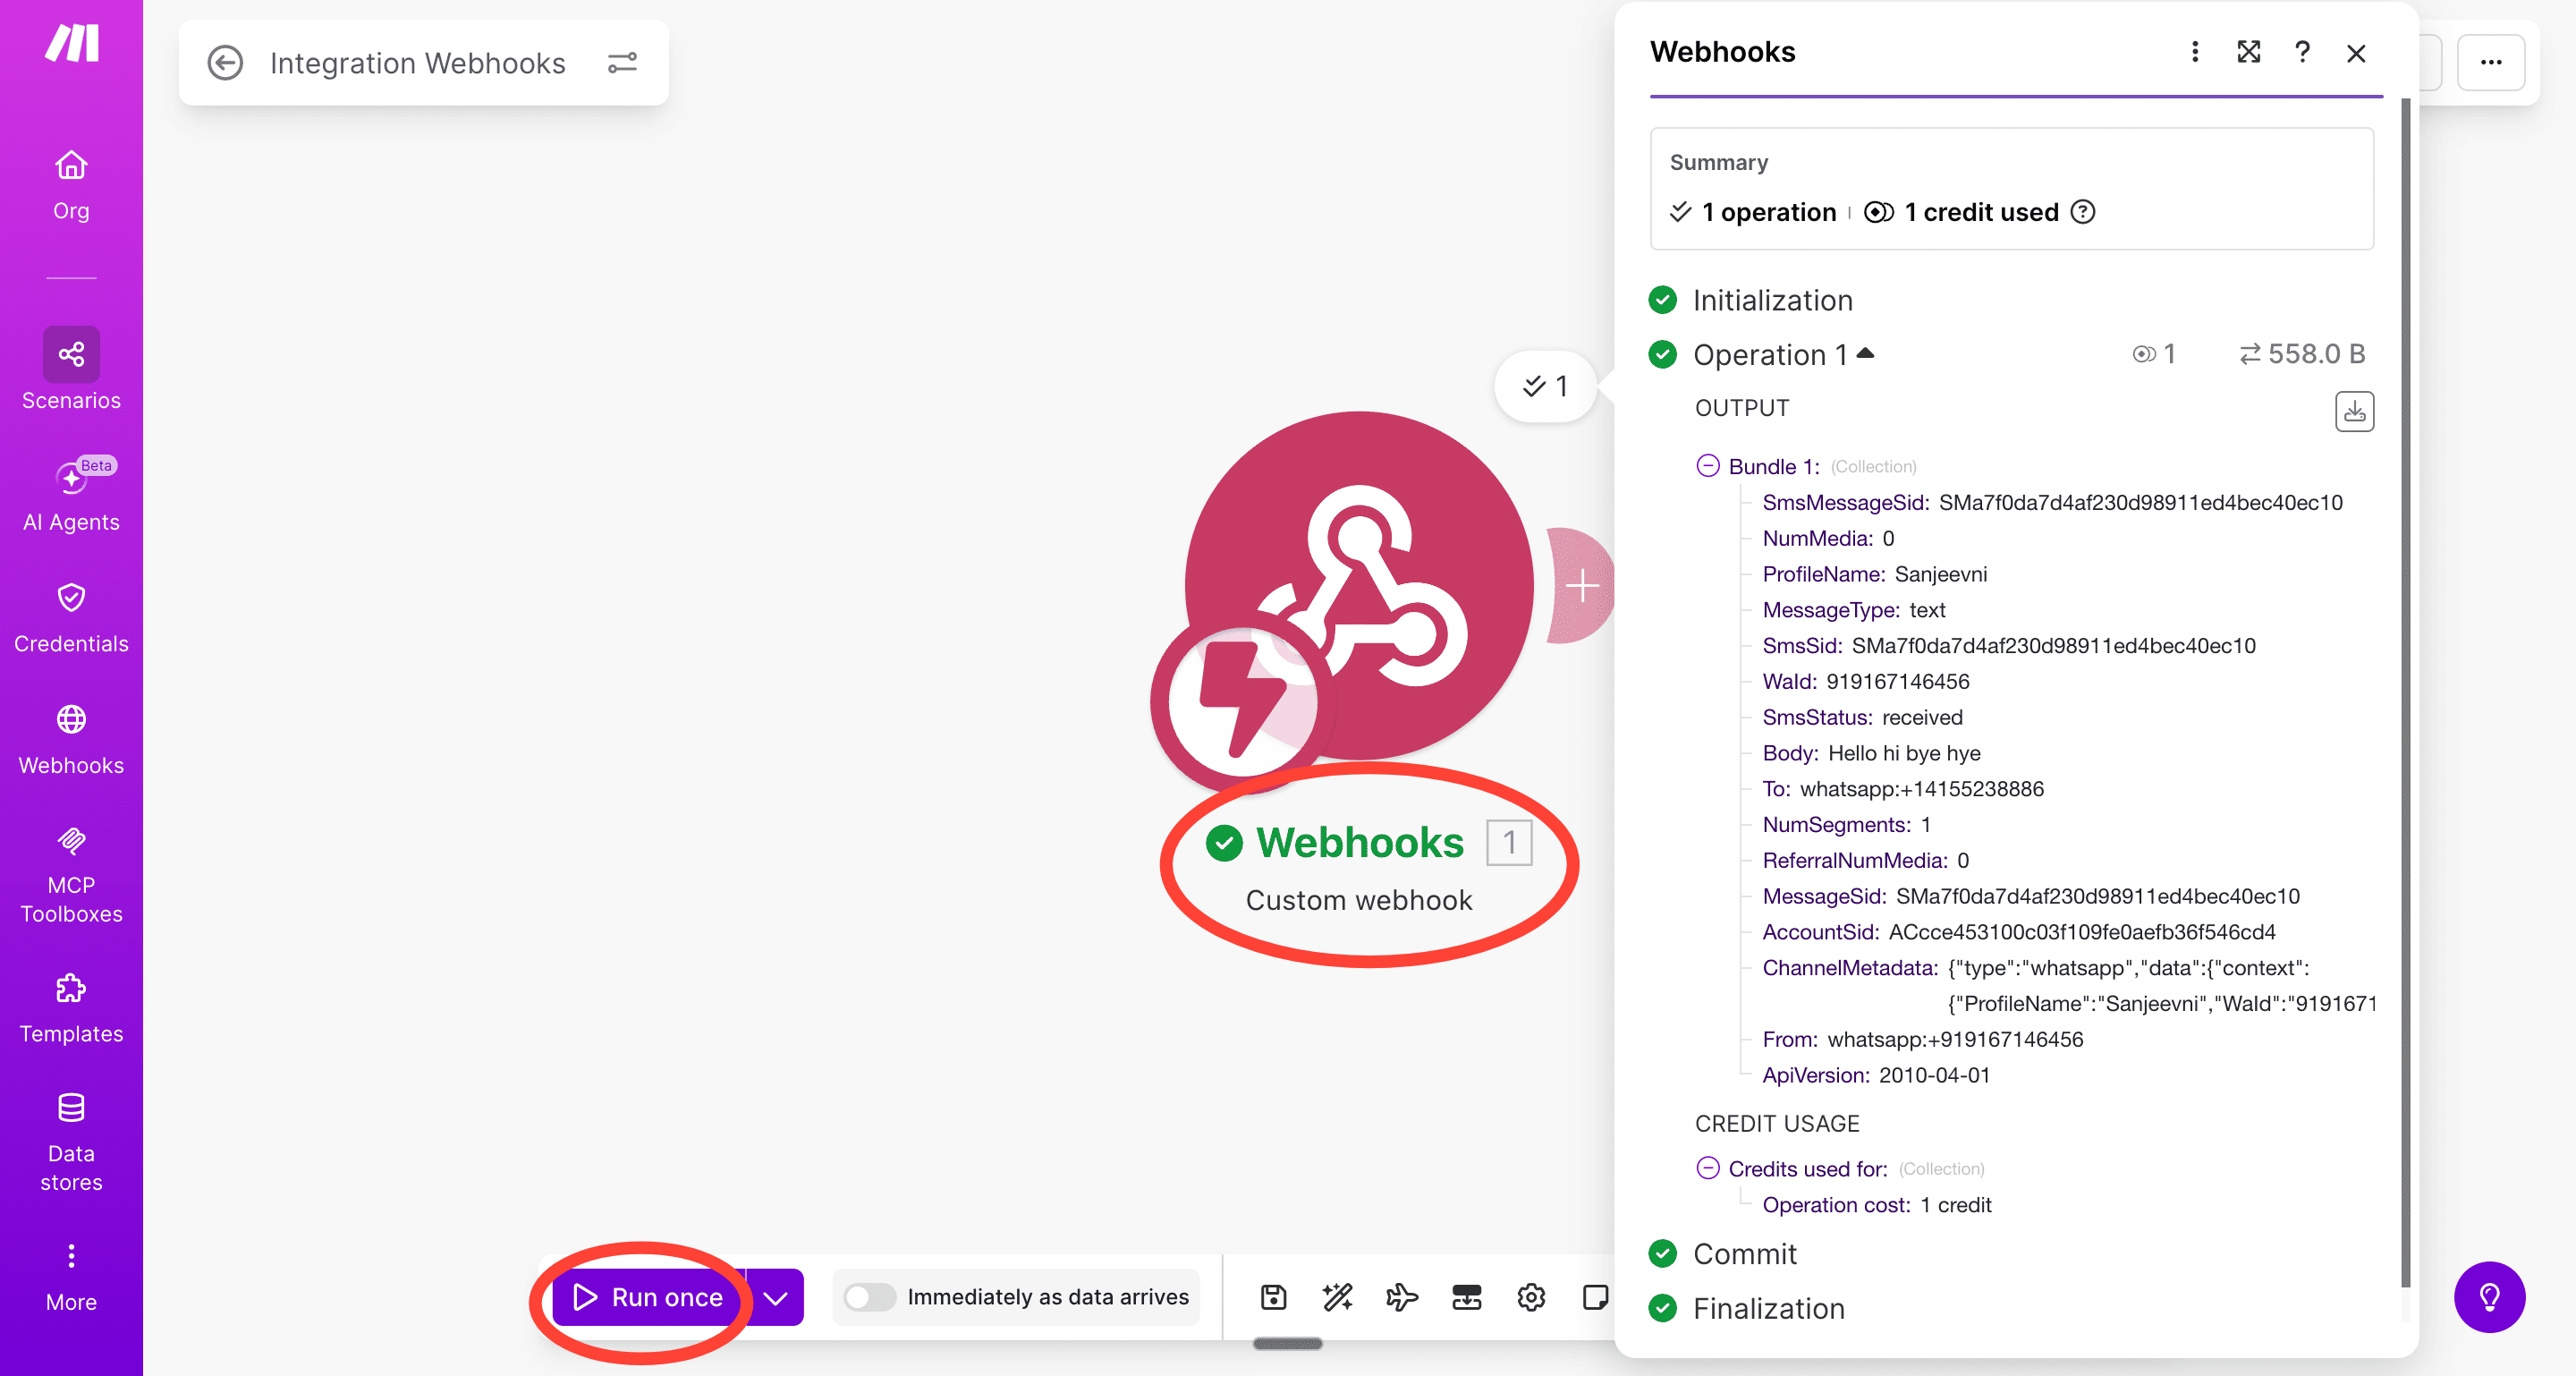
Quick test: Check your automation. Hit the Run command on Make and then send a voice note to your Transcriber Bot on WhatsApp. You should see the Webhook block light up. This means your automation is running.
Setting up the filing system.
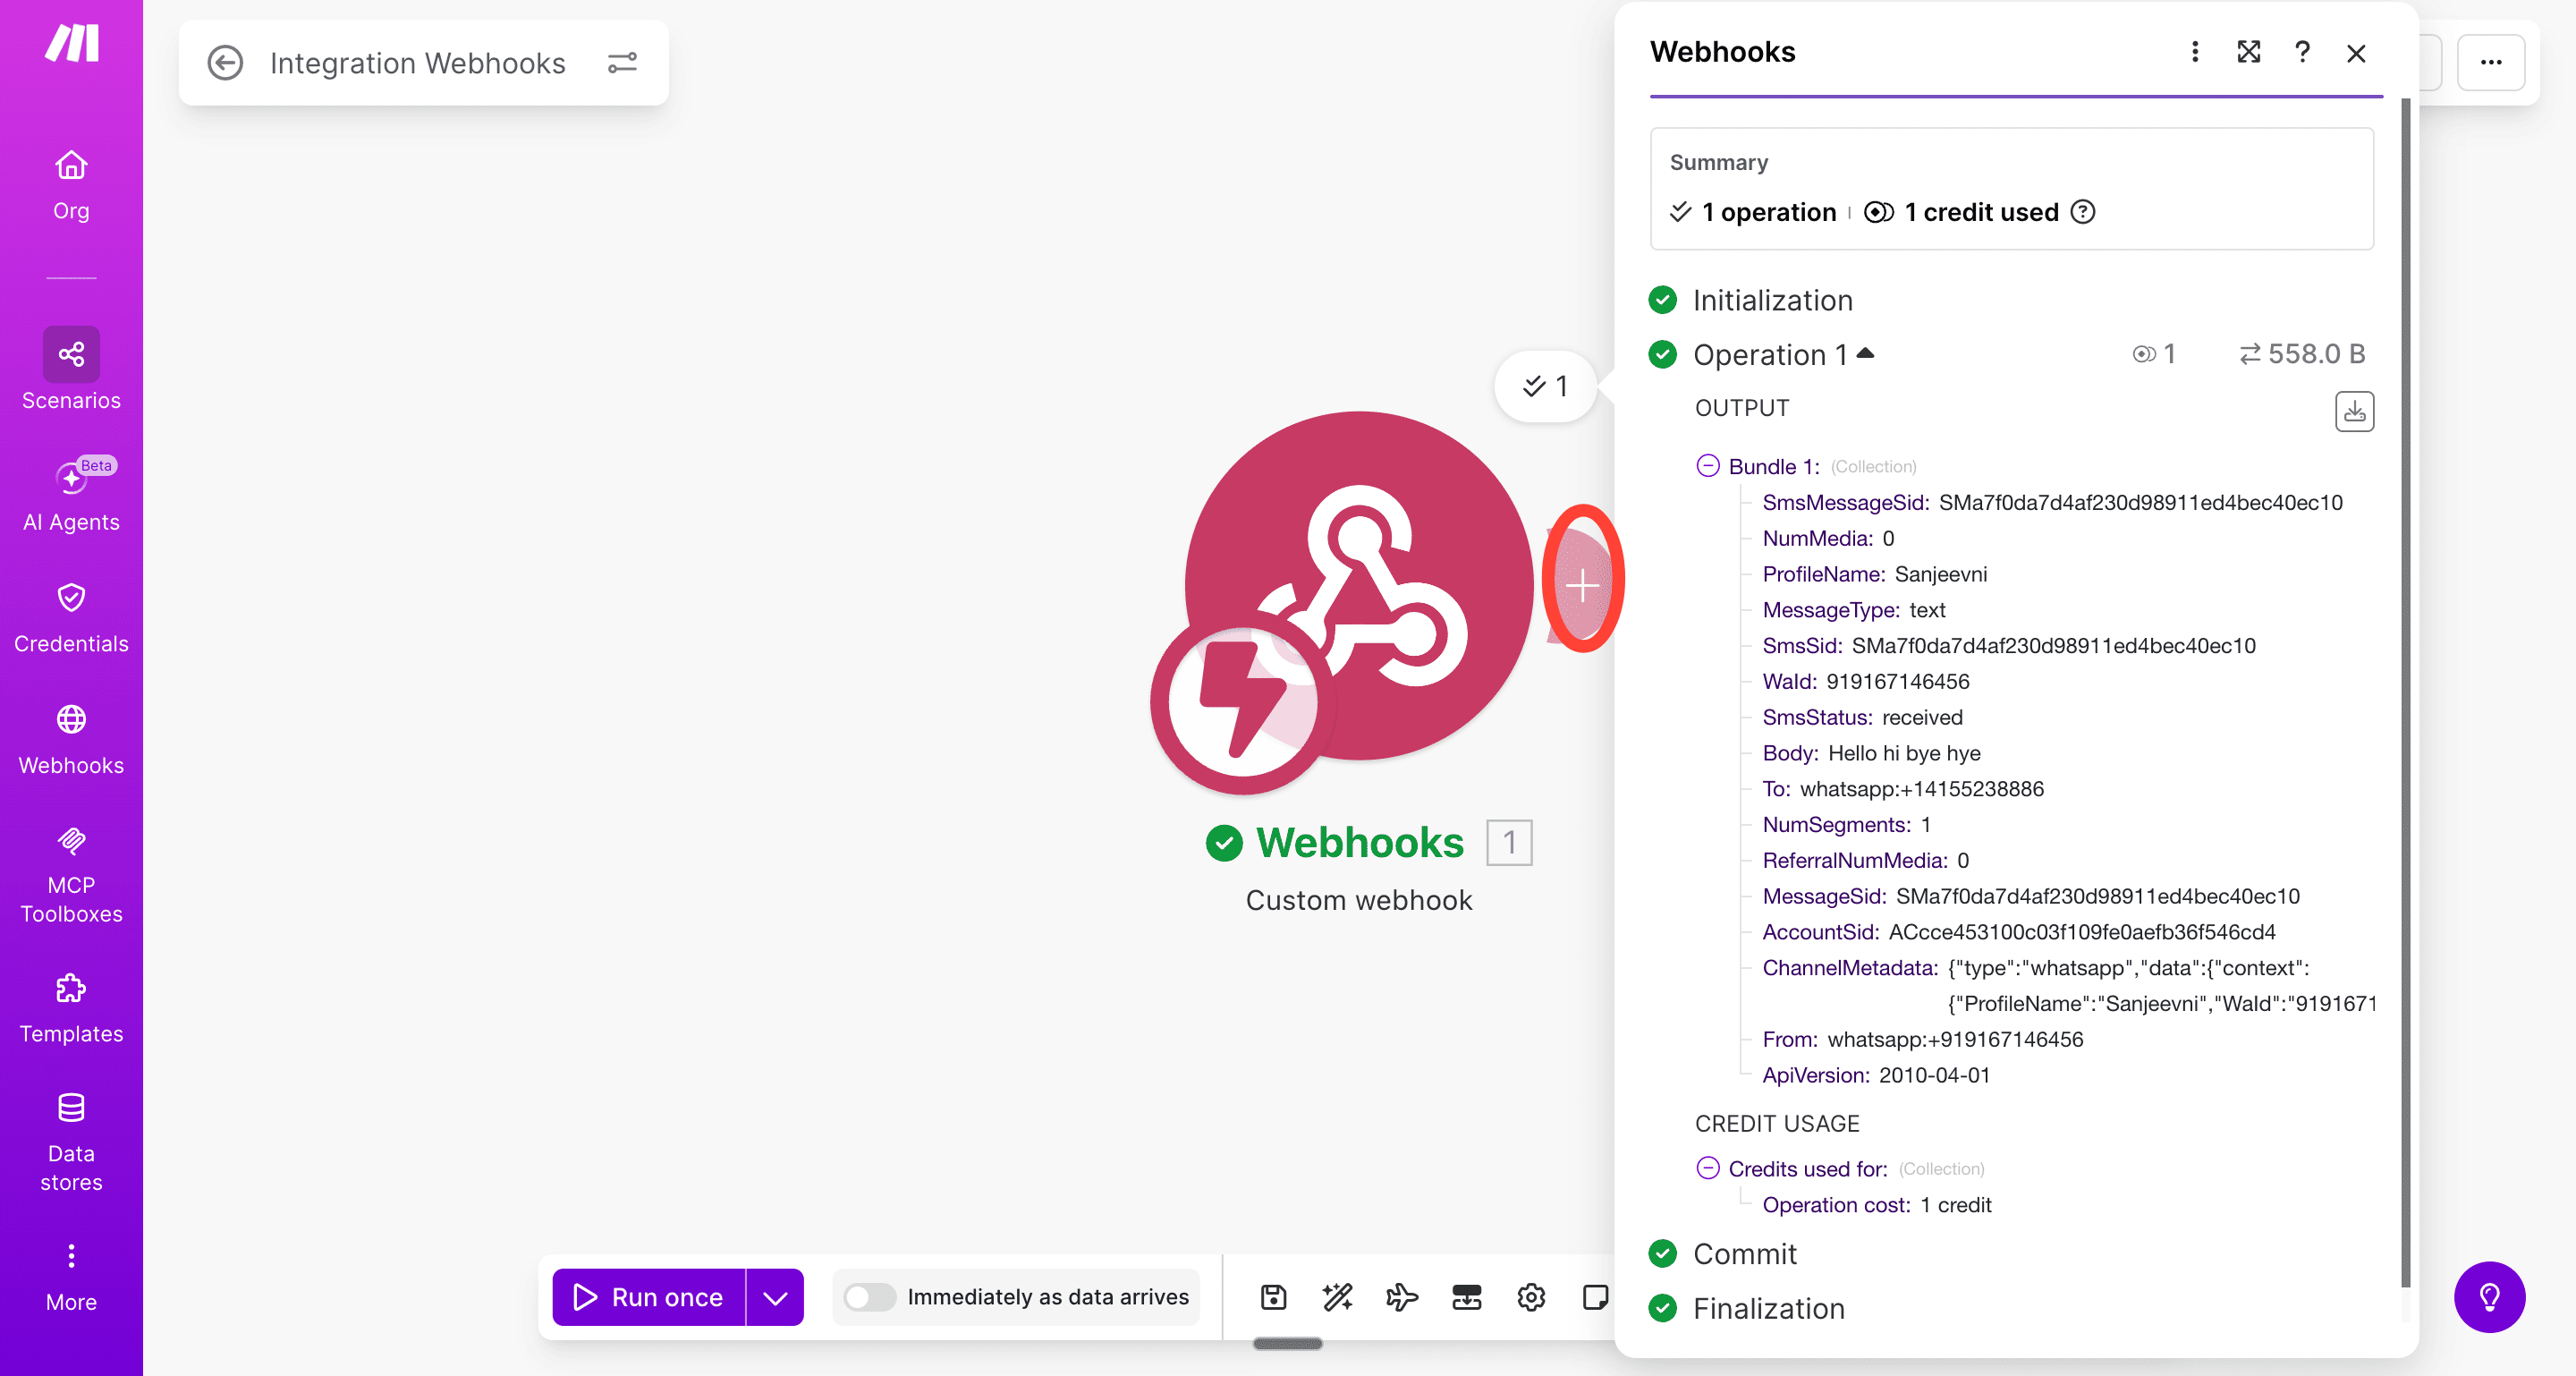
Why do we need that? When Twilio receives a voice note, it does not send the audio file to Sarvam directly. Instead, it sends a URL pointing to where the audio file is stored on Twilio’s servers, which Sarvam cannot access. So, we’ll add a “get a file module” to the automation before connecting it to Sarvam.
Click on the ‘+’ to the right of your Custom webhook.
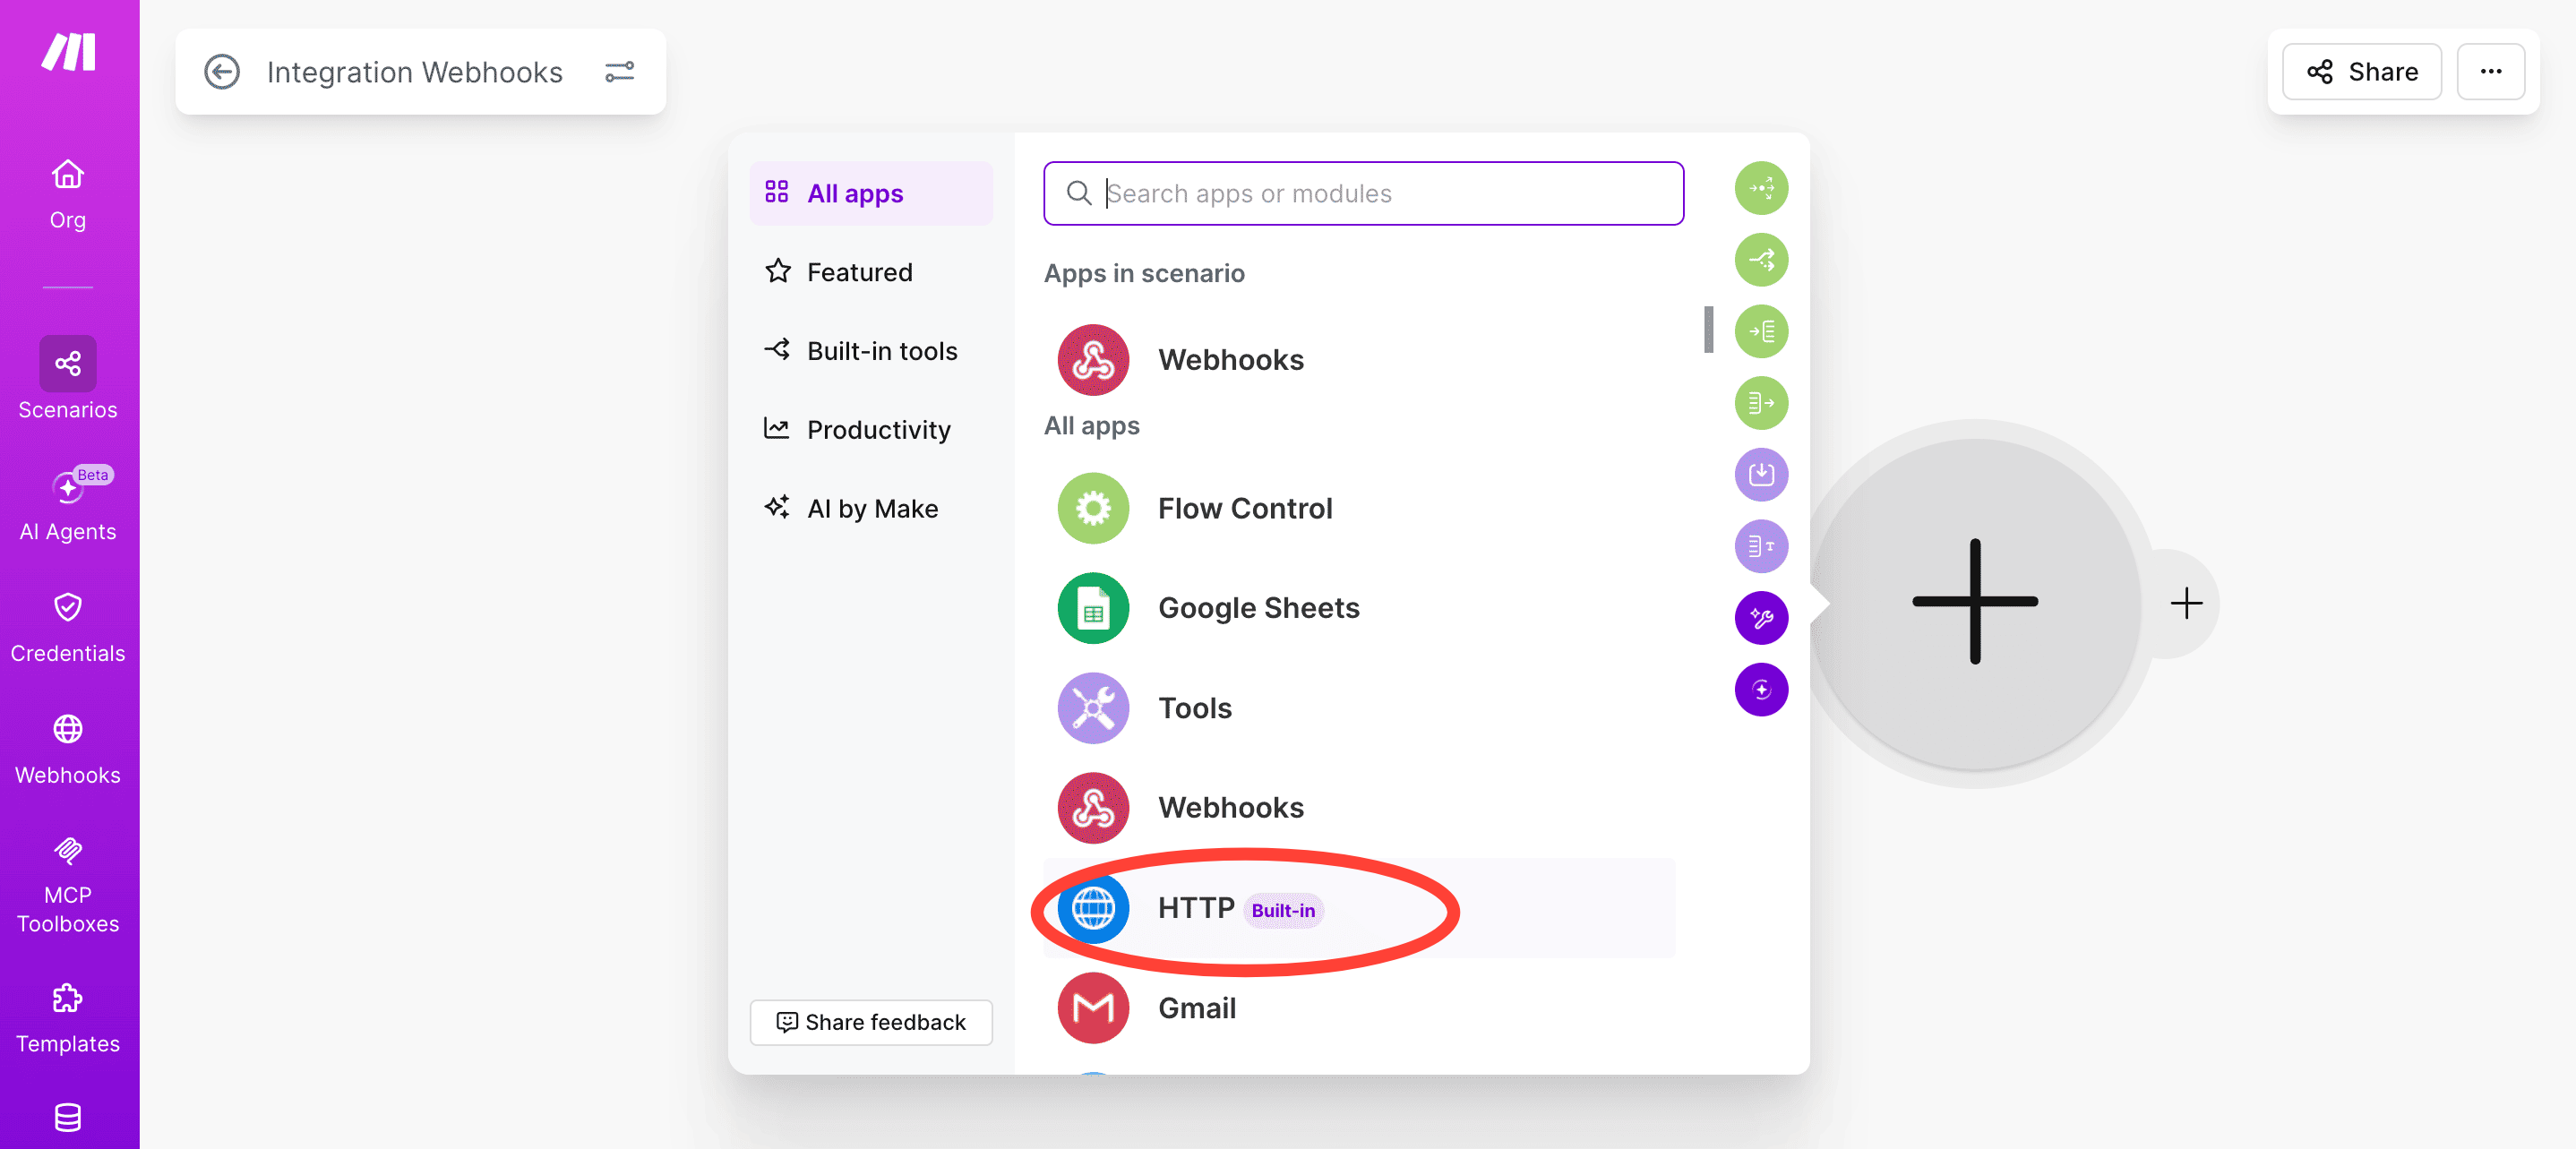
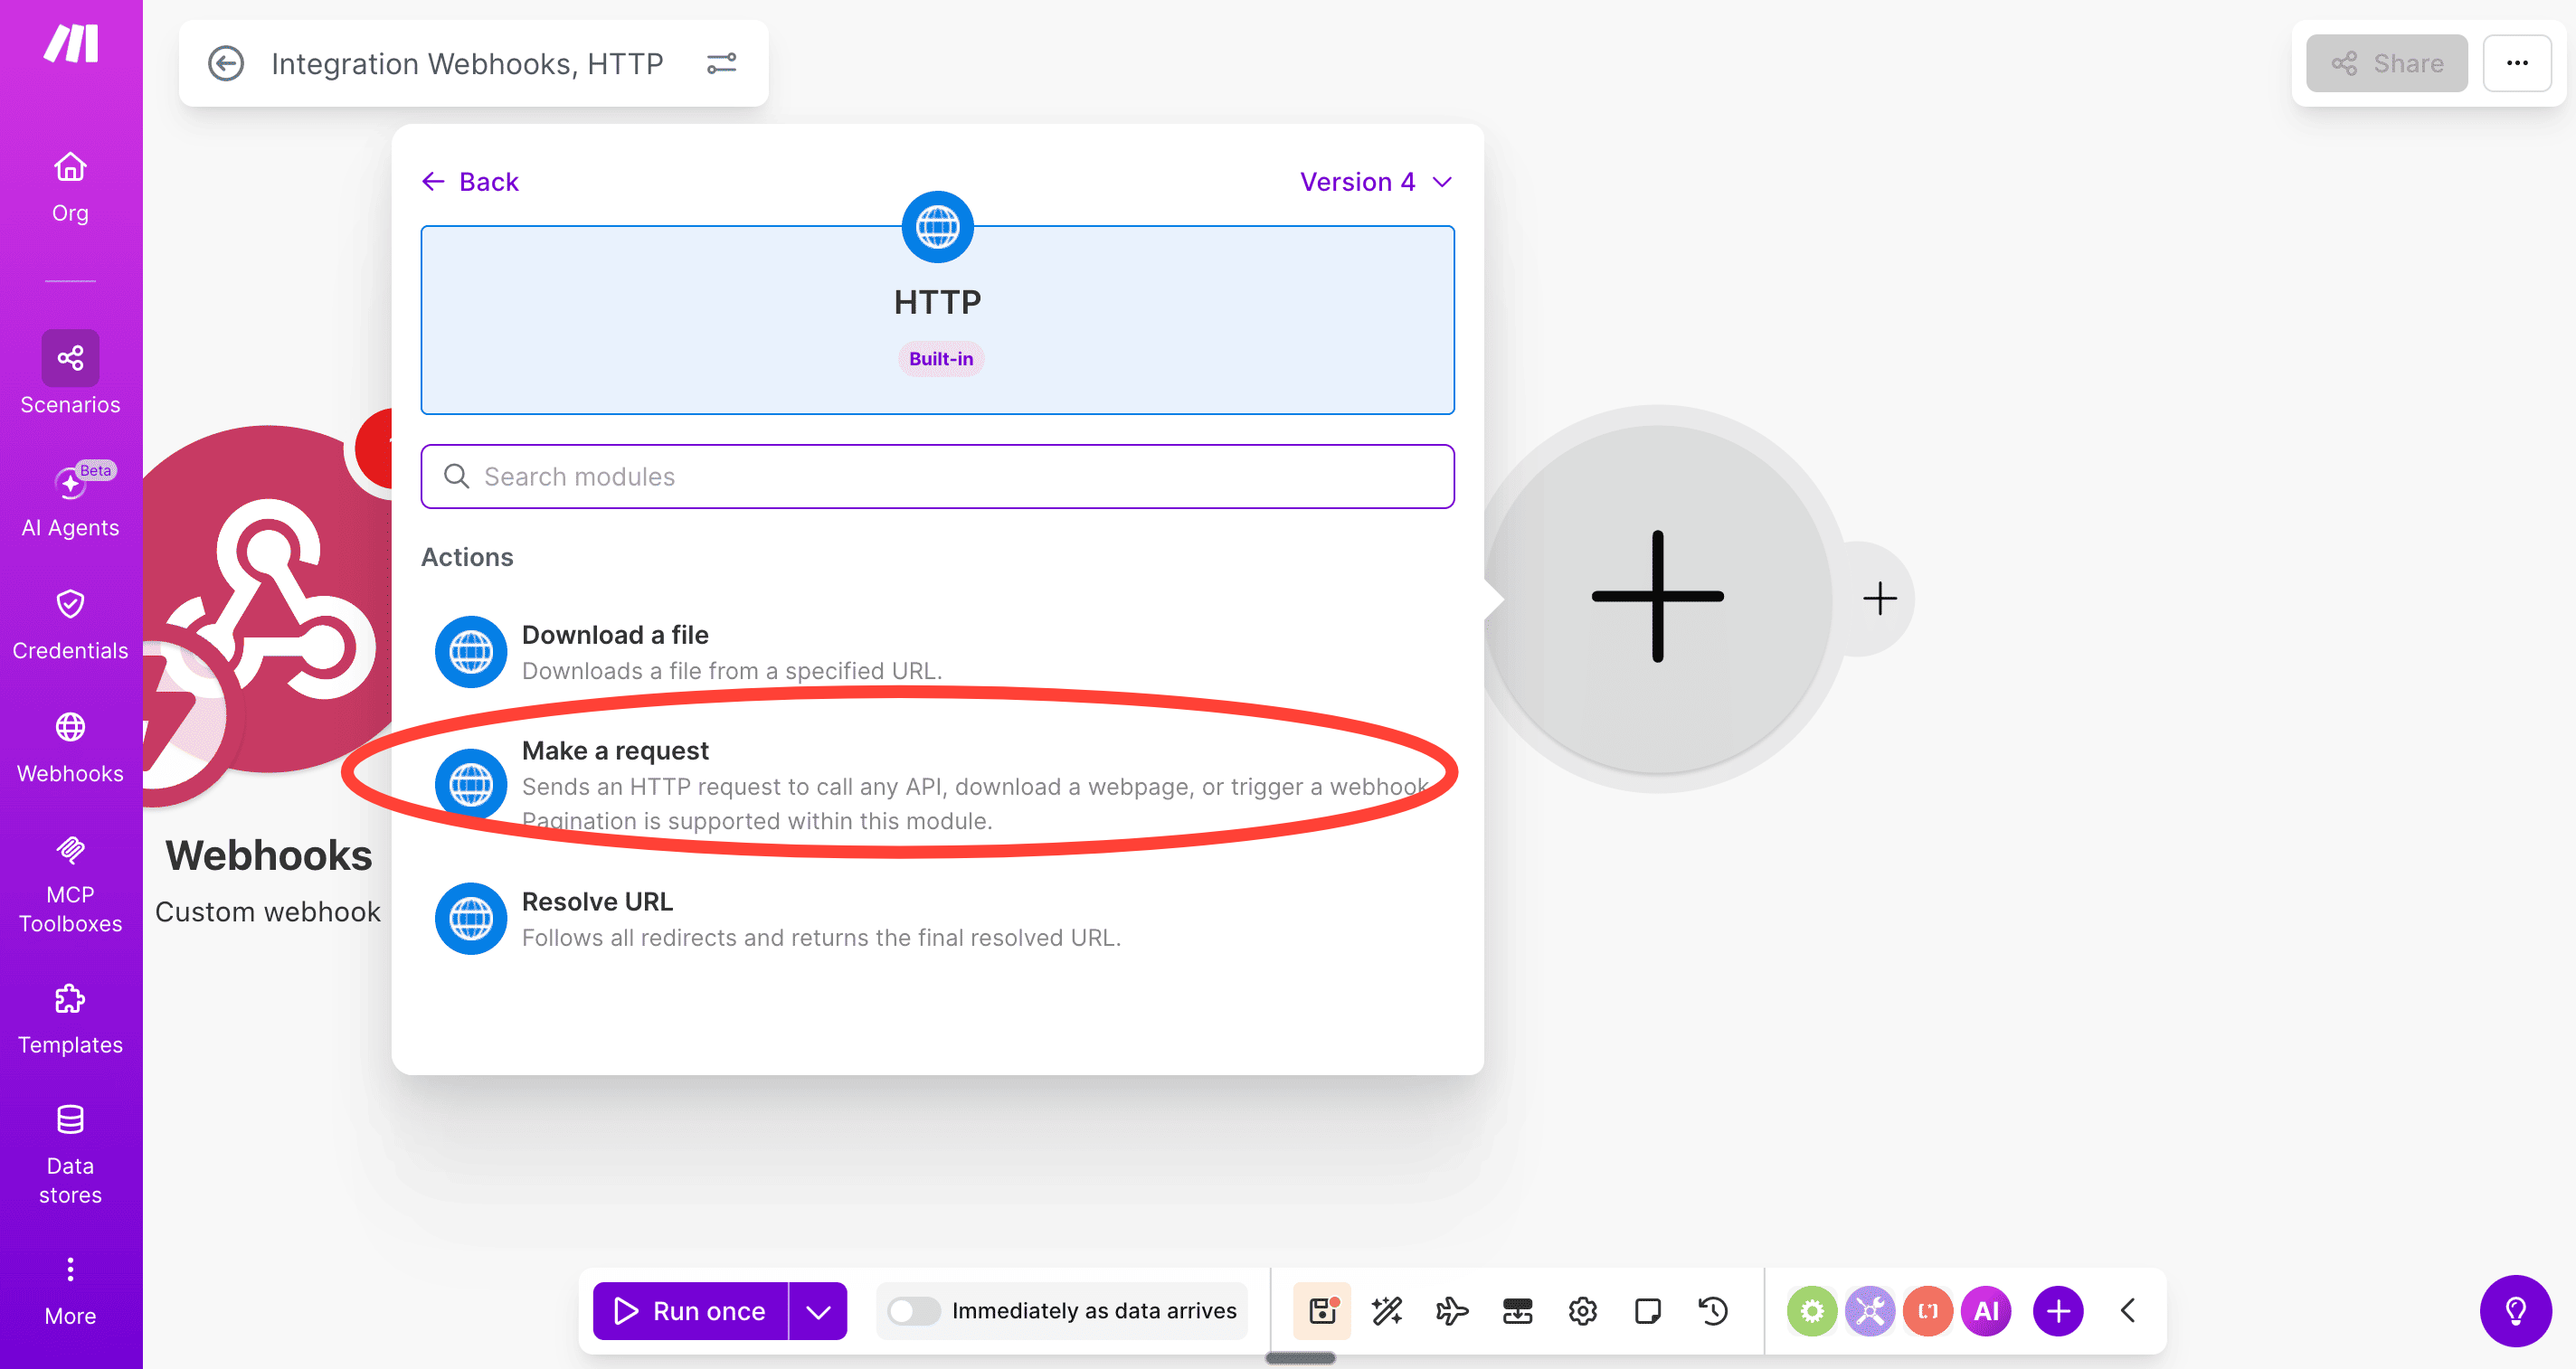
Now select the HTTP module.
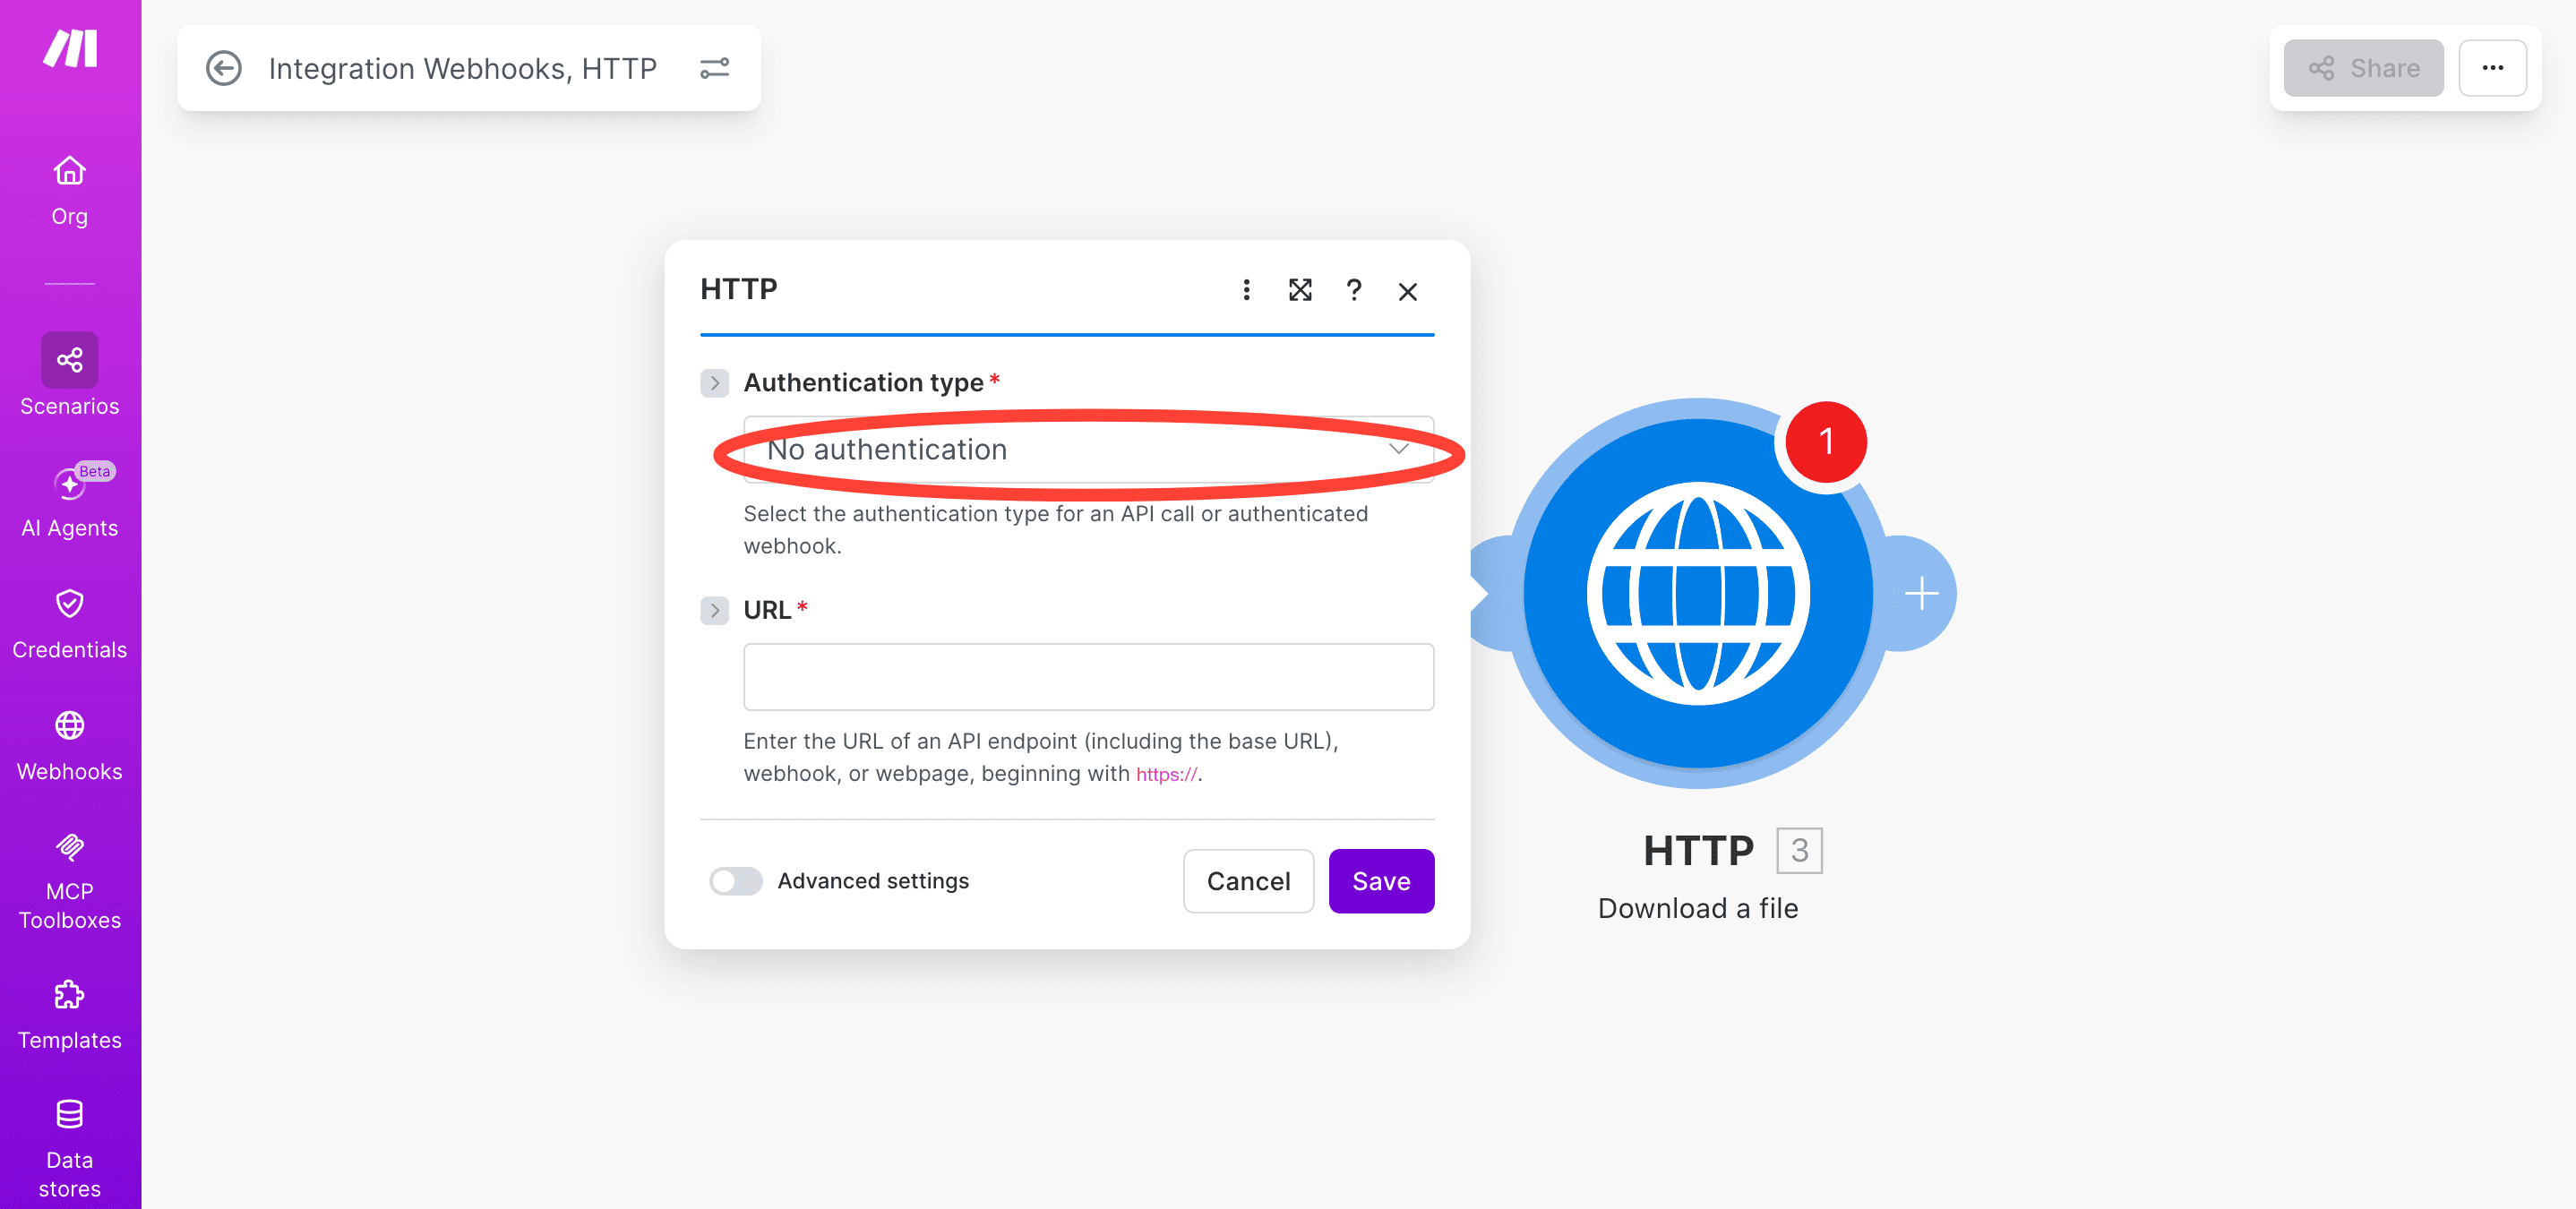
You should see a pop-up with HTTP options. Select Download a file.
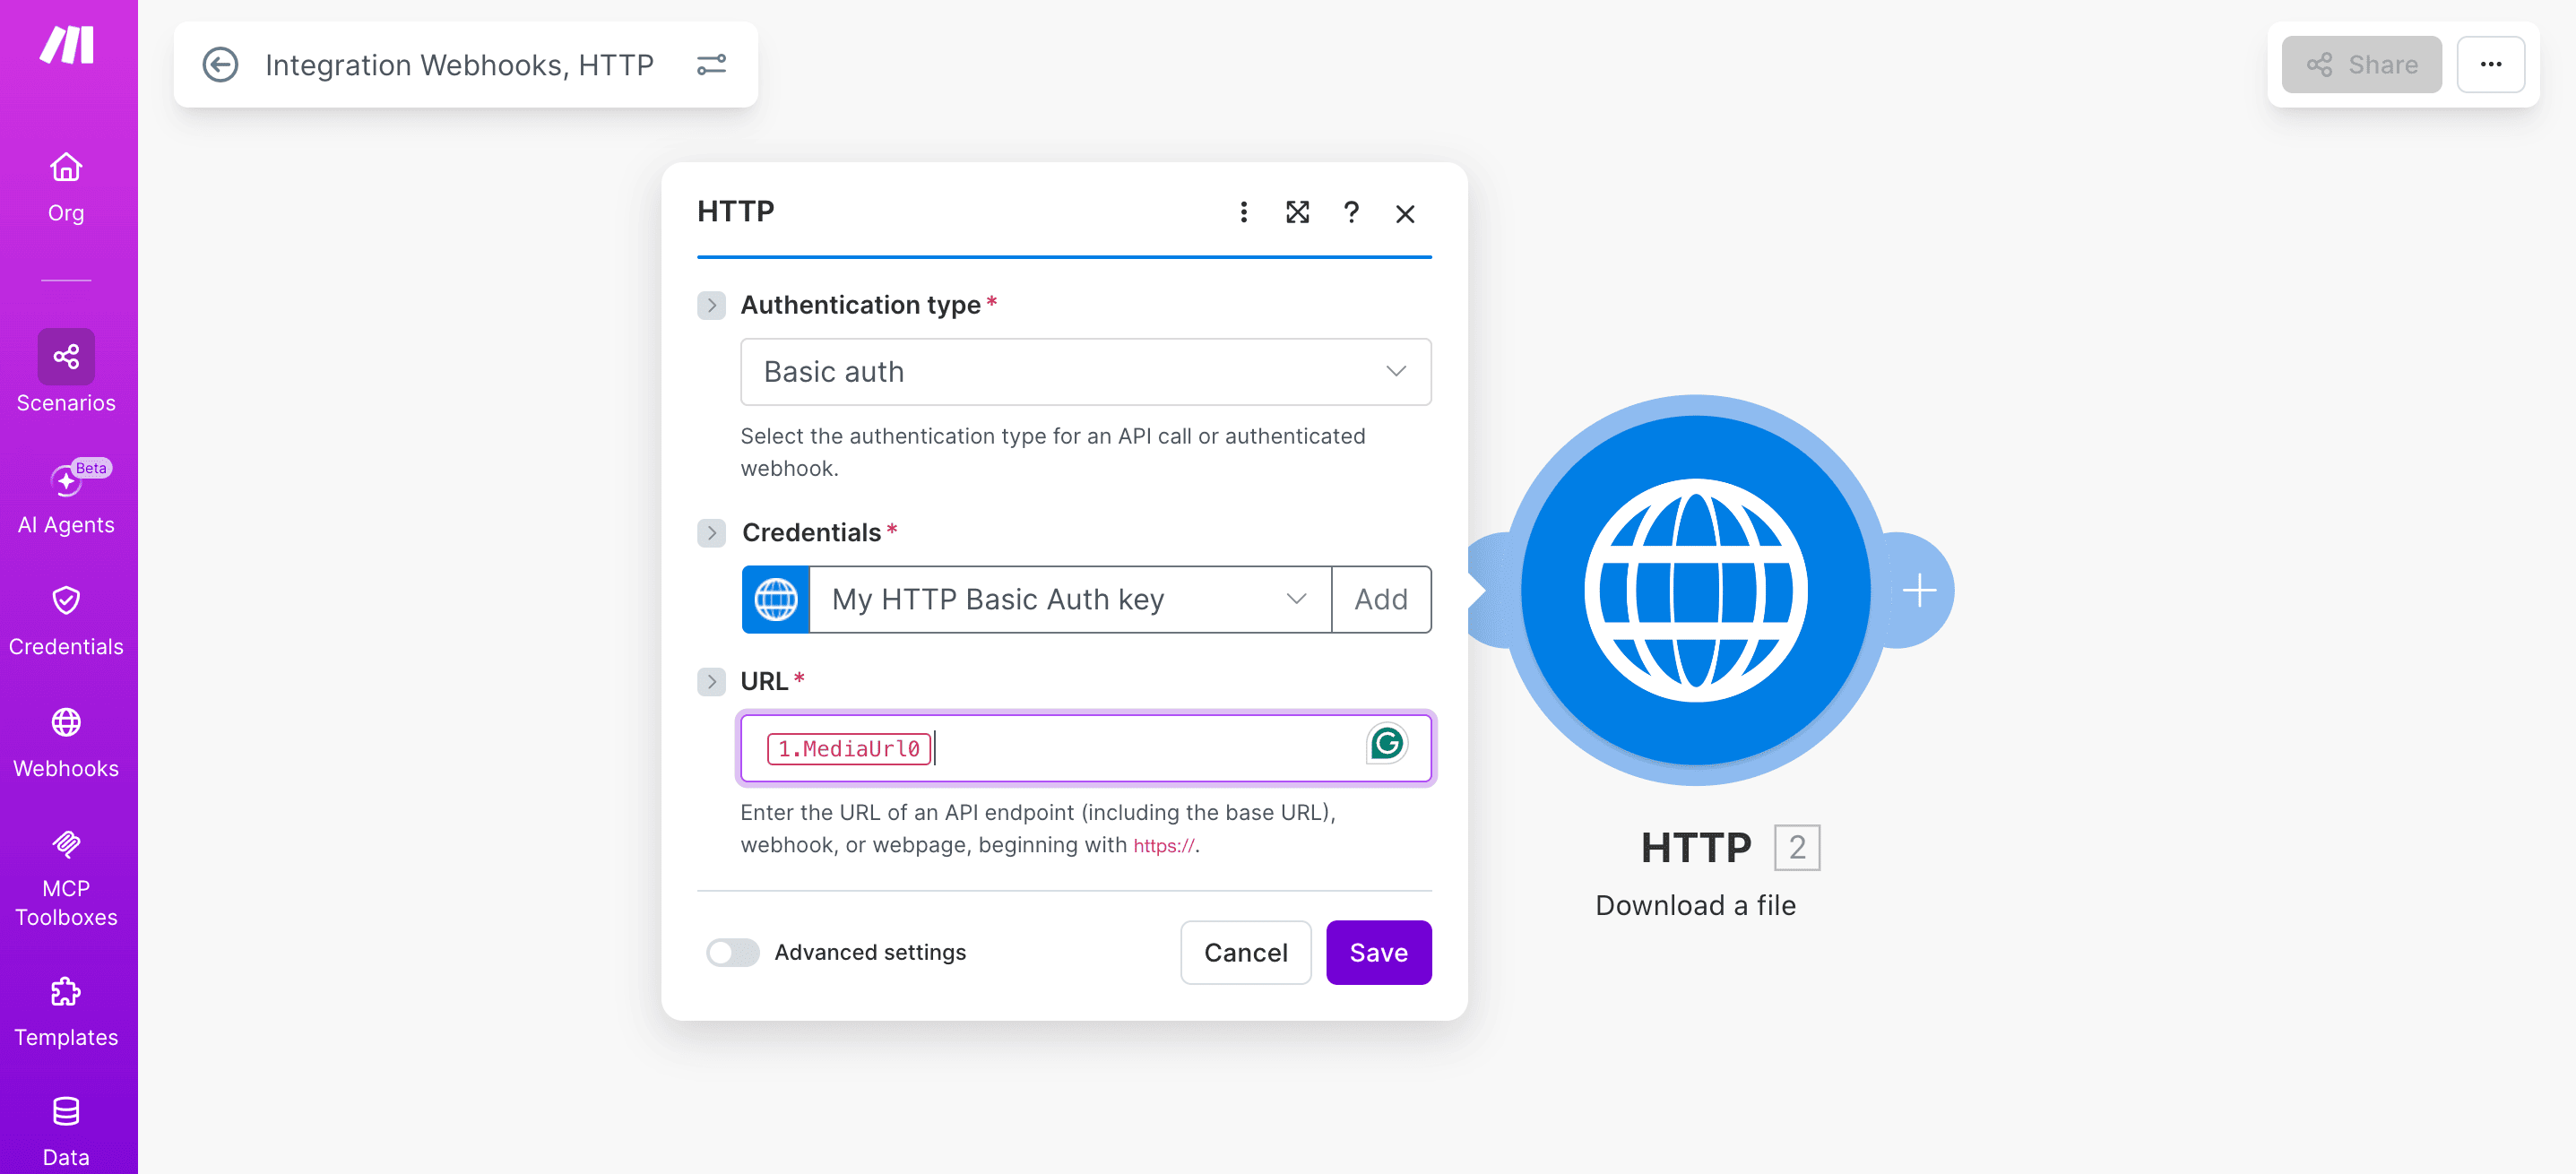
You should see a pop-up like this. Under Authentication type, select 'Basic Authentication’ from the dropdown.
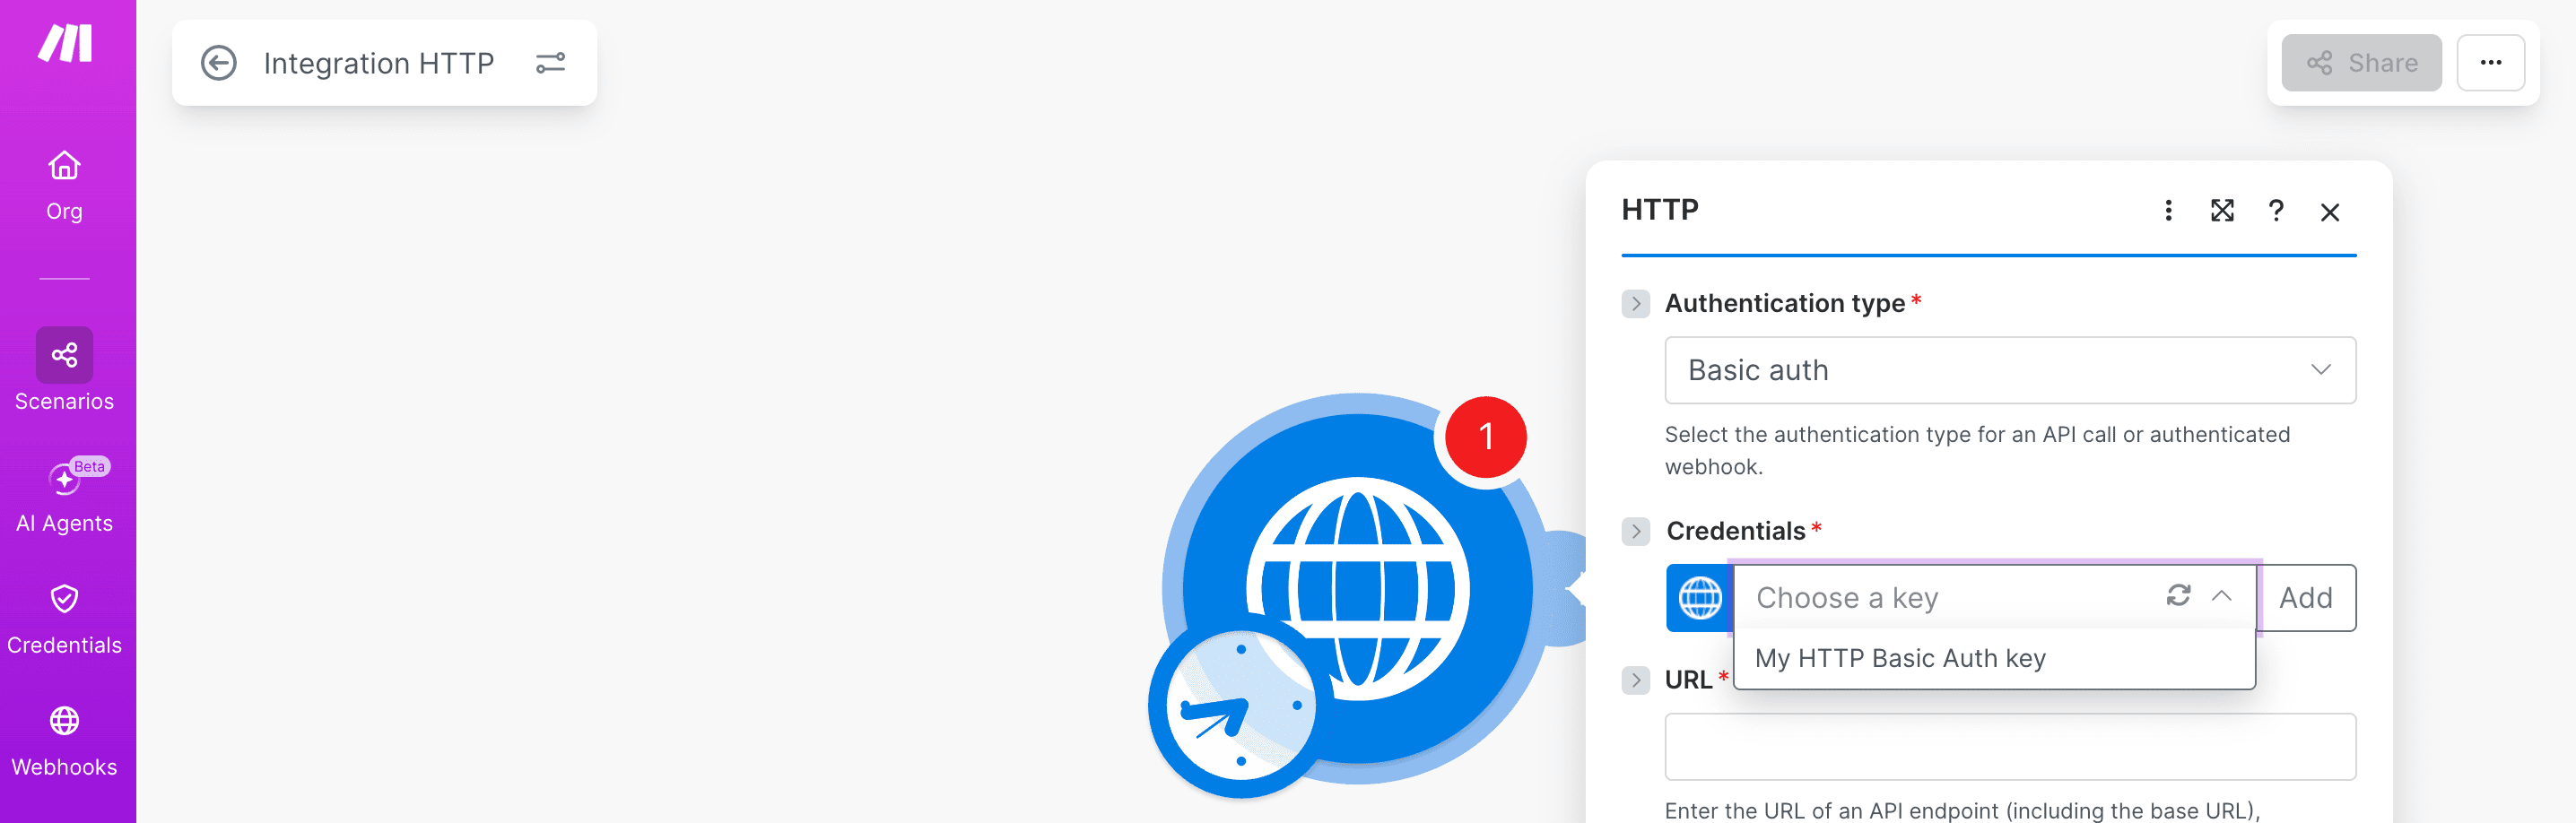
Now, go to Credentials and click on the input box. You should see “My HTTP Basic Auth Key”. Click on it and select Add.
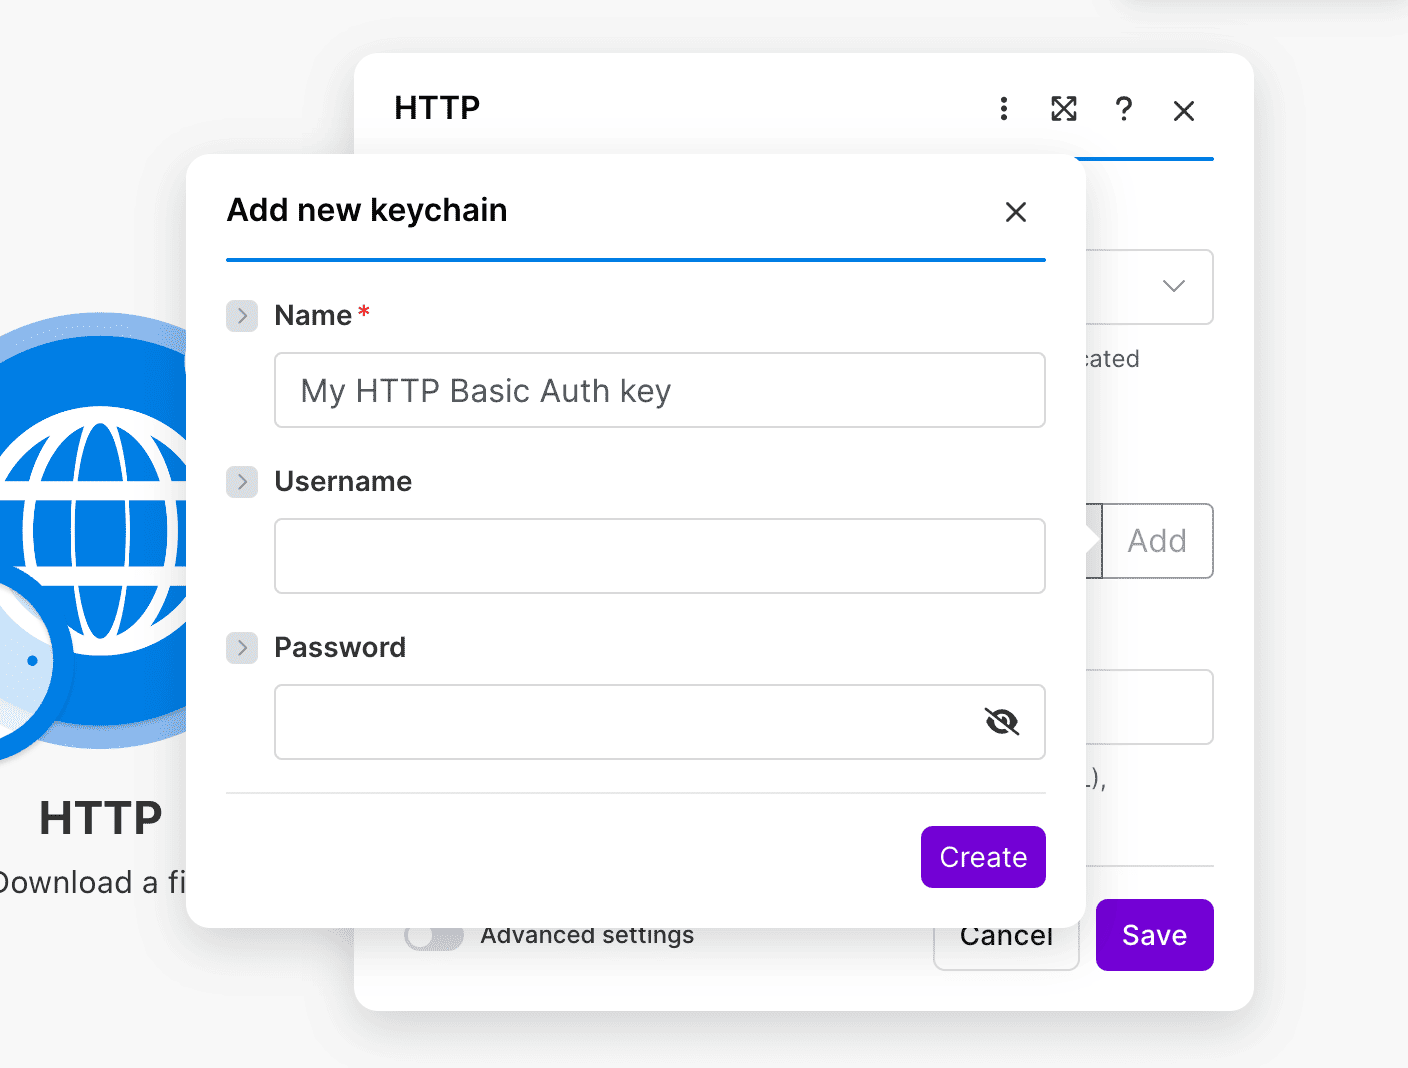
You should now see the “Add new keychain” pop-up box and input boxes for Username and Password.
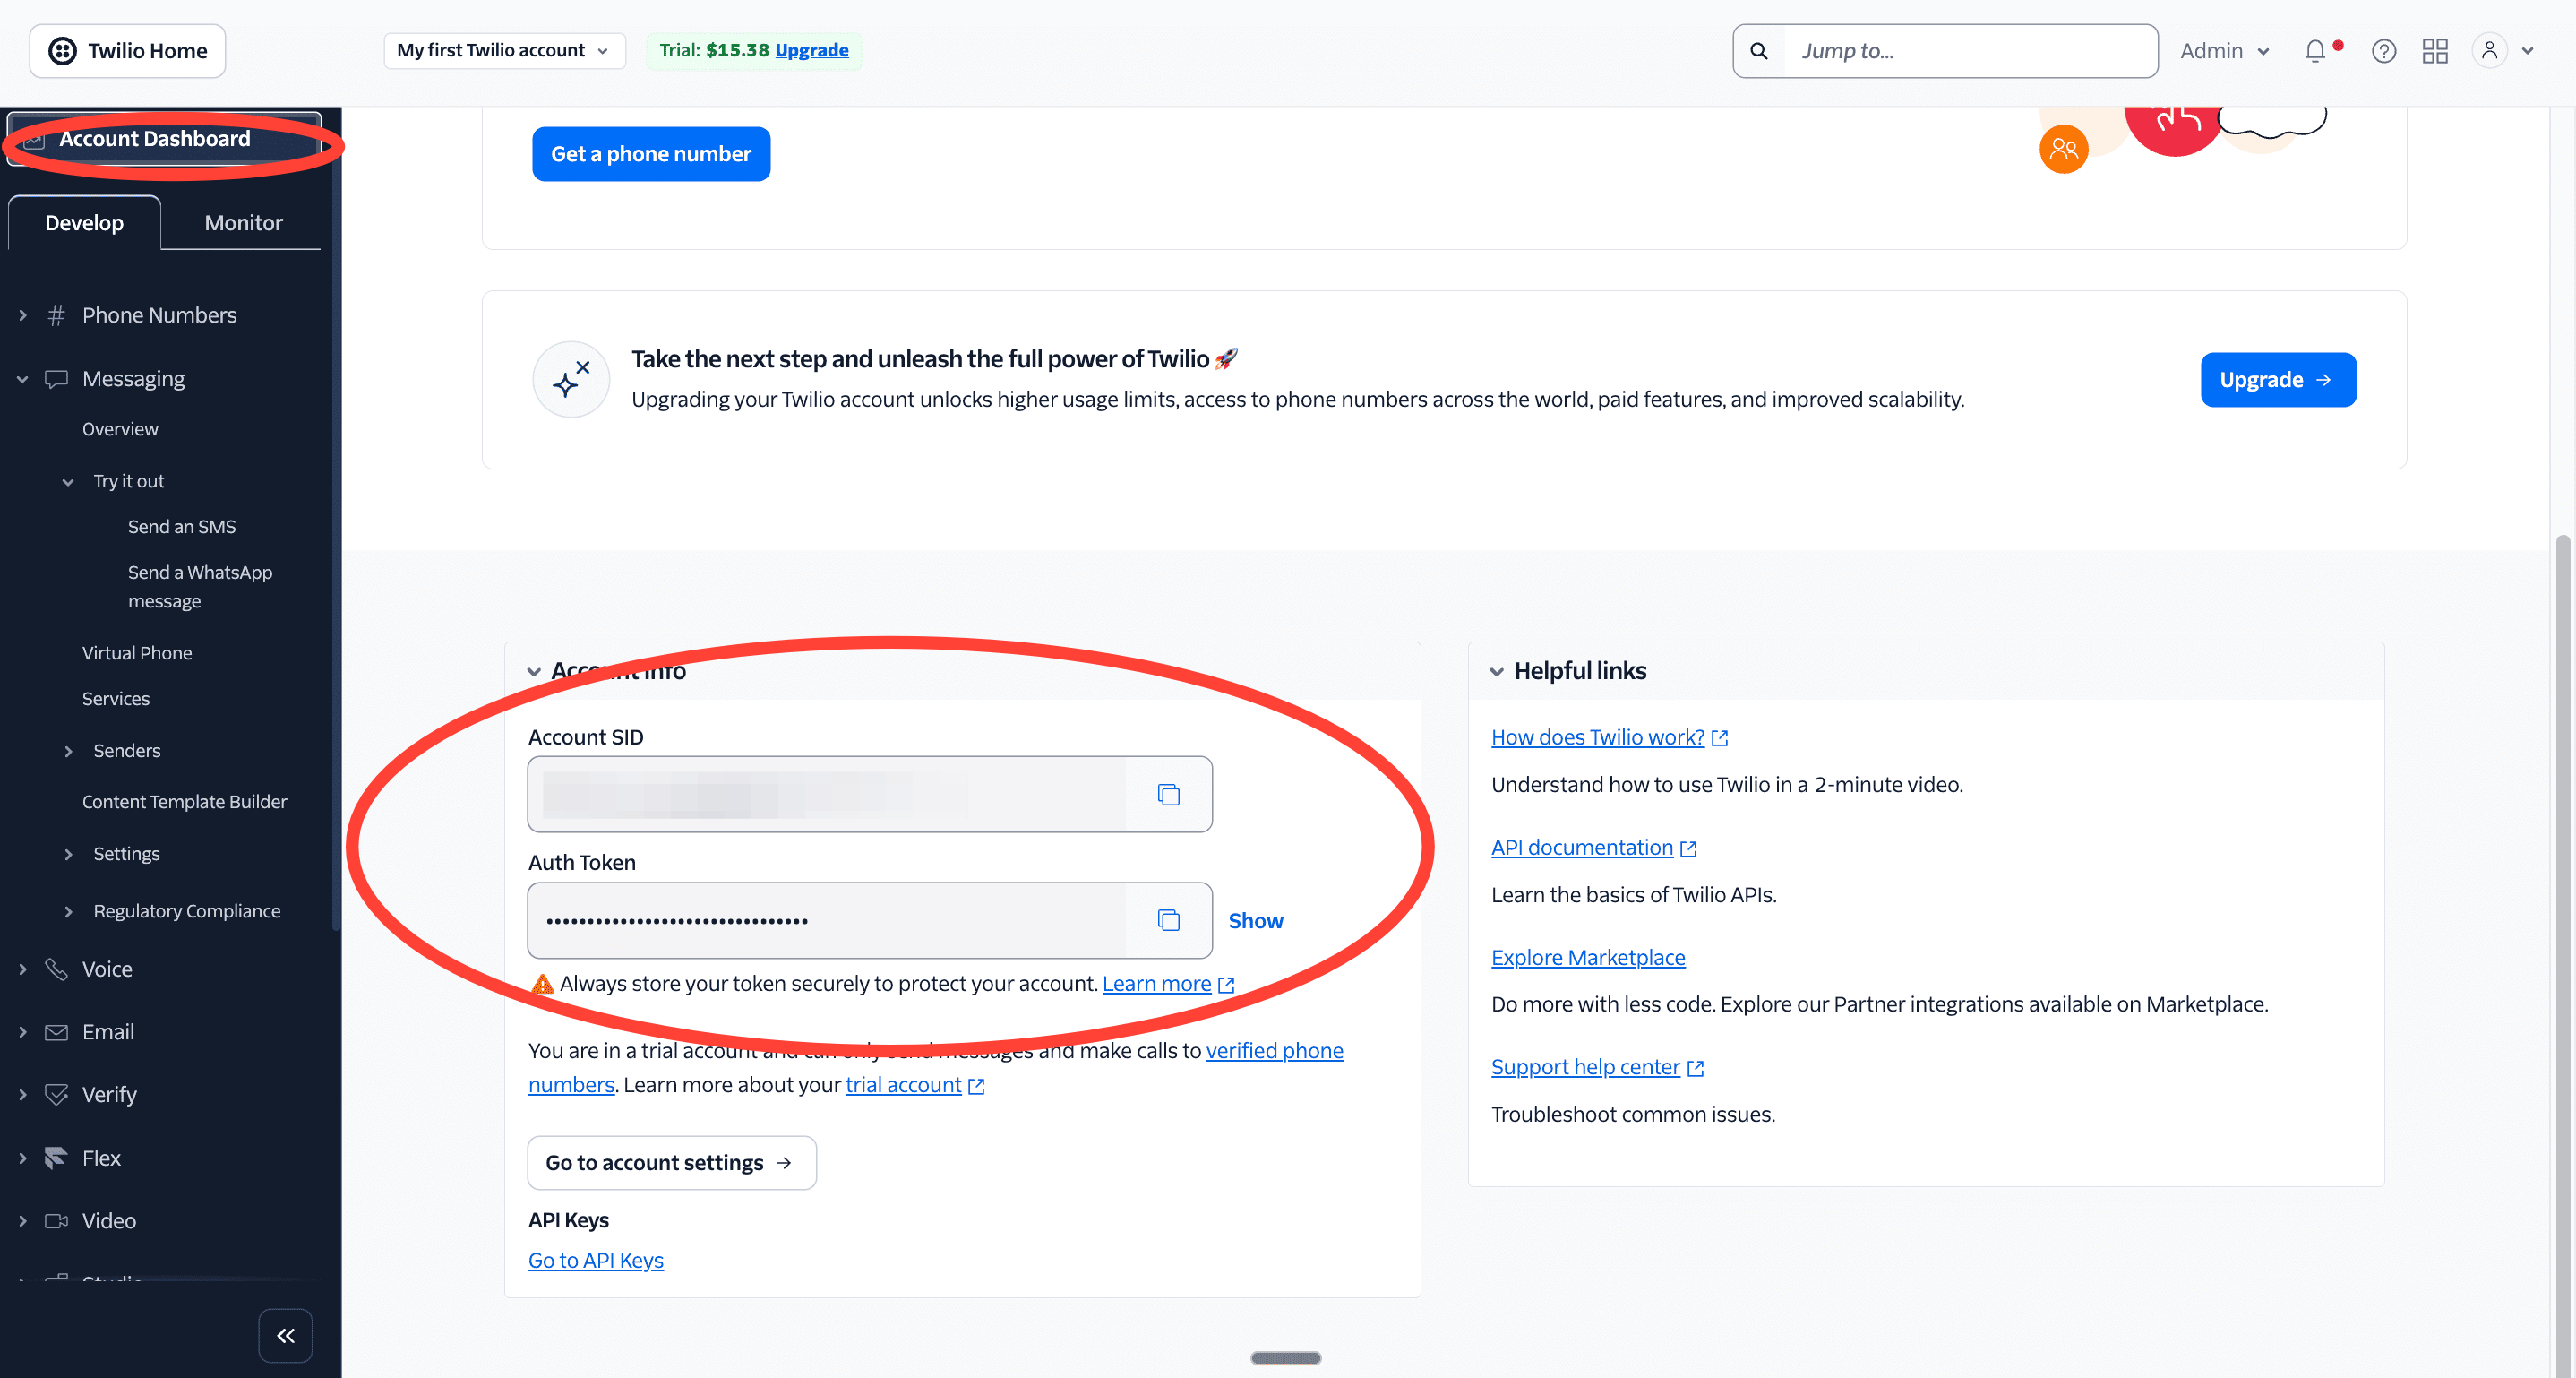
Now head over to the Twilio Console and click Account Dashboard. You should see the Account SID and Auth Token once you scroll down. Copy these details and paste them in the Username and Password input box in Make.
Now, in the URL input box, type in this exactly.
{{1.MediaUrl0}}
Setting up Sarvam API. Click the “+” on the canvas after the last HTTP block and search for “HTTP” and select “Make a request”.
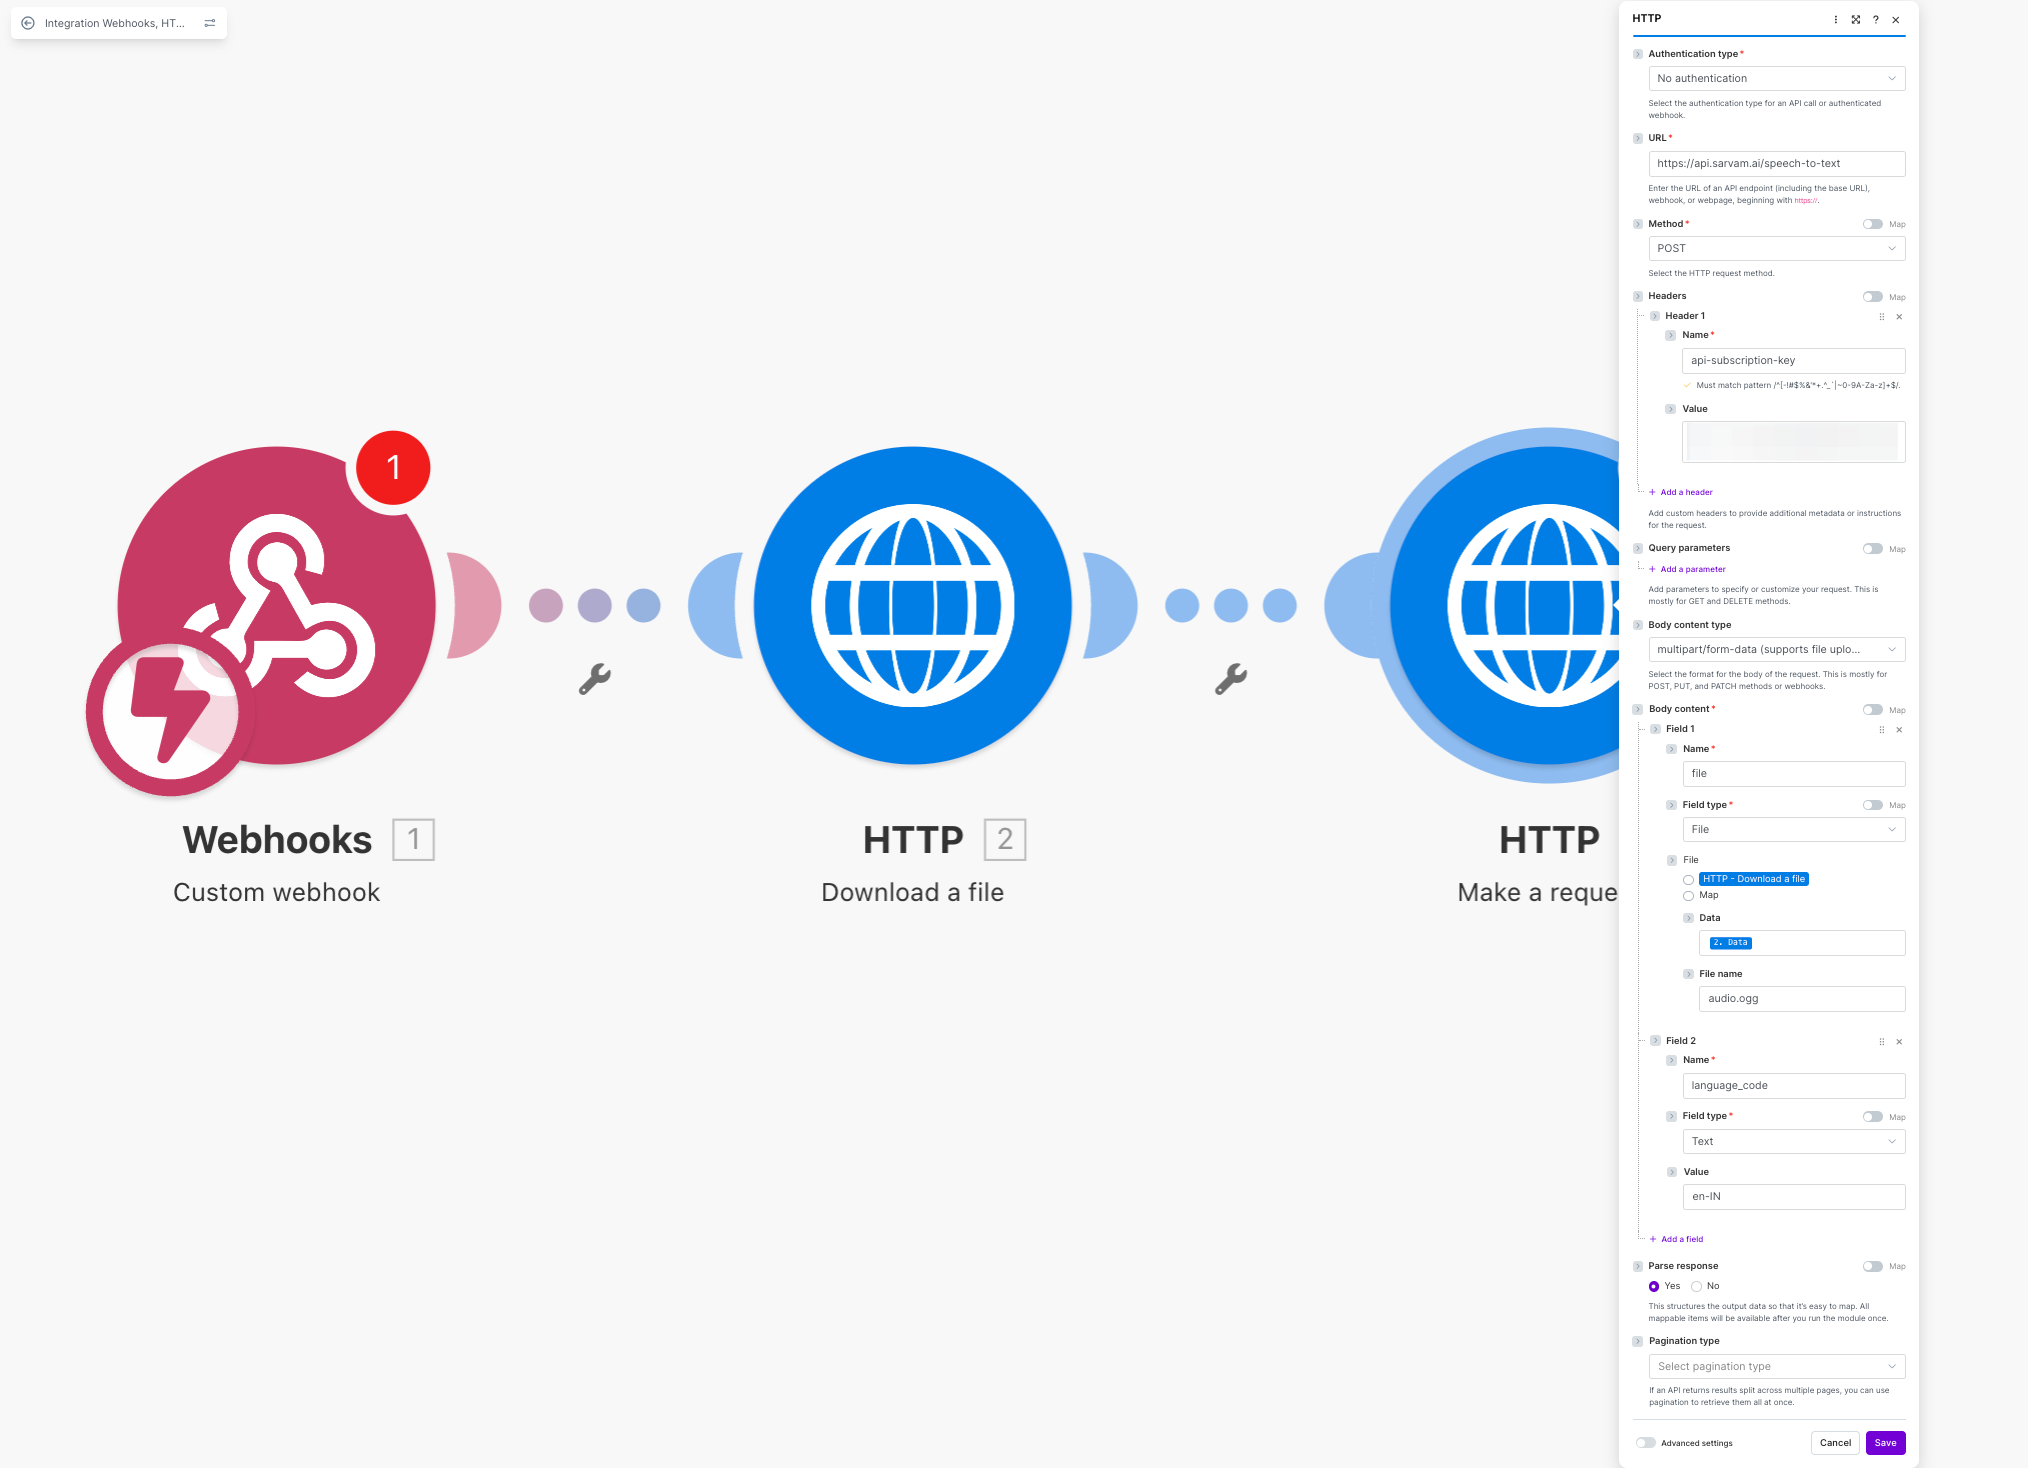
Then fill in these details. URL: https://api.sarvam.ai/speech-to-text Method: POST Authentication type: No authentication Headers — click Add a header:
Name: api-subscription-key
Value: your Sarvam API key
Btw, if you’re a GrowthX member, you’ve got exclusive access to Sarvam’s models now. Head to Perks to claim ~$1,000 in Sarvam AI credits for free.
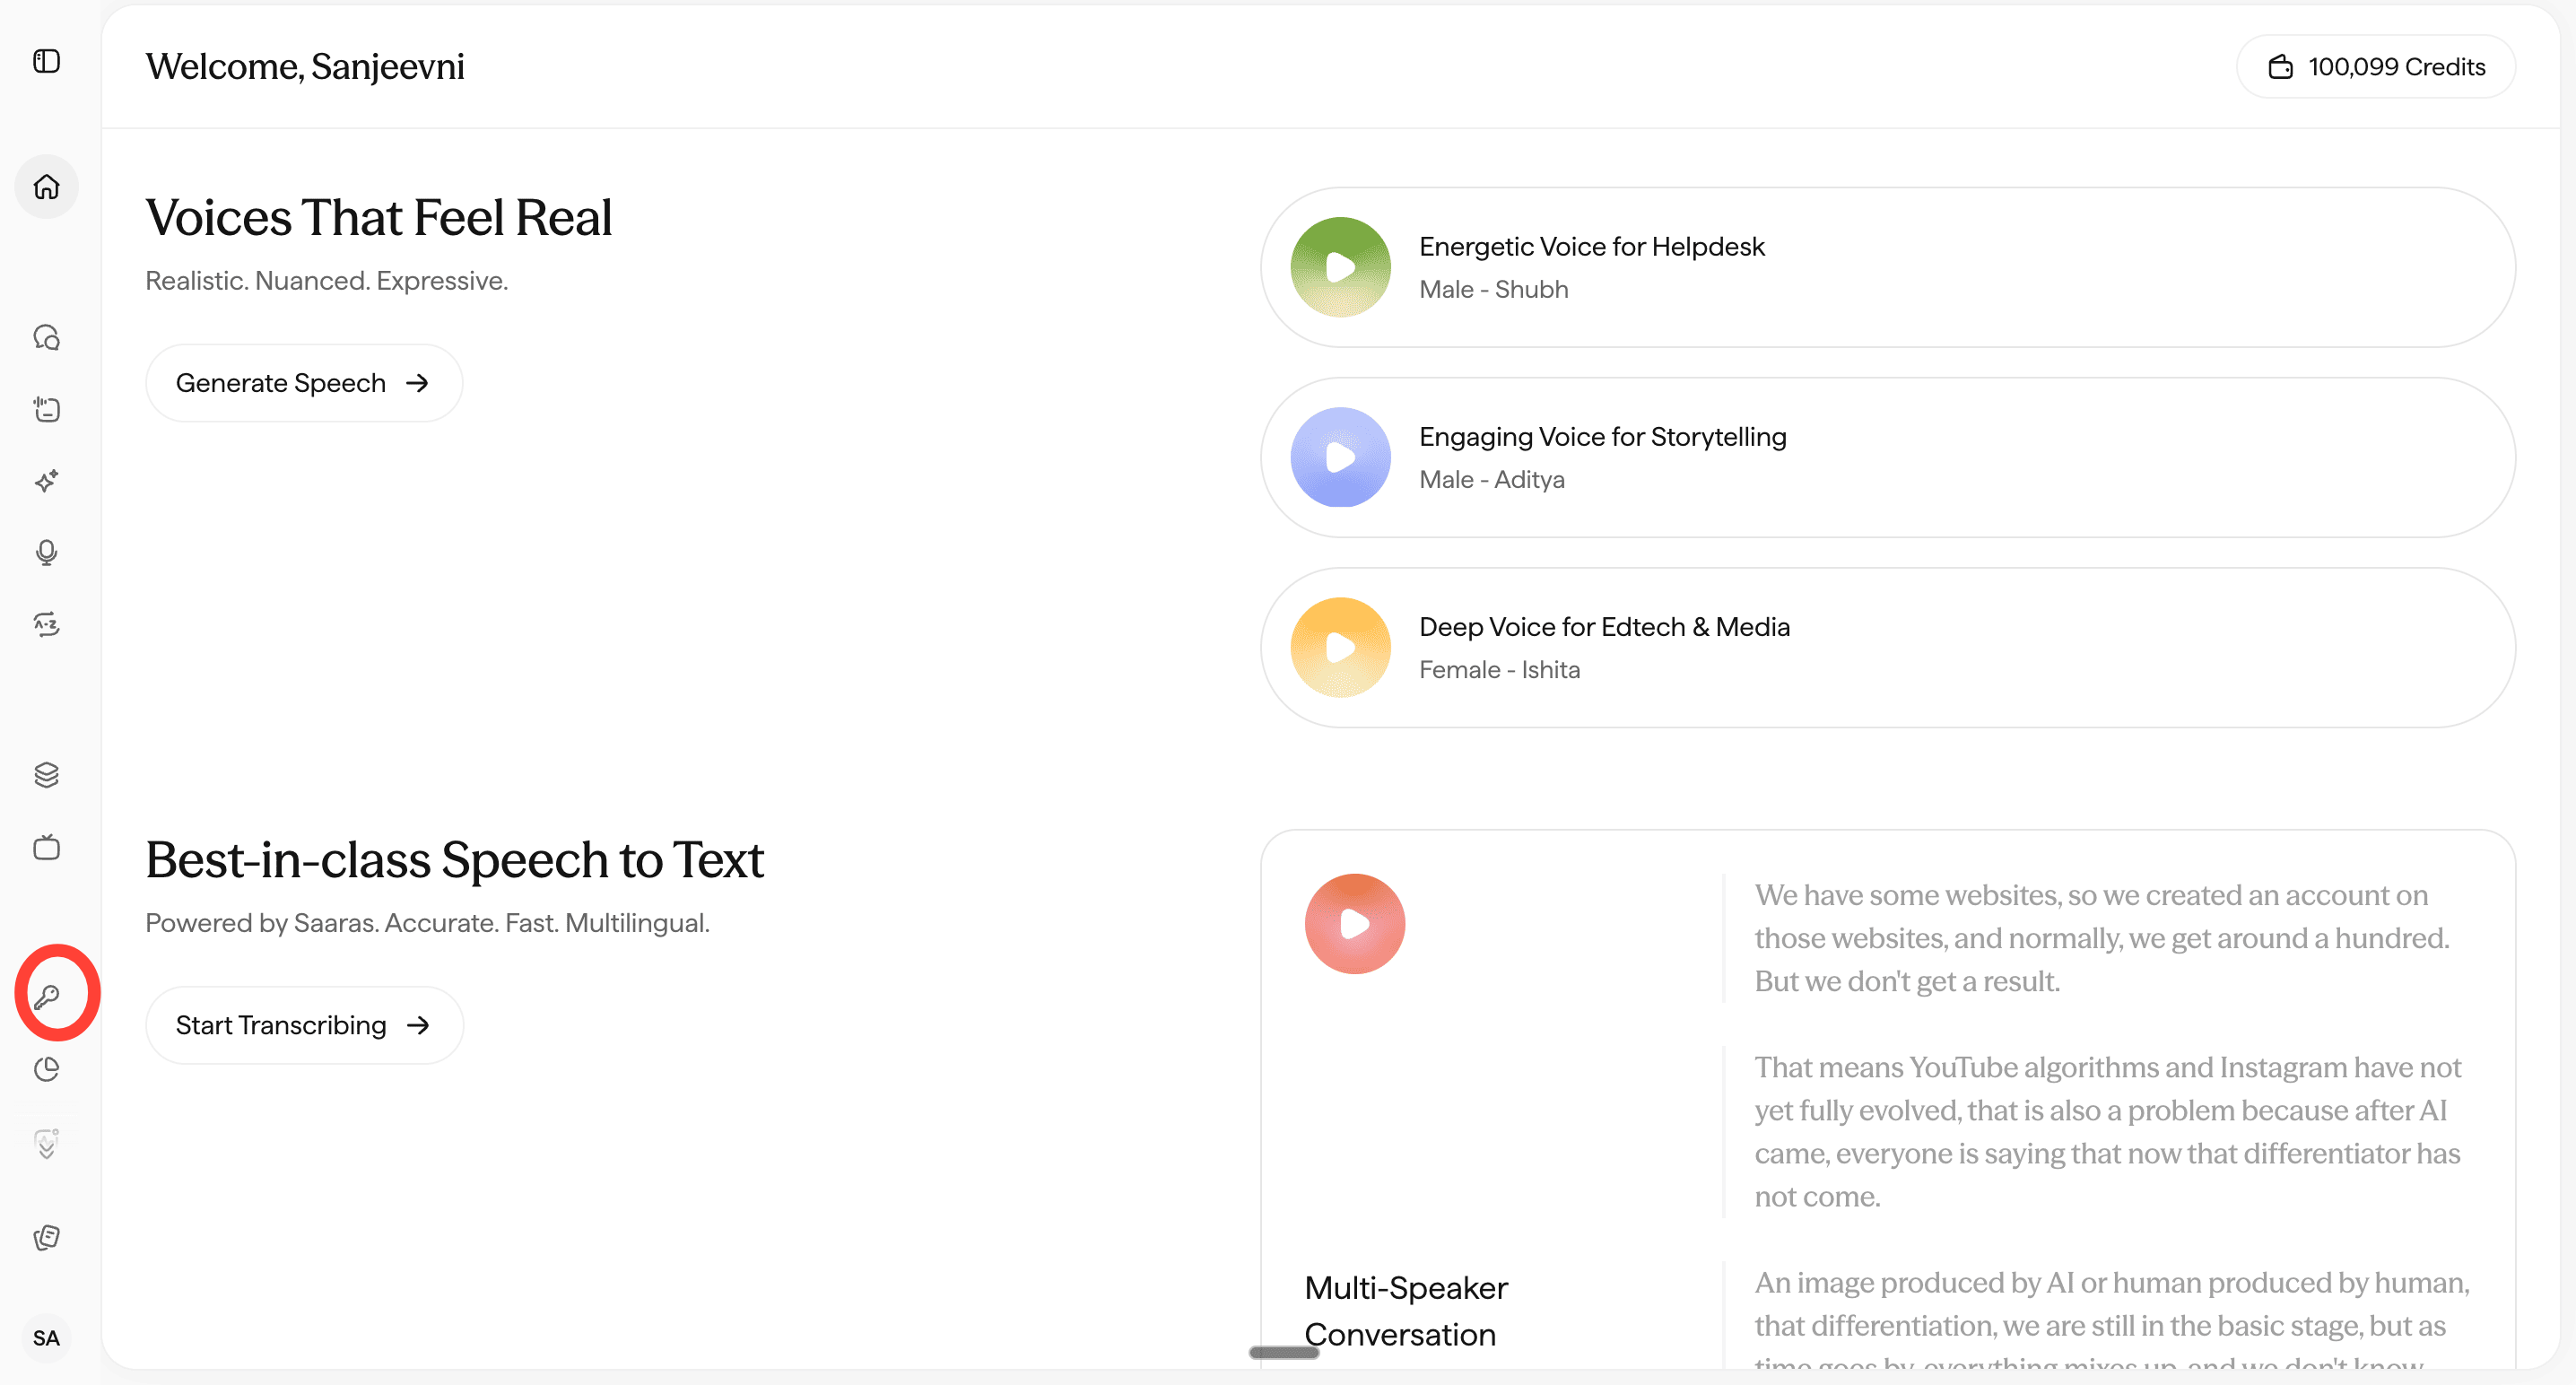
To get your API Key do this: Go to your Sarvam dashboard Click on the Key icon on the left.
Click on Create Key. Enter a name for your Key. Sarvam will generate a secret key for you. Copy this into your Make workflow now.
Body content type: multipart/form-data Field 1:
Name: file
Field type: File
Data: open the variable picker, find the Download block, select Data
File name: audio.ogg
Field 2:
Name: language_code
Value: en-IN
Field type: Text
Parse response: Yes Then click Save. Here’s what my entries look like at a glance.
Cleaning the transcript with Gemini Sarvam’s raw STT output is accurate but unformatted — no punctuation, no paragraph breaks, all lowercase. We added a Google Gemini 2.5 Flash step to clean this up into a readable transcript.
1. Click on the ‘+’ next to your Sarvam block on Make and find Google Gemini AI.
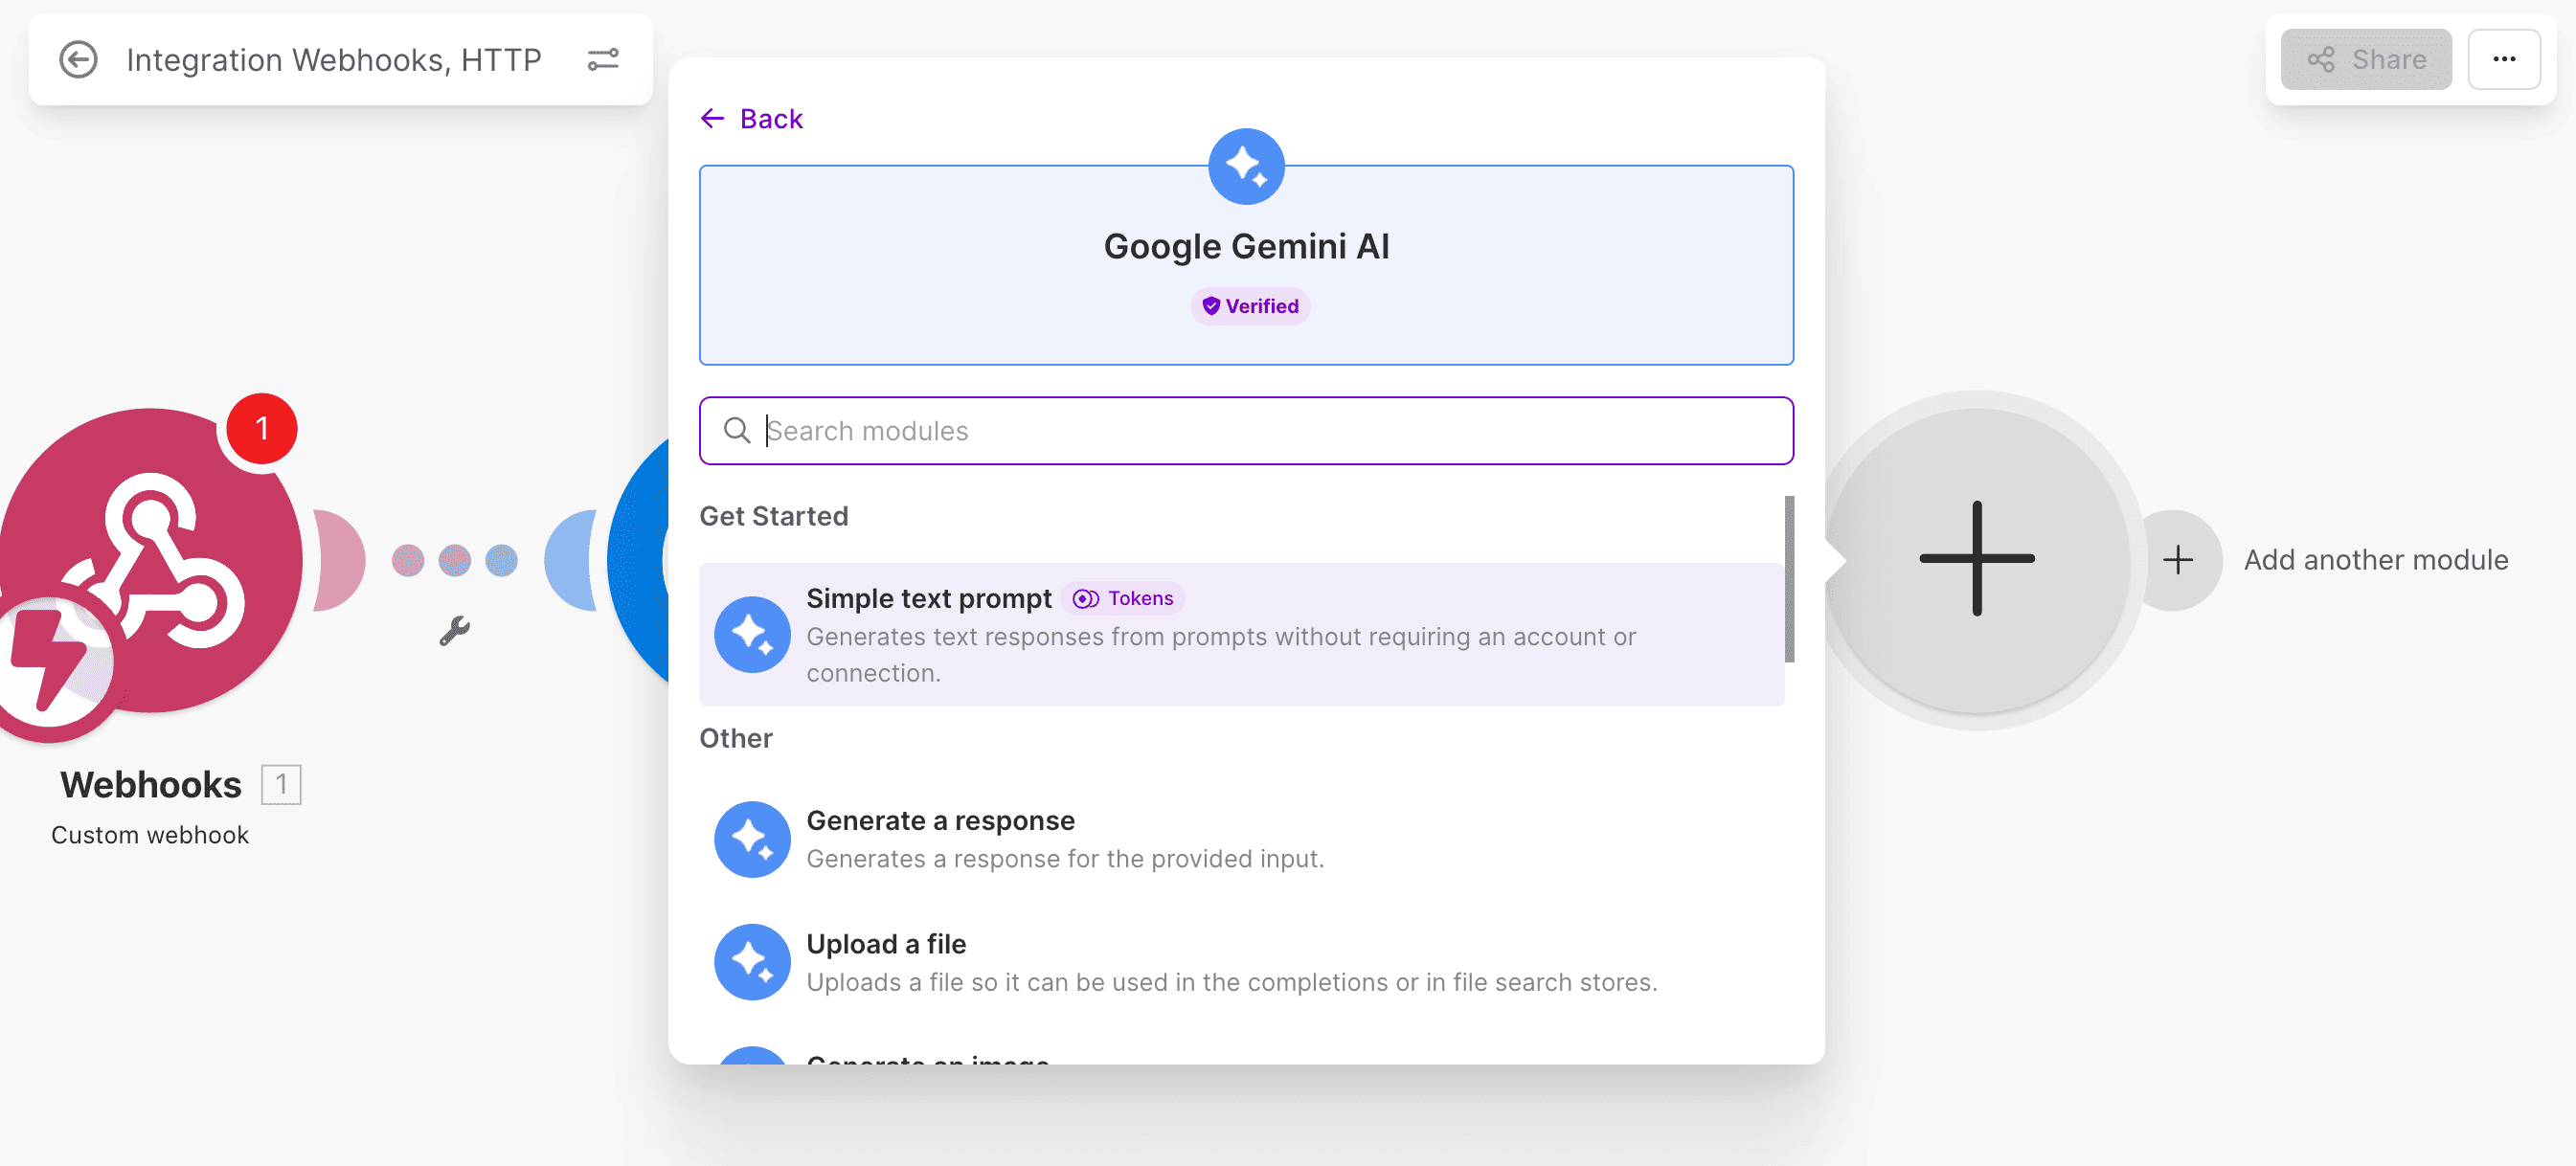
Now select Generate a response from the pop-up.
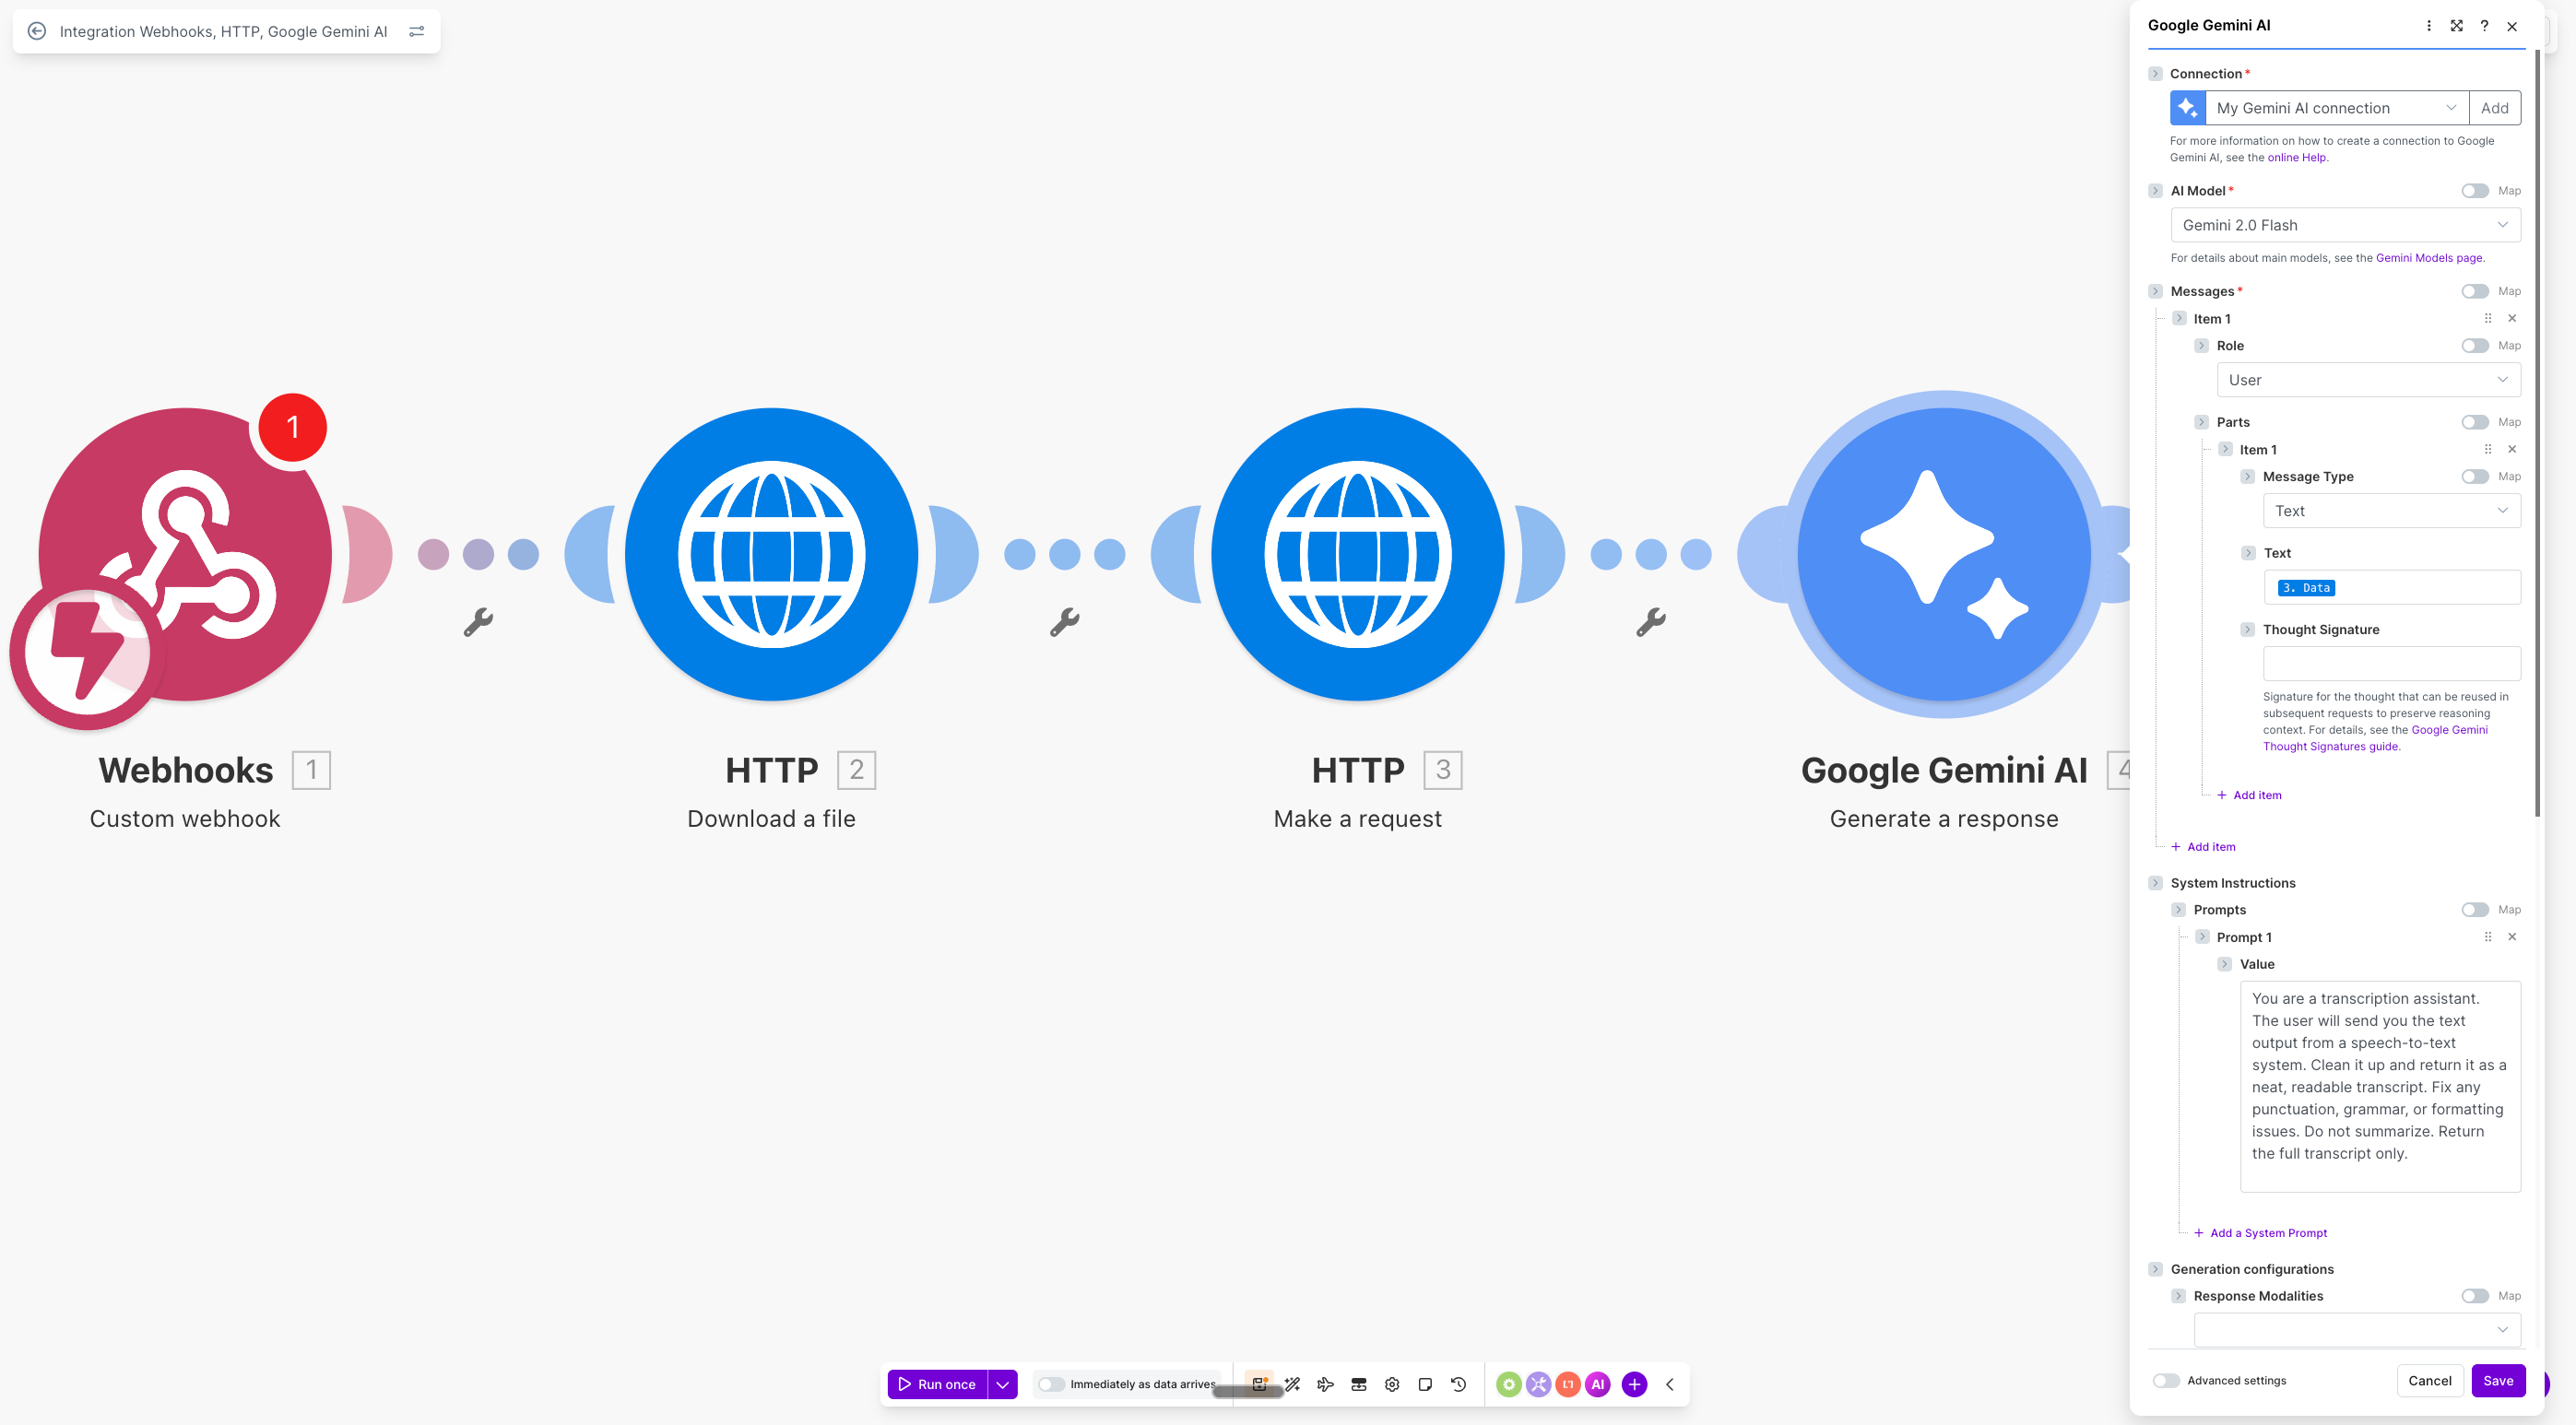
Now, you’ll see the Google Gemini AI pop-up. Fill this into the right fields.
Connection: select your existing “My Gemini AI connection” — it should already be there from before, no need to reconnect. AI Model: Gemini 2.5: Gemini 2.5 Flash Messages: click “Add item”
Role: User
Message type: Text
Text: Open variable picker → Under HTTP Block 3 select Data System Instructions: click “Add a System Prompt” and paste:
You are a transcription assistant. The user will send you the text output from a speech-to-text system. Clean it up and return it as a neat, readable transcript. Fix any punctuation, grammar, or formatting issues. Do not summarise. Return the full transcript only.
Now hit Save. Here’s what your inputs should look like.
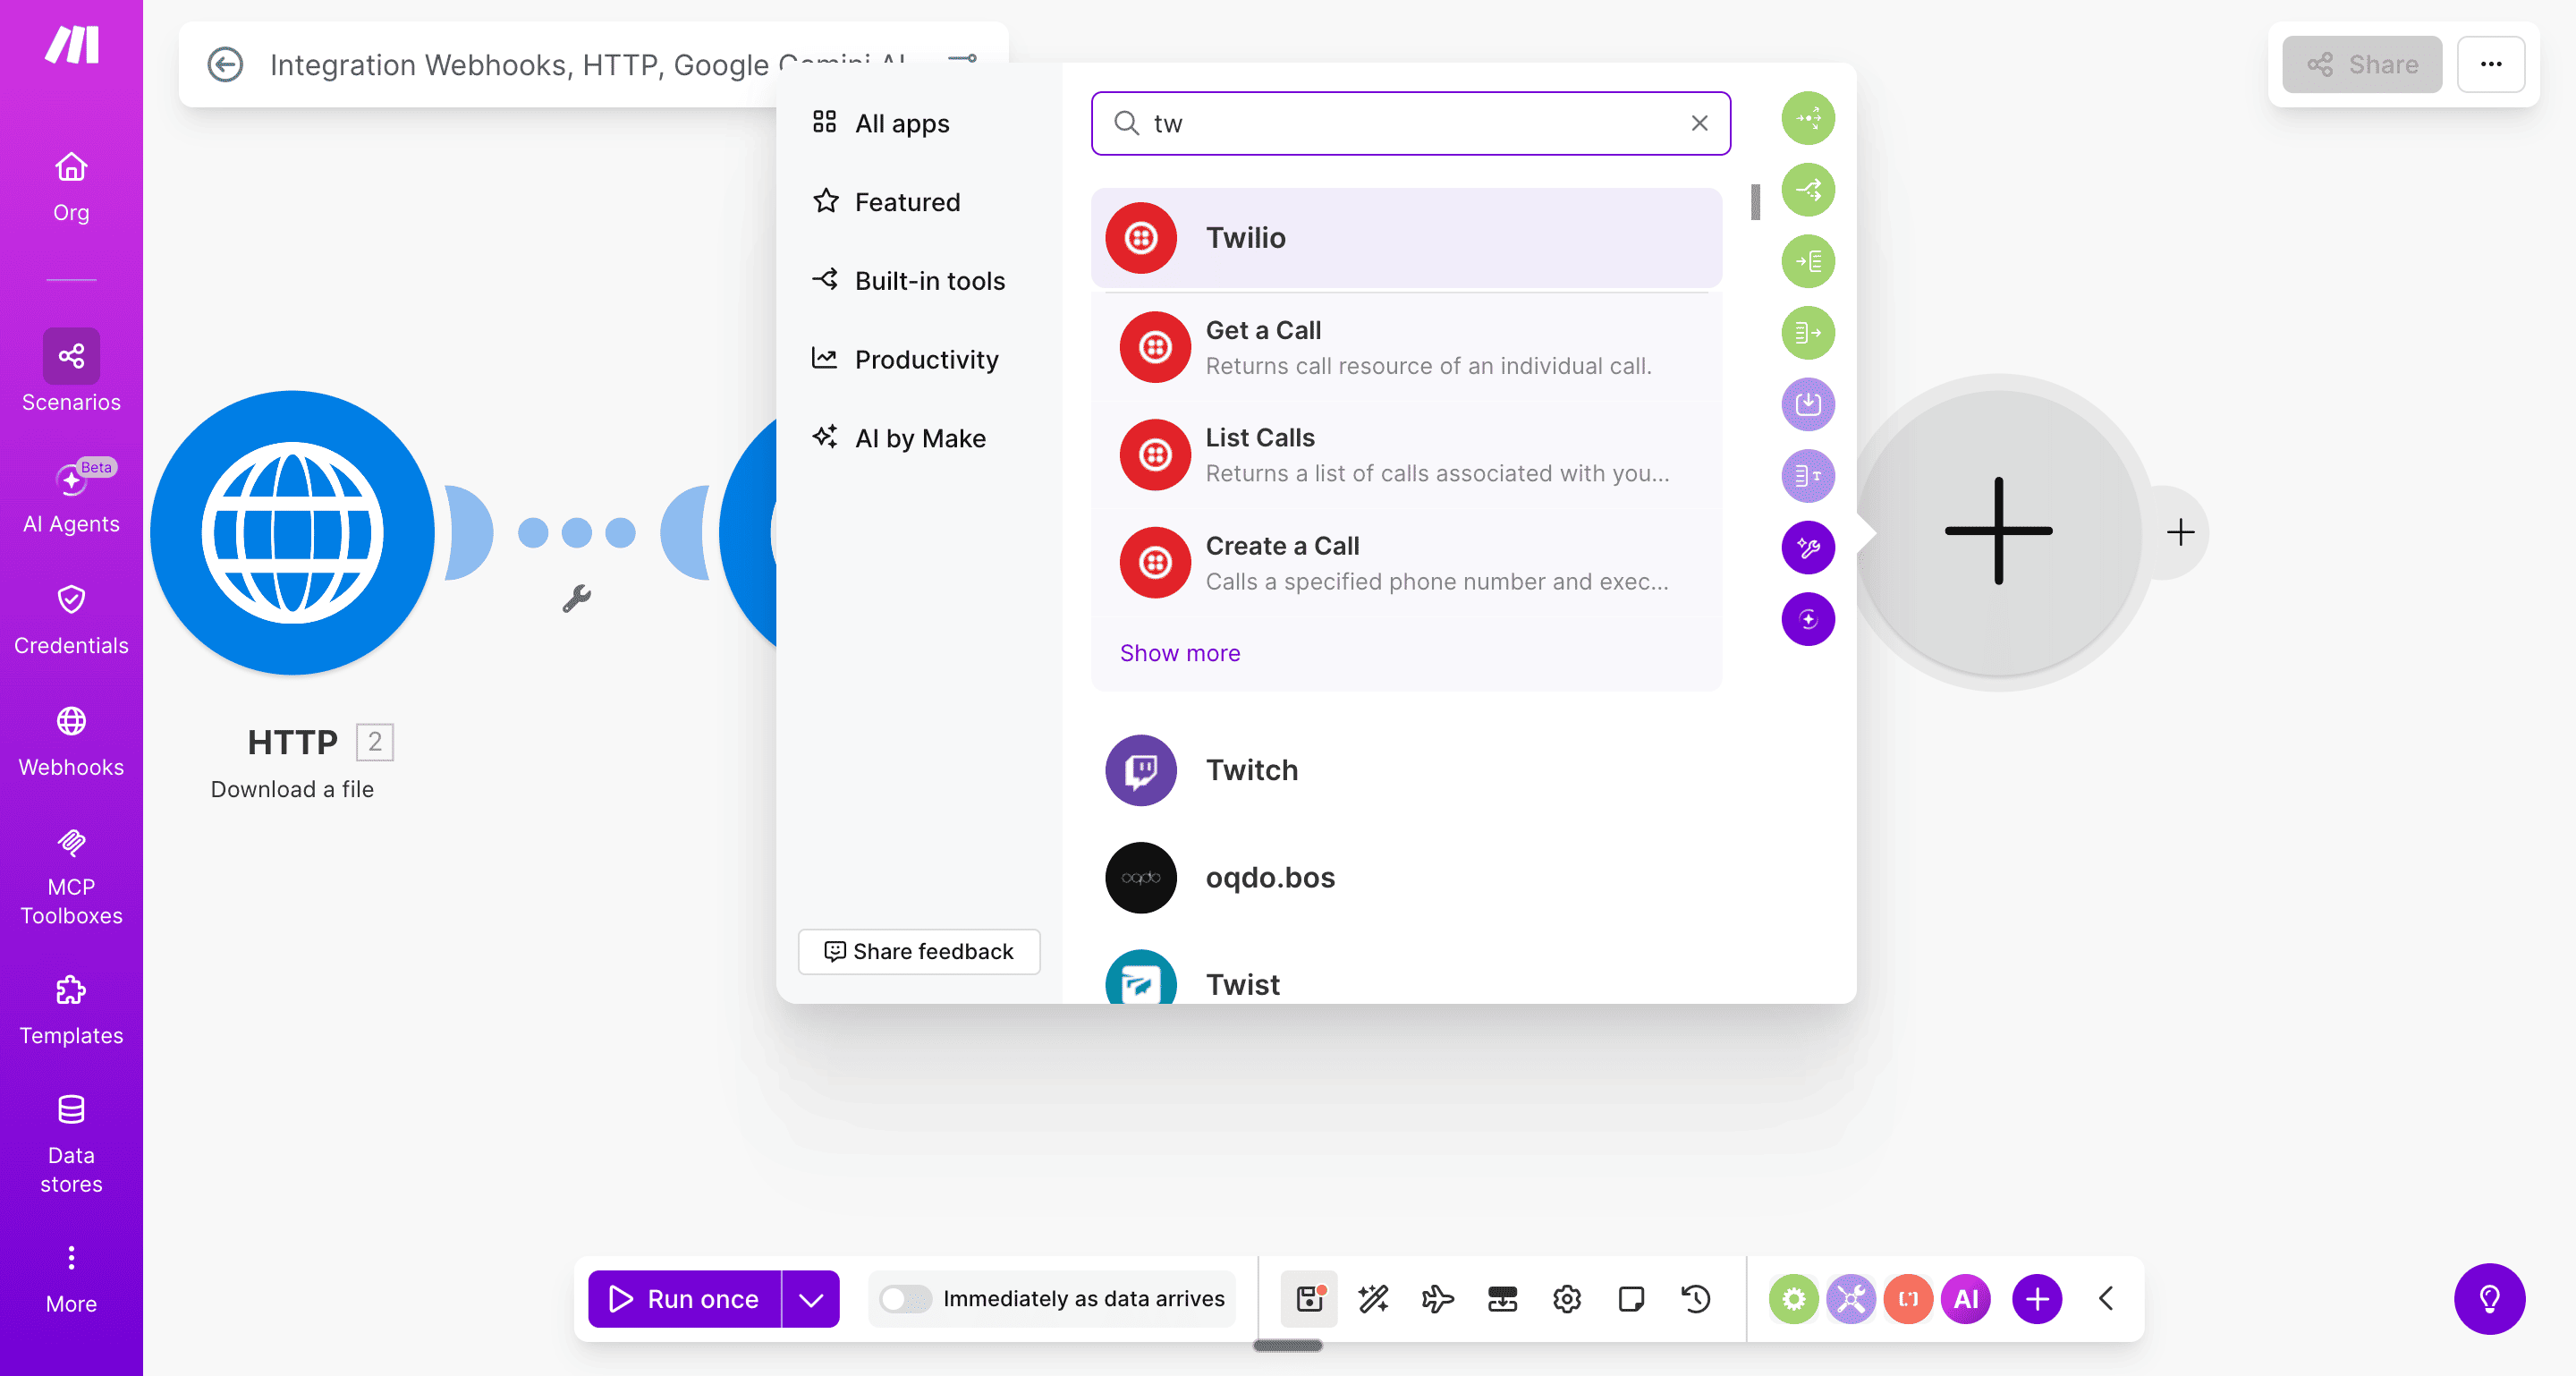
Sending the reply back via Twilio The final block sends the cleaned transcript back to the person who sent the original voice note, using Twilio’s Create a Message API.
1. Click “+” after the Gemini block, search for “Twilio”. Click on " Show More” and select “Create a Message”.
Now, in the pop-up that appears, enter these details.
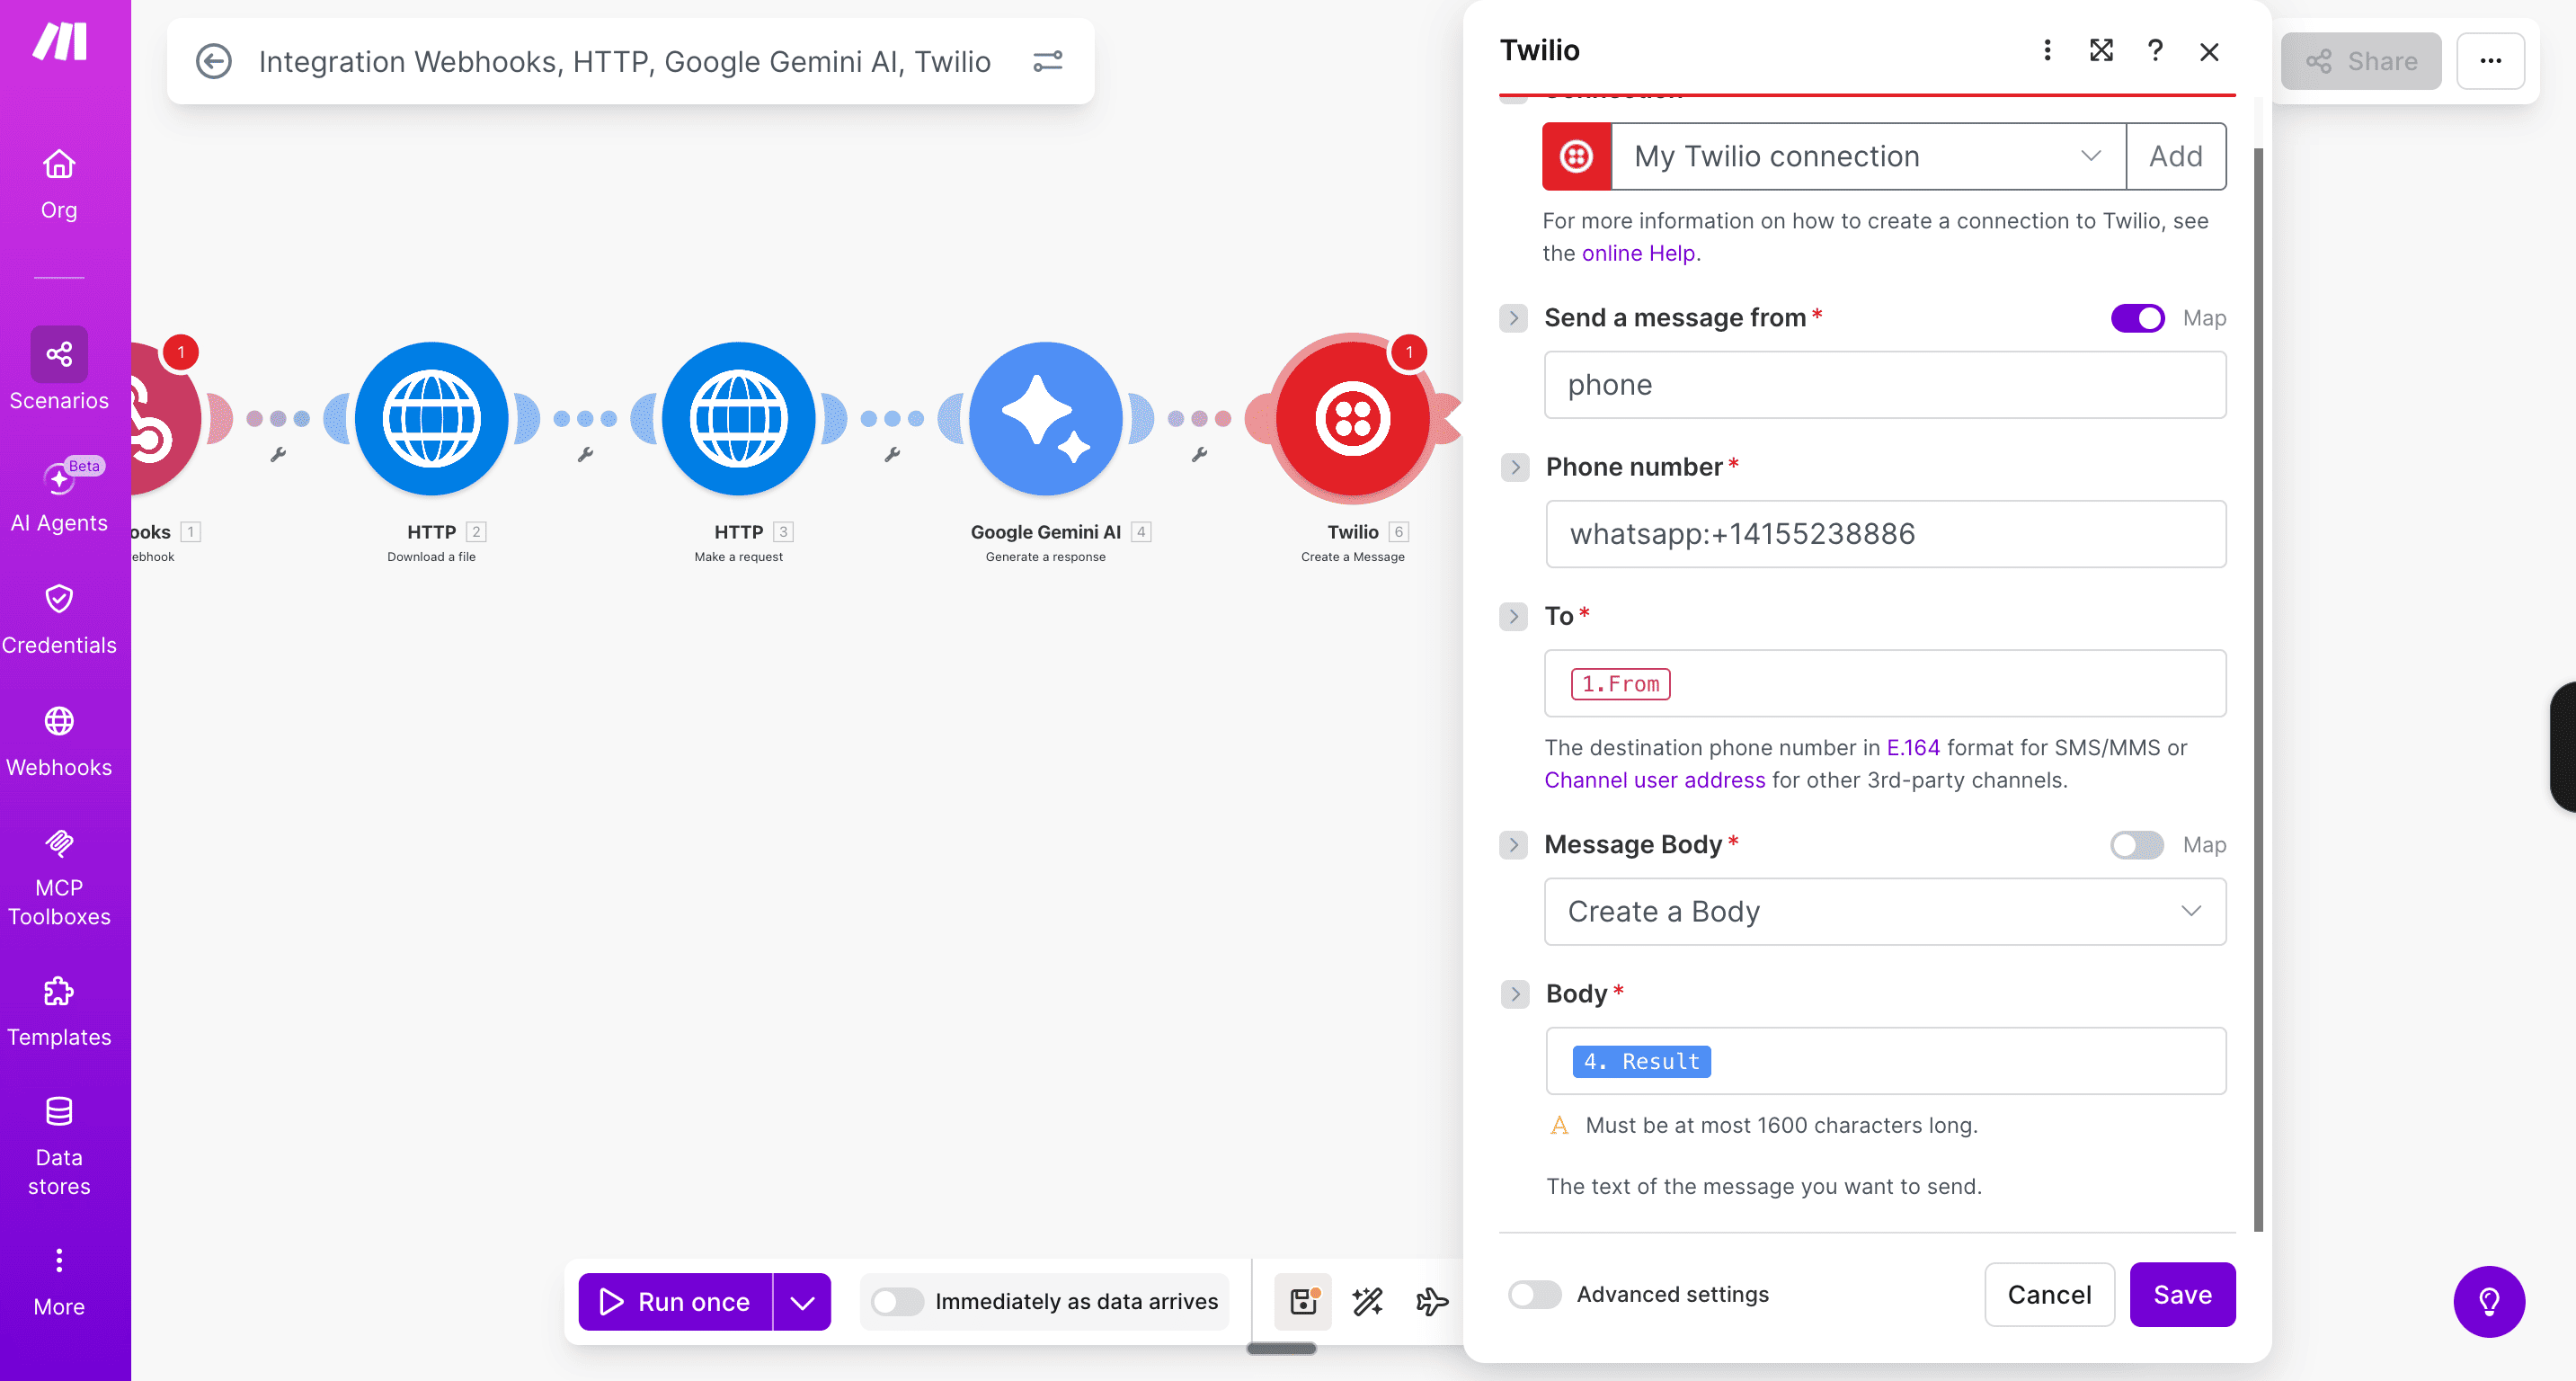
Connection: select your existing “My Twilio connection” — already there from before. Send a message from: toggle Map on, then type:
whatsapp:+14155238886
To: {{1.From}} Message Body: click “Create a Body” → in the Body field, open variable picker → find the Gemini block (Block 4)→ select Result
Then click Save. Your inputs should look like this.
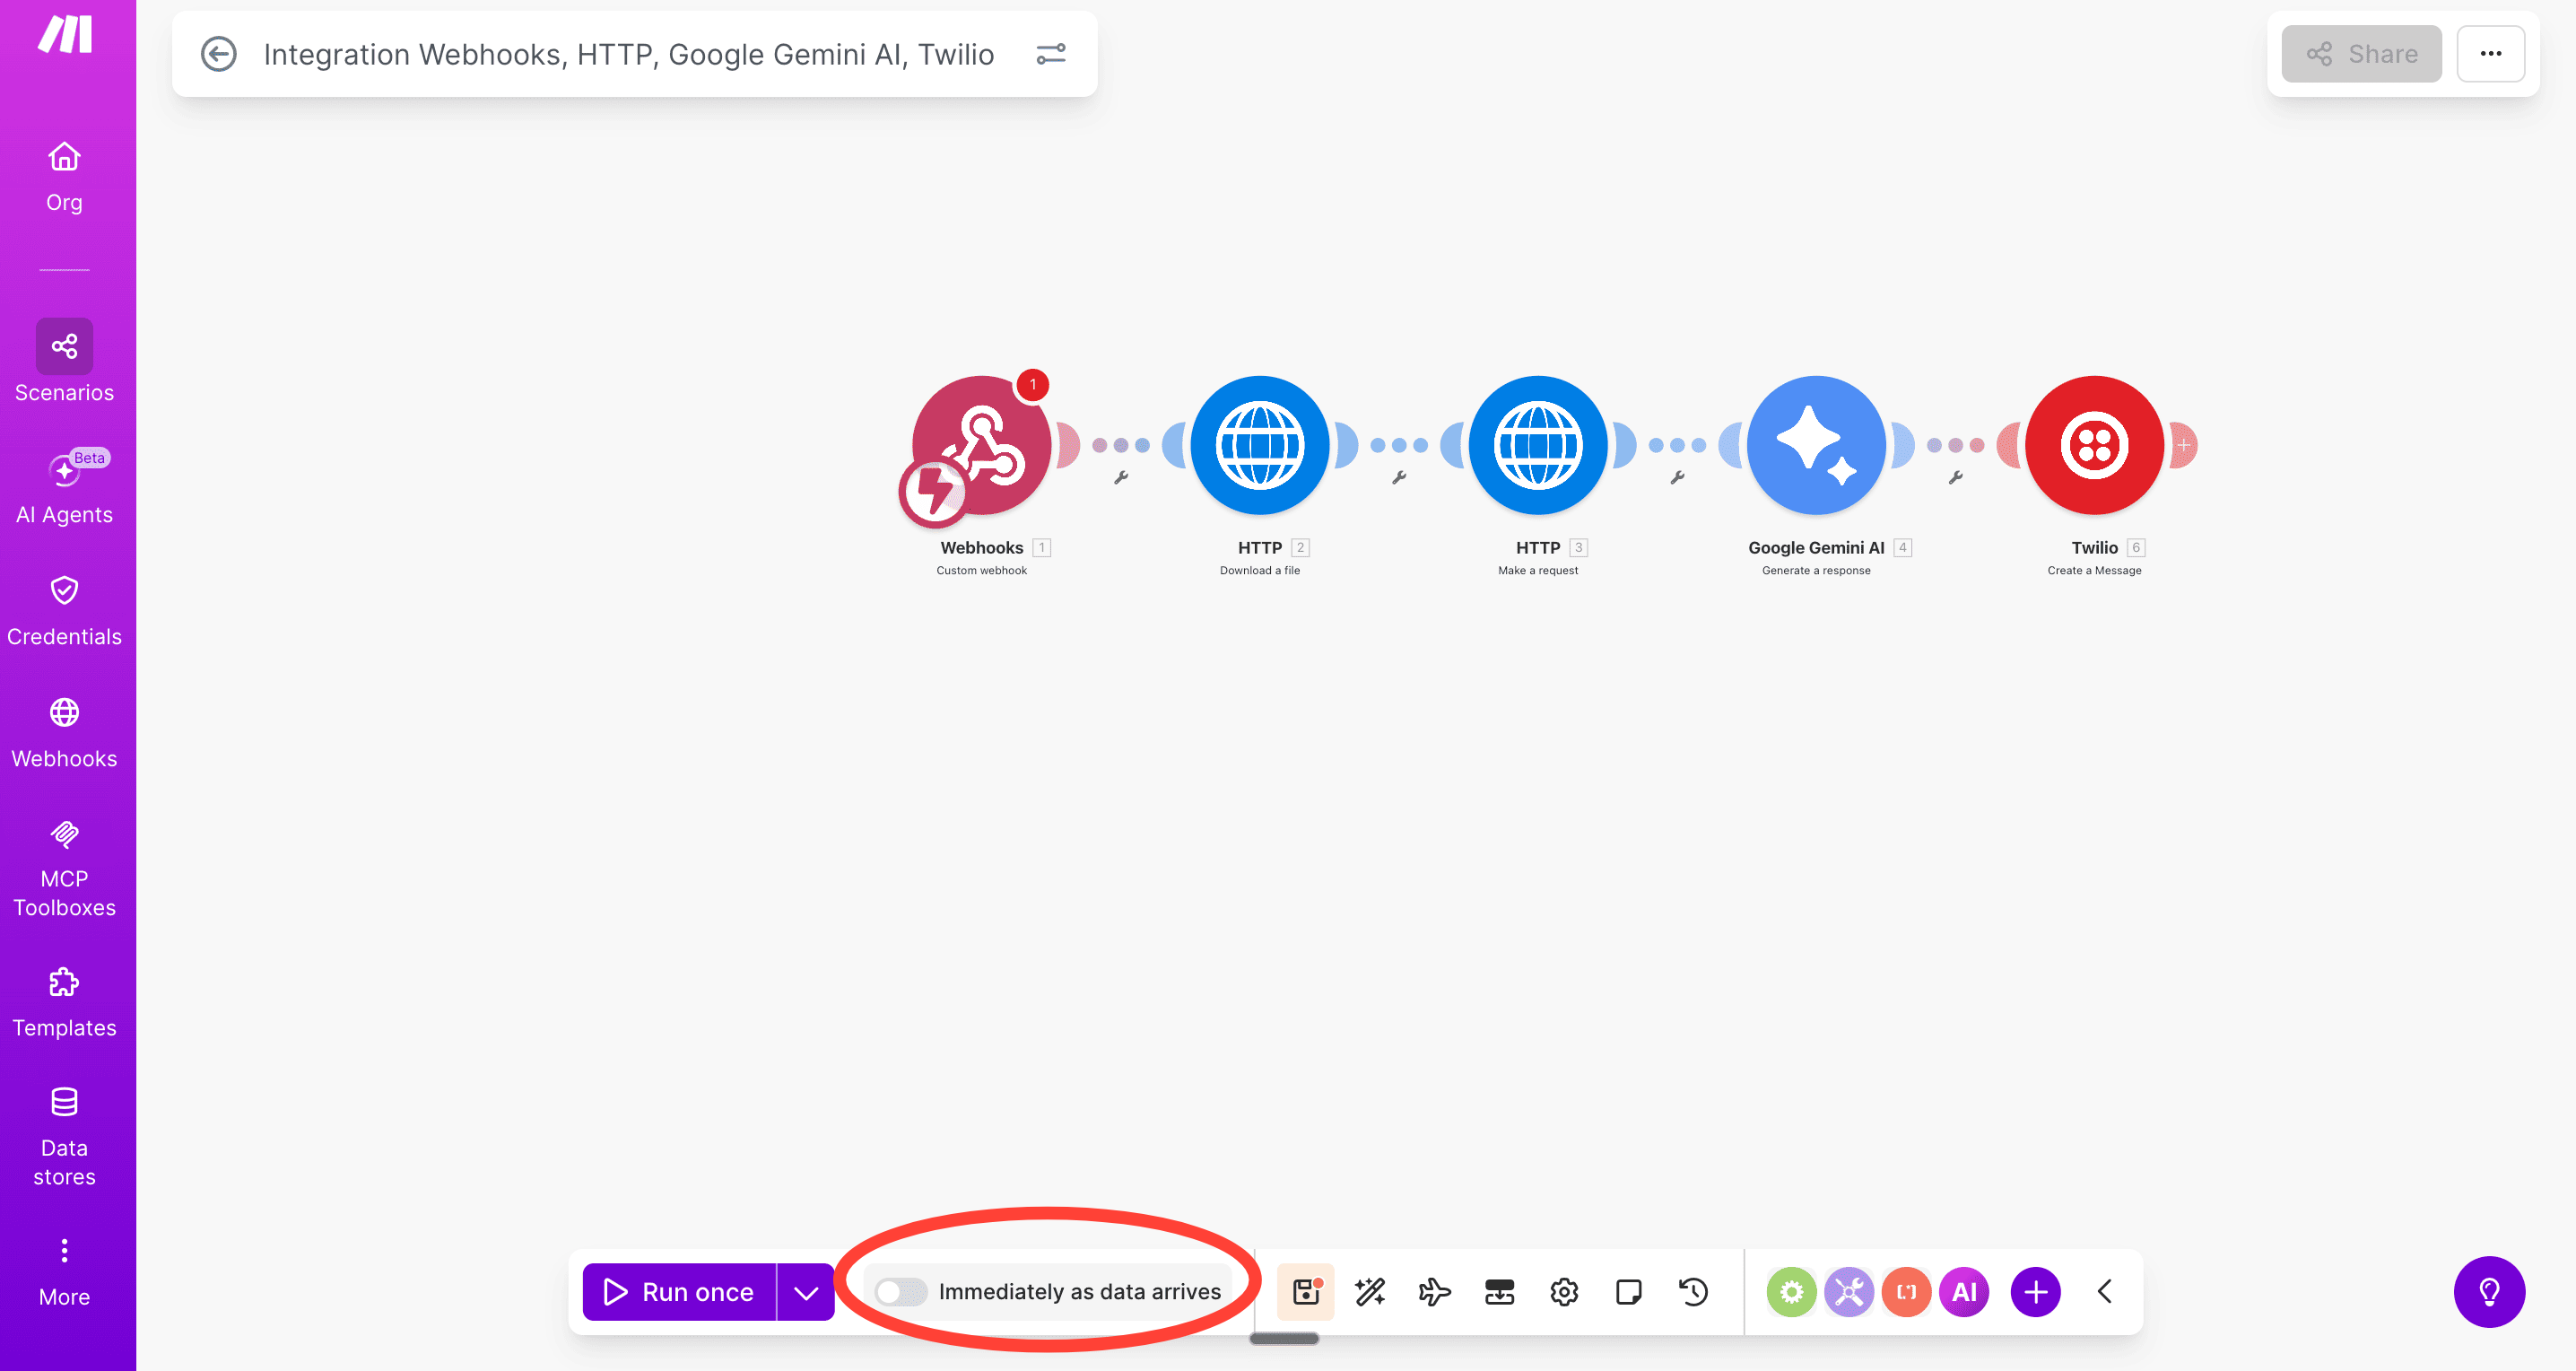
Then click “Immediately as data arrives” toggle to turn it on.
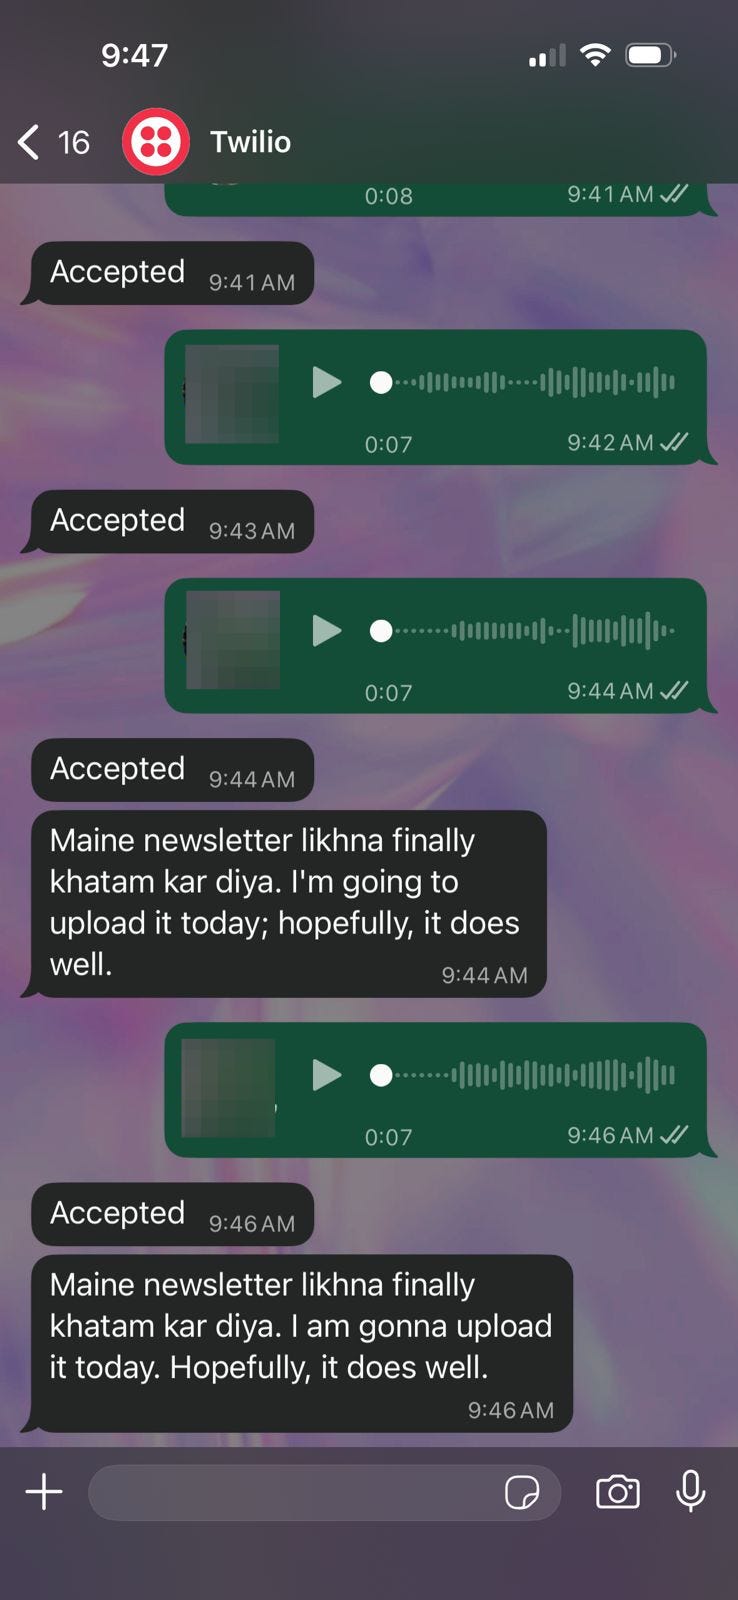
Your Transcriber bot is ready! Now, every time you want to transcribe something, click Run once, record your message and send it to the transcriber bot. It’ll generate a transcript and send it back to you. Here’s what mine looks like.
It’s not perfect, but it’s a start.
Is this perfect? No.
The transcription isn’t always clean. Long voice notes can hit API limits. And you still have to manually send the voice note — it won’t sit in your meeting and record everything passively.
But here’s what it does do: it takes a voice note in any Indian language, transcribes it in seconds, and delivers it back to you on WhatsApp. No app to download. No UI to build. No server to maintain. Just a number saved in your contacts.
The next steps are obvious from here: cleaner transcripts, passive recording, and a Google Docs integration. But those are upgrades. The foundation is already working. The question is, will you build that out?


This is good stuff.
Thank you.